
If you’ve been following me you know that my husband and I were gearing up for a world-winded international trip to China this time last year. We collected so many memories and had a wonderful time, especially at the Great Wall. But today I stand in front of another “Great Wall”, the great Living Wall that now anchors the mood for the entire first floor of our home. See what I did there lol! Right now I want to invite you on a journey with me through all of the steps my husband and I took to create this amazingly great and beautiful living work of art.
My husband and I had a mutual desire to do something with this northwest facing wall for a long while. So I started brainstorming and researching. We talked about a custom mural of some type of pattern or floral design to a photo gallery wall full of pictures and memories. I even photoshopped images into this space to see what would work and what spoke to us both. We really liked the natural wall mural but weren’t 100 percent sold on it. Then my husband remembered an indoor herb garden wall I created a couple of years ago and said why not make a garden wall. He knew I really wanted to start incorporating more living plants into our home so this was a perfect idea.
I’m a little upset I didn’t think of it first.
Creating Our Living Wall
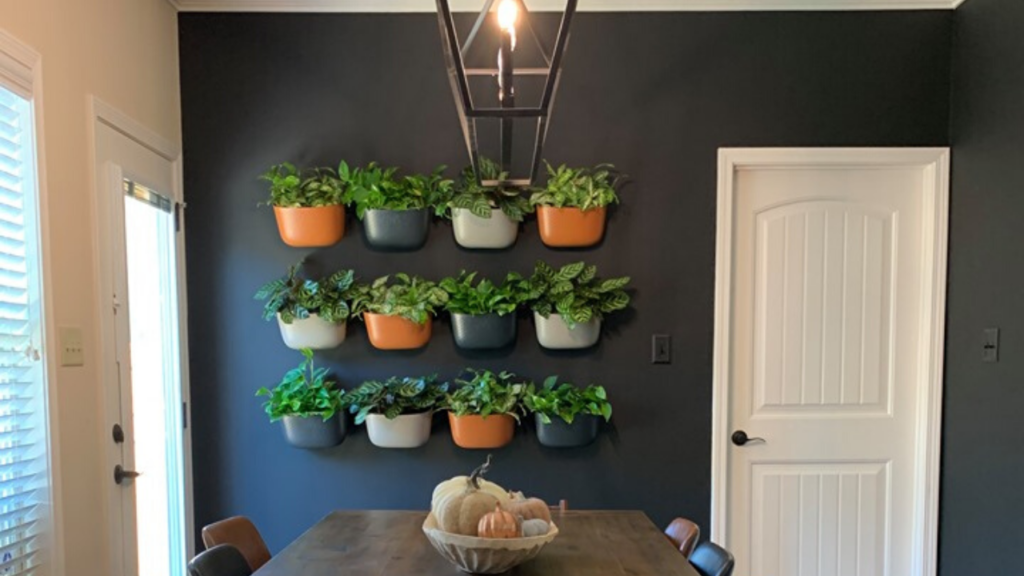
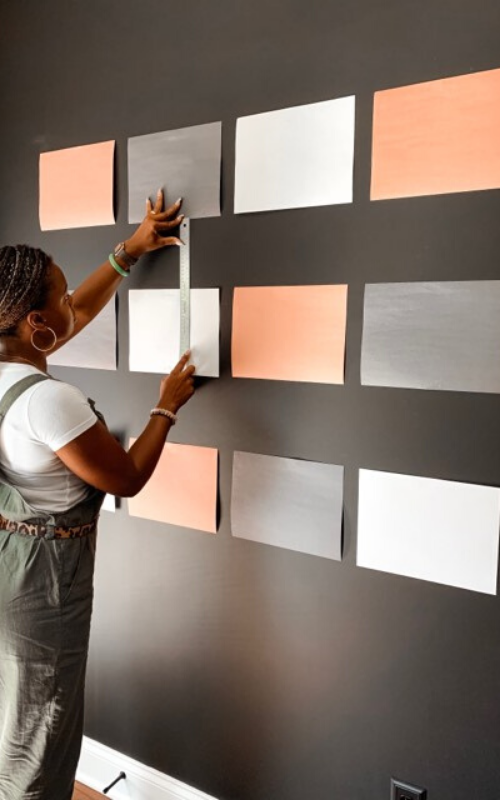
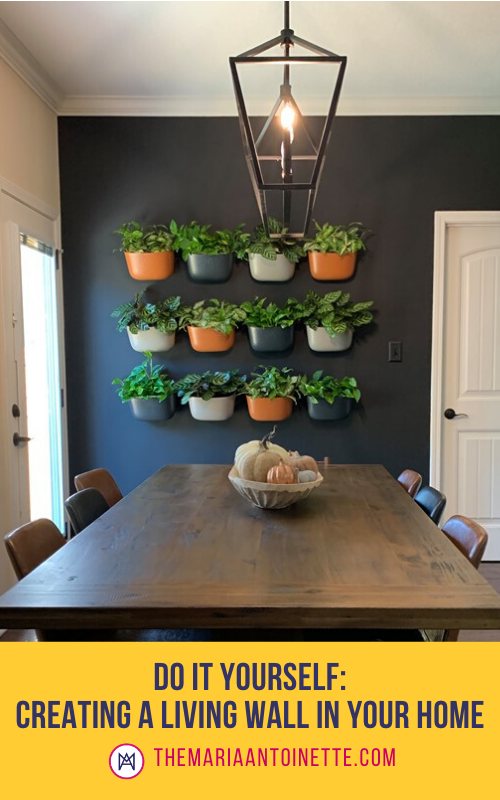
I immediately grabbed on to the idea and went into planning mode. I found a million and one inspirations on the web. From palette gardens to pictured framed moss based plant hangings. It wasn’t until I stumbled across an amazing company called WallyGro on Instagram that the anchor points of my wall came to fruition. See Wally Grow sells wall mounted planting kits that are so easy to pot and install. That part is amazing of course but it was the colors and textures of the planters that set it off for me. I chose a mixture of the Wally Eco Wall Planters in the colors Espresso, Stone, and Terracotta. With this three-color combination, I create an asymmetrical pattern with 12 planters.
Oh, did I mention each planter is made out of recycled milk jugs, yes! I’m headed toward my eco greenhouse one planter at a time.
As the wall design started to functionally take shape I still had to do two things: select my plants and choose my wall color. My husband and I had been fascinated with a chalkboard finish on a small wall adjacent to the main accent wall. So I asked him, what do you think about this wall being a chalkboard and the larger one too? He said, “sure.” and with that, we were off to Lowes. While we got a bunch of supplies there, we actually found a highly reviewed chalkboard paint on Amazon. So we bought two of the 20 oz Krylon Chalkboard paint. It is a matte black paint that is easy to paint on, pristine and easy to clean.
What Types of Plants To Choose
Now that we have the wall color solidified I still need to select which types of plants we will use. Prior to this project, we didn’t have many living plants in our home but I do come from a long line of green-thumbed gardeners and florists so I’m pretty confident in my ability to take on this project. But before I headed over to my local nursery I did some additional research on the WallyGro site and found they have a whole page dedicated to the ideal plants for your planters.
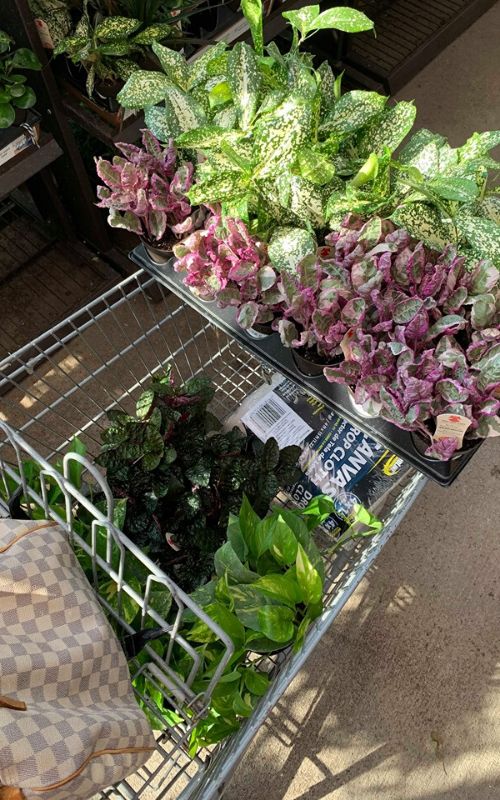
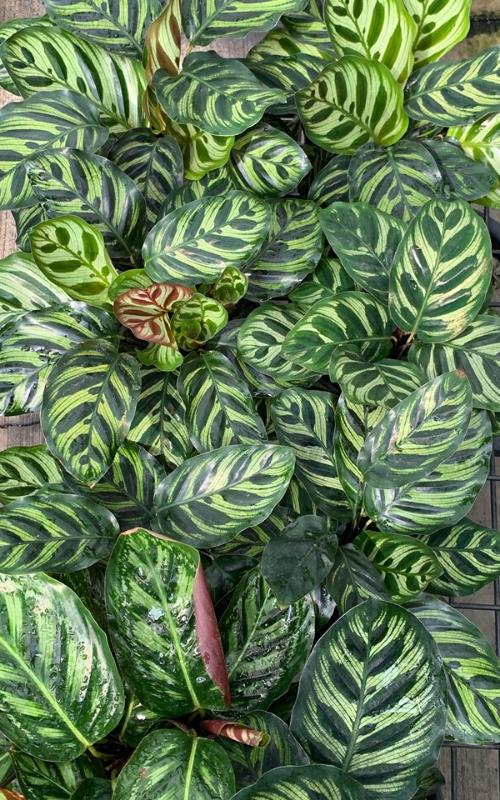
I took that information and headed out to a couple of local nurseries and greenhouses. I ultimately chose three plants. The first being the Japanese Bamboo Florida Beauty, I loved the white speckled leaves and the ease of this plant. My second pick was the Golden Pothos, you can never go wrong with a pothos they are a staple houseplant. And last but not least, the Calathea, it’s markings had me at first sight. All of these plants will thrive in medium light and watering varies but isn’t hard to schedule. With all of my plants in hand, I ready to bring my living wall to life.
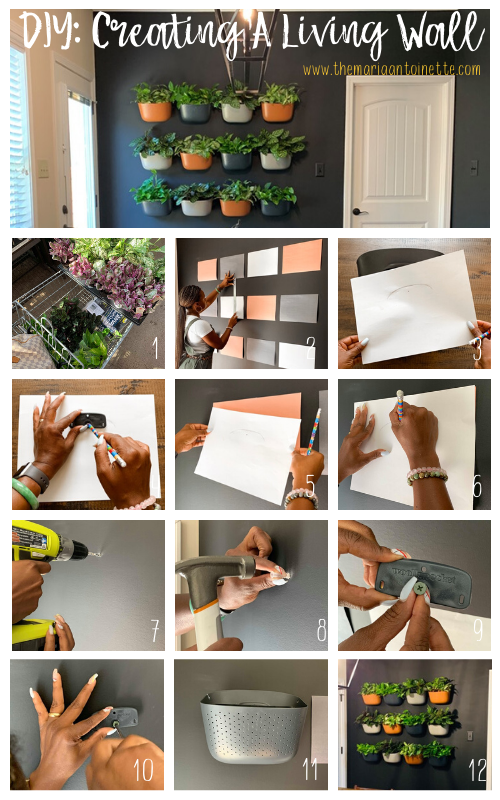
Here is an easy step-by-step pictorial on how I installed my WallyGro Eco Planters
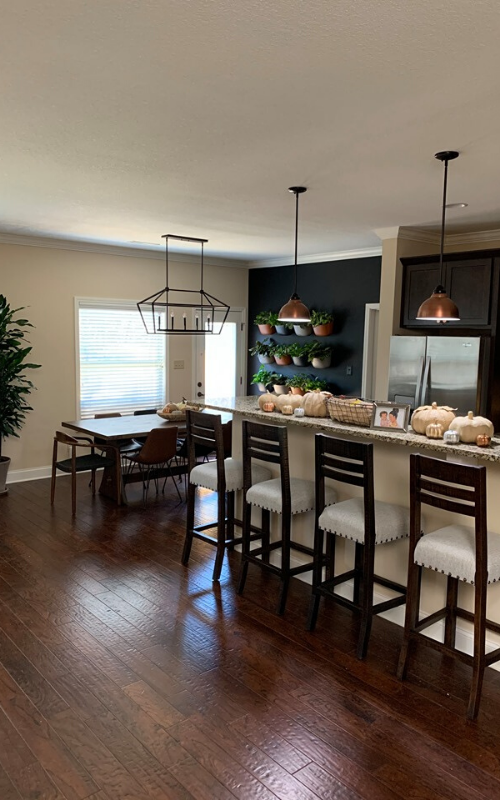
The moment that I hung my last potted WallyGro planter I knew we had made the right decision. I remember standing back and just smiling with a deep sense of accomplishment at my own personal Great Wall! It’s such a perfect statement for our downstairs area. It’s helped me update my home color pallet, textures, and it’s a design aesthetic that is influencing other areas in my home. Like the copper accepts on the kitchen cabinets, my new rustic wooden table with contrasting modern chic black and tan leather chairs.
Over the past year, I have been transforming my home so there’s more that I want to and am going to do. But one’s things for sure, I’ll definitely be adding more plants around the house. My ultimate goal is to create space utilization where design of form meets the essence of function. I’m so excited and to think it all started with a plain old matte sourdough painted wall in my once pretty plane kitchen eating area. But look at the area now. It’s been transformed into a space that my husband and I love. And that love and joy has spread to family and friends who gather around the dinner table, in front of our own Great Living Wall.
There you have it! What do you think about my new living wall? Is this something you would consider creating in your own home? Also, check out my behind the scenes Q&A on the WallyGro website.
Don’t forget to tag me and WallyGro in your living walls on social using #TMABlog and #WallyGro – we want to see them. Happy planting!
Latest posts by Maria Antoinette (see all)
- 10 Romantic Date Night Ideas For Any Time of The Year - January 26, 2023
- Tips To Help You Reconnect With What Brings You Joy - January 19, 2023
- Planning A Road Trip? Here Are Some Key Tips You Should Know - January 12, 2023


Wow I really love this. You consider interior designing so I can pay you to come do it in my home.