

Custom ornament making is definitely on the list of fun activities for getting “Christmas-ready.” Not only because it’s a potentially great family activity, but because you get to put your stamp on Christmas with a completely original design. So today I bring you my own “stamp,” entirely customizable by the way, on the traditional ornament.
While traditional Christmas tree decor can feel comforting and nostalgic, contemporary or eclectic decor put a fun spin on it without reducing the splendor of the season. No one wants to celebrate Christmas without the warm and fuzzy glamour that comes with such a beloved holiday, right? Sparkle, ribbon, homemade, and warm scents are all staples of the season that give us that Christmas feeling.
With these components as the foundation for your holiday decor scheme, your design is headed in the right direction. So by all means, tackle that blush pink Christmas tree and put up that black and gold wreath you’ve been obsessing over. Just throw in a little ribbon and sparkle, add a homemade touch, and enjoy your unique holiday decor.
With that said, let’s get into making some DIY Christmas ornaments.
This tutorial is awesome because it is super easy, has a fashionable look, and takes little time and effort to complete. If you are accessorizing a full-size tree with DIY ornaments, great style at the expense of little effort is important.
With a can of spray paint and some beginner hand-painting skills, you can complete this project
in no time. Let’s get started.
Here’s what you’ll need:
Clear DIY plastic ornaments (amount of choice)
“Dover White” Krylon spray paint (gloss, 1 can)
Metallic gold spray paint (small can)
Black acrylic paint (2 oz. bottle)
#2 round brush
½ inch gold glitter ribbon
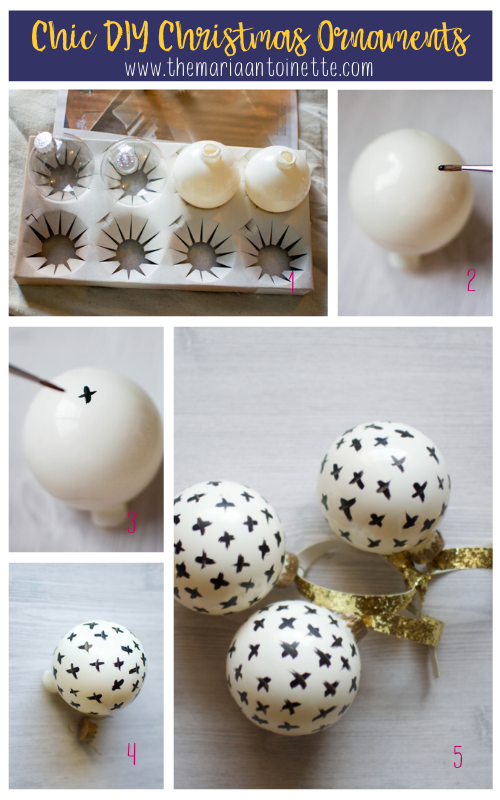
Spray Paint Ornaments
First, remove ornament caps, and place each ornament, cap side up, back in the open casing. Now, at a twelve-inch distance, spray paint the top of each ornament, using a light pulsing action. If applying spray paint in consistent strokes at a close distance, you risk causing heavy paint dripping.
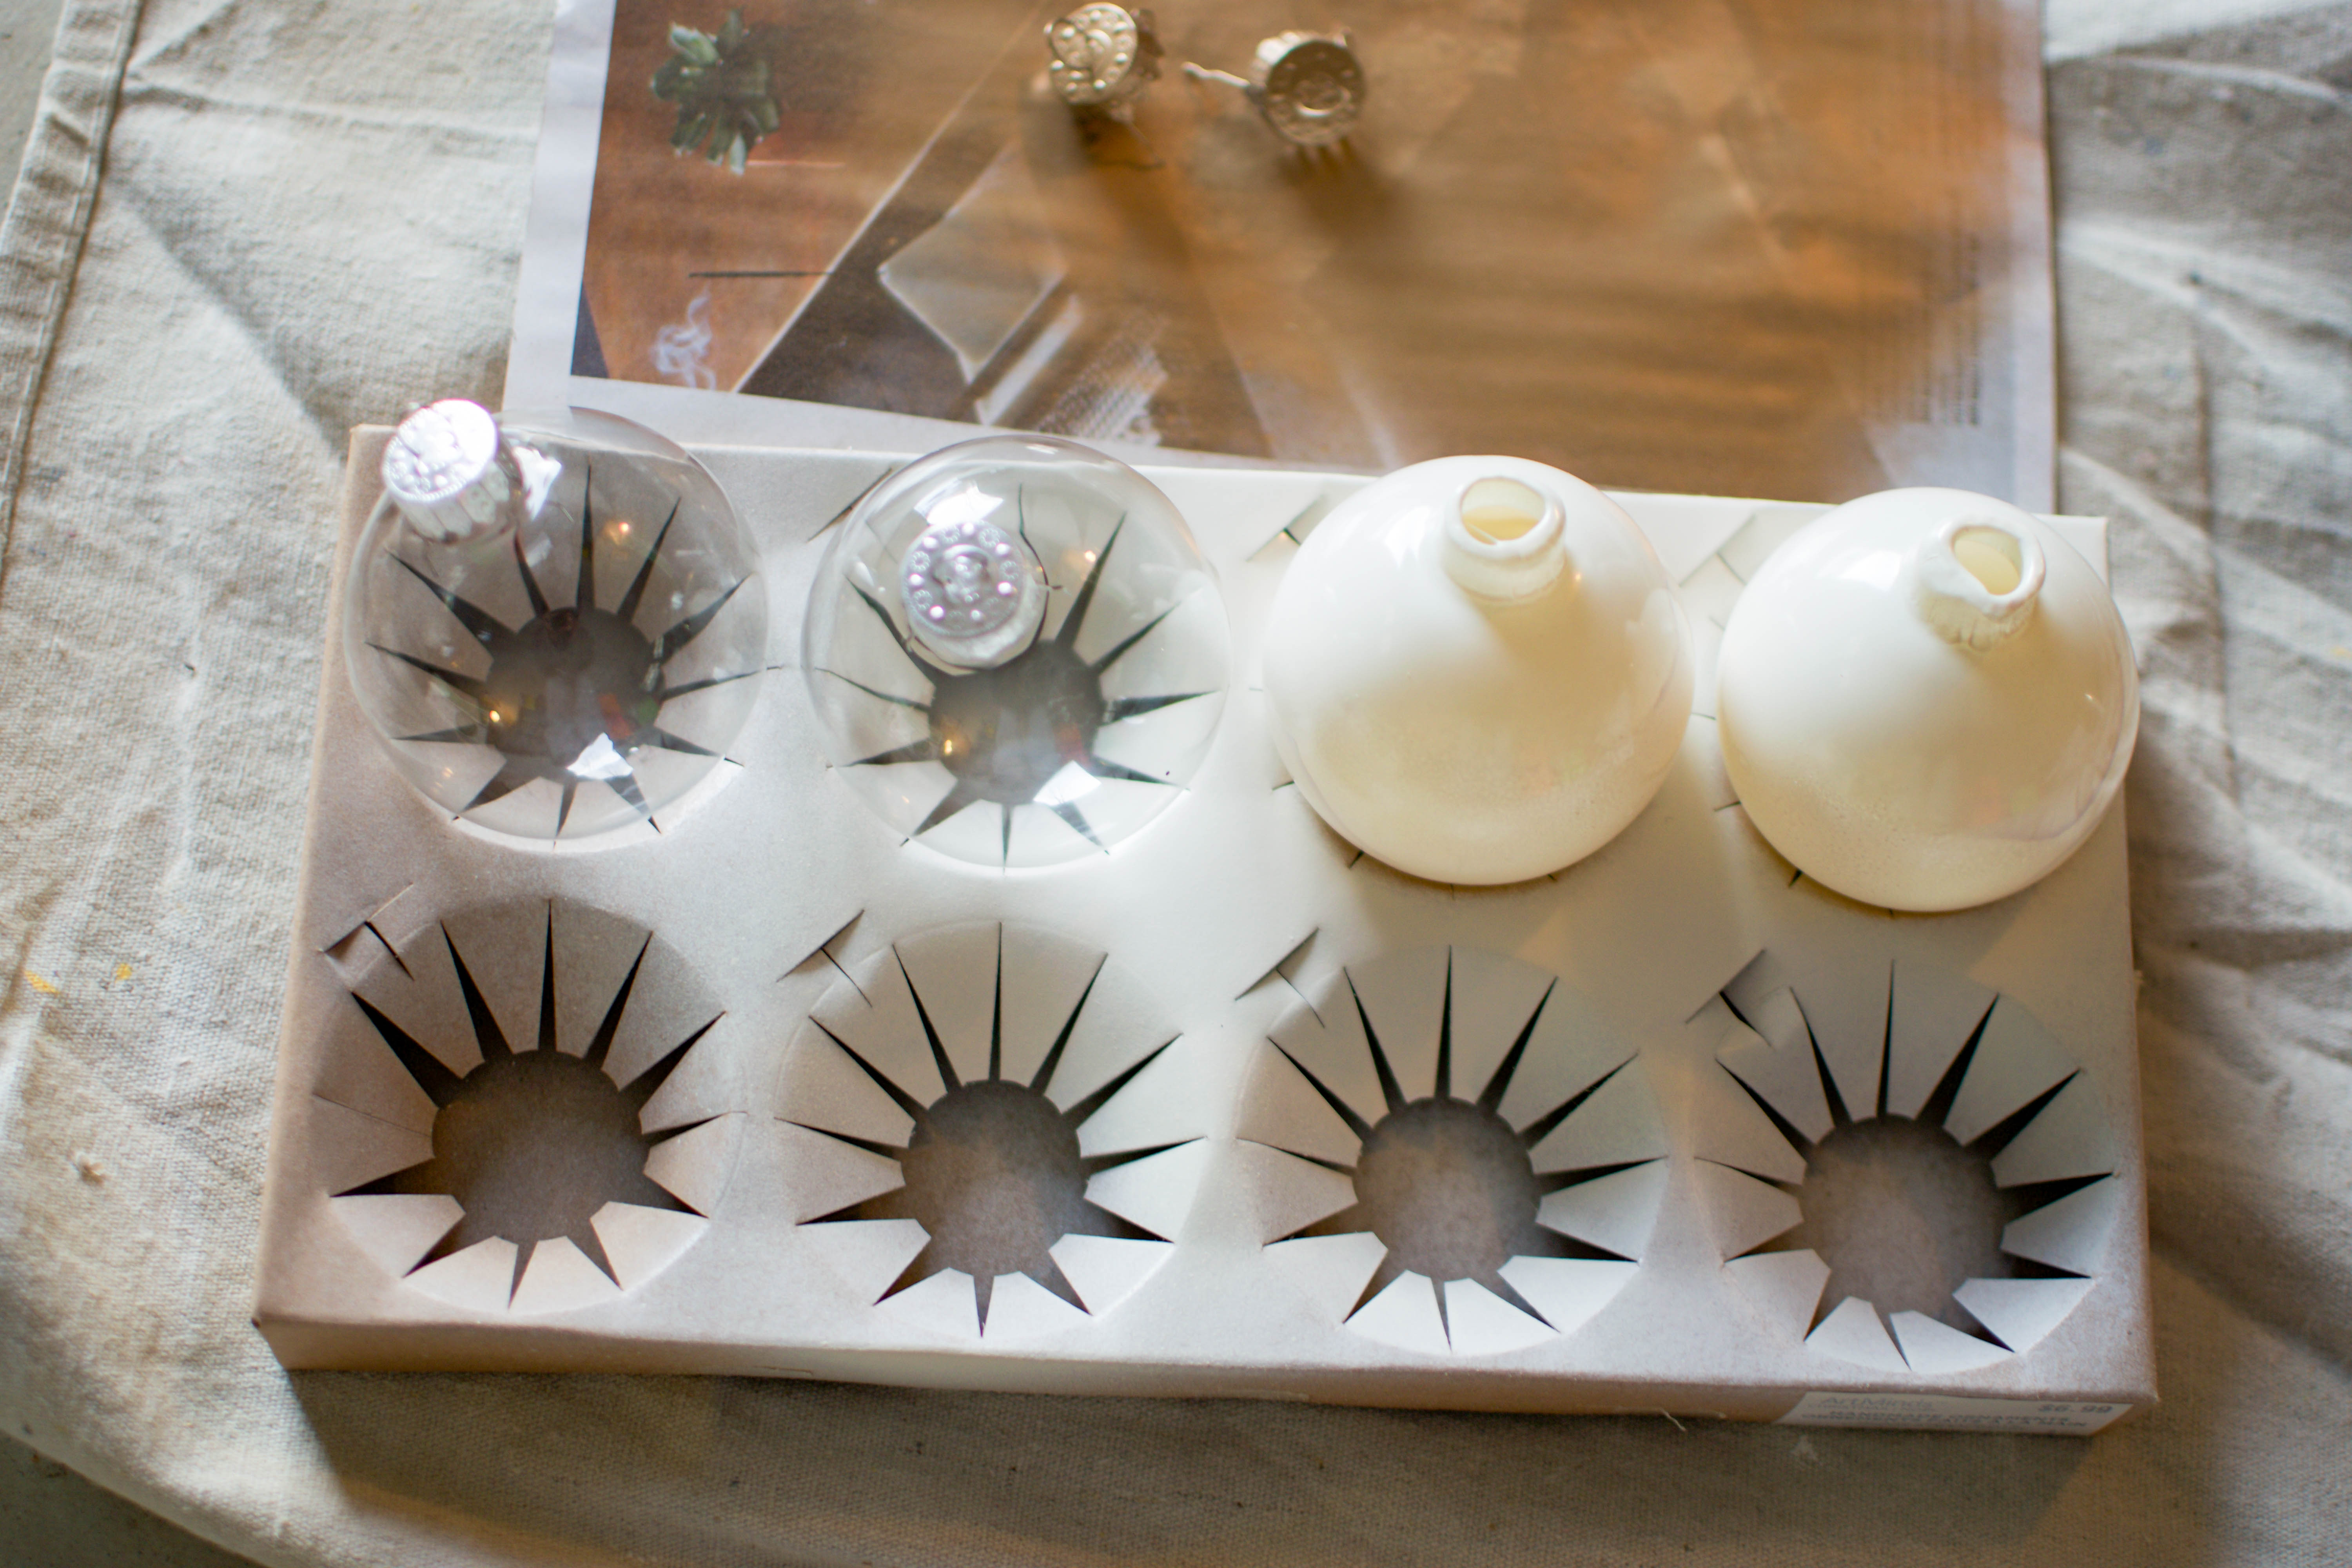
Allow the paint to dry for 1.5hrs. While that drys, spray paint your ornament caps using a metallic gold spray paint. Allow drying for 1hr. Then rotate each ornament, cap side down, and apply one coat of spray paint just as you did the other side. Allow the paint to dry for 1.5hrs, and apply another coat as necessary
Hand-paint Ornaments
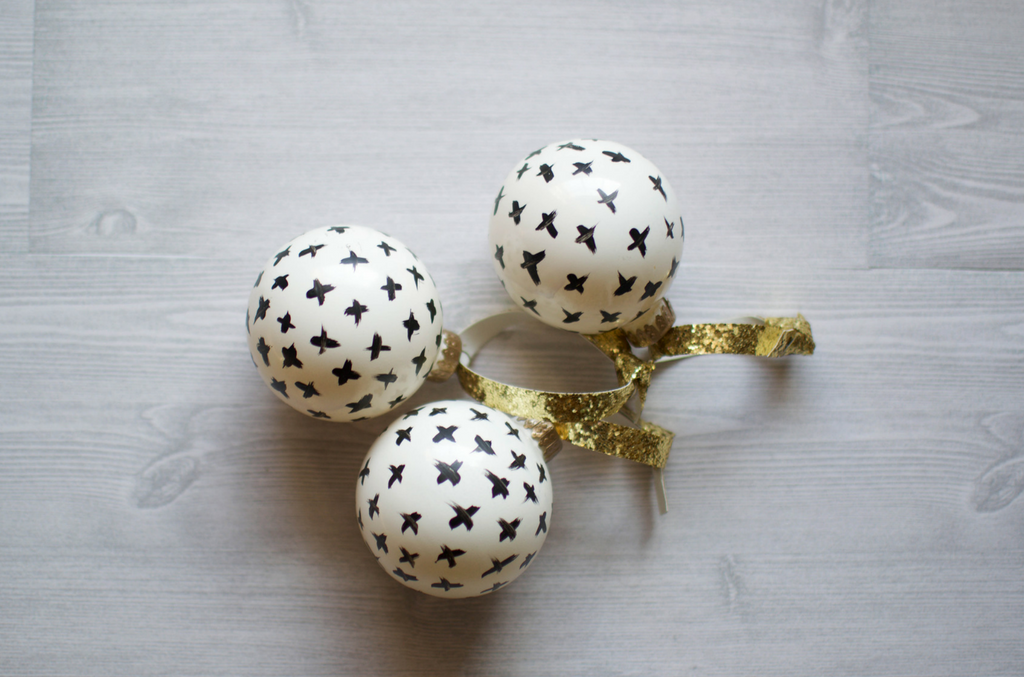
Now, dip your #2 round brush in a small amount of black acrylic paint
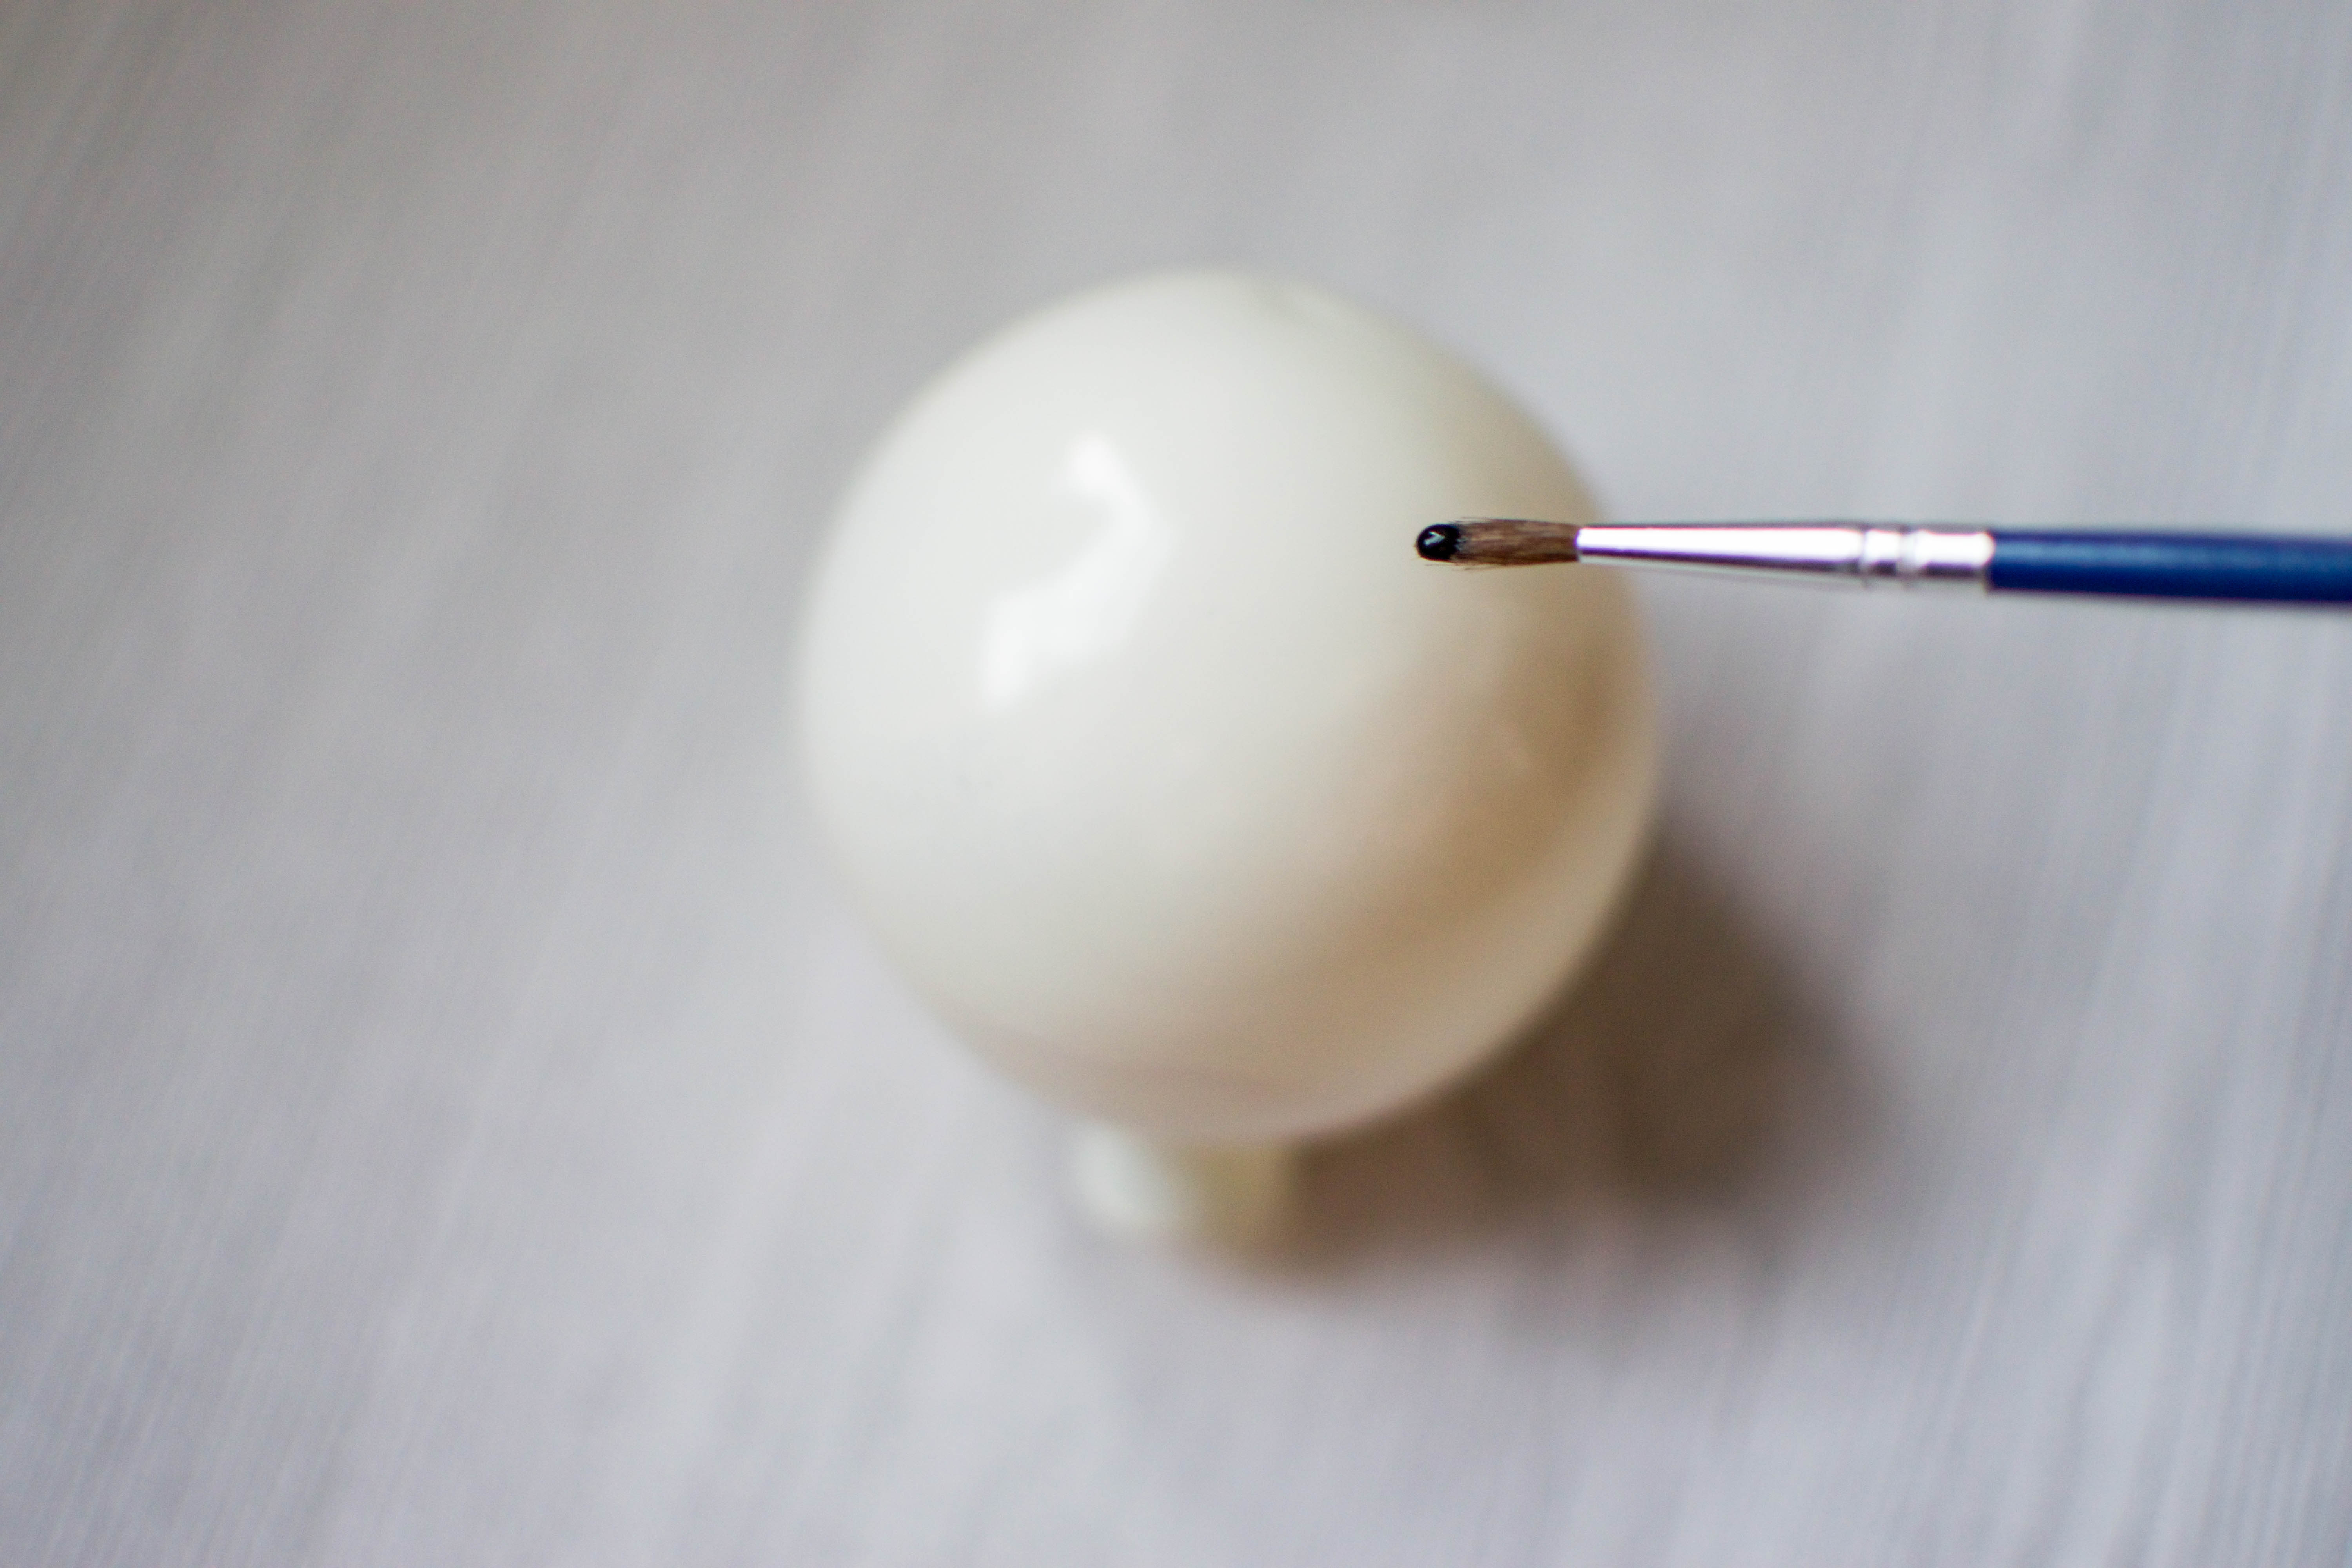
and apply a small “+” in the top area of your ornament.

Then reapply around the top half of each ornament with ½ inch spacing between each. I applied each in straight lines around the ornament, alternating the position of each line. This means a “+” on each lines falls in between two “+” above or beneath its row.

Allow drying for 1hr. Then rotate each ornament and apply the remaining design on the bottom half of each ornament. Allow drying for 1 hr.
Next, re-attach the ornament caps and loop gold glitter ribbon through each cap hook, knotting at the top.
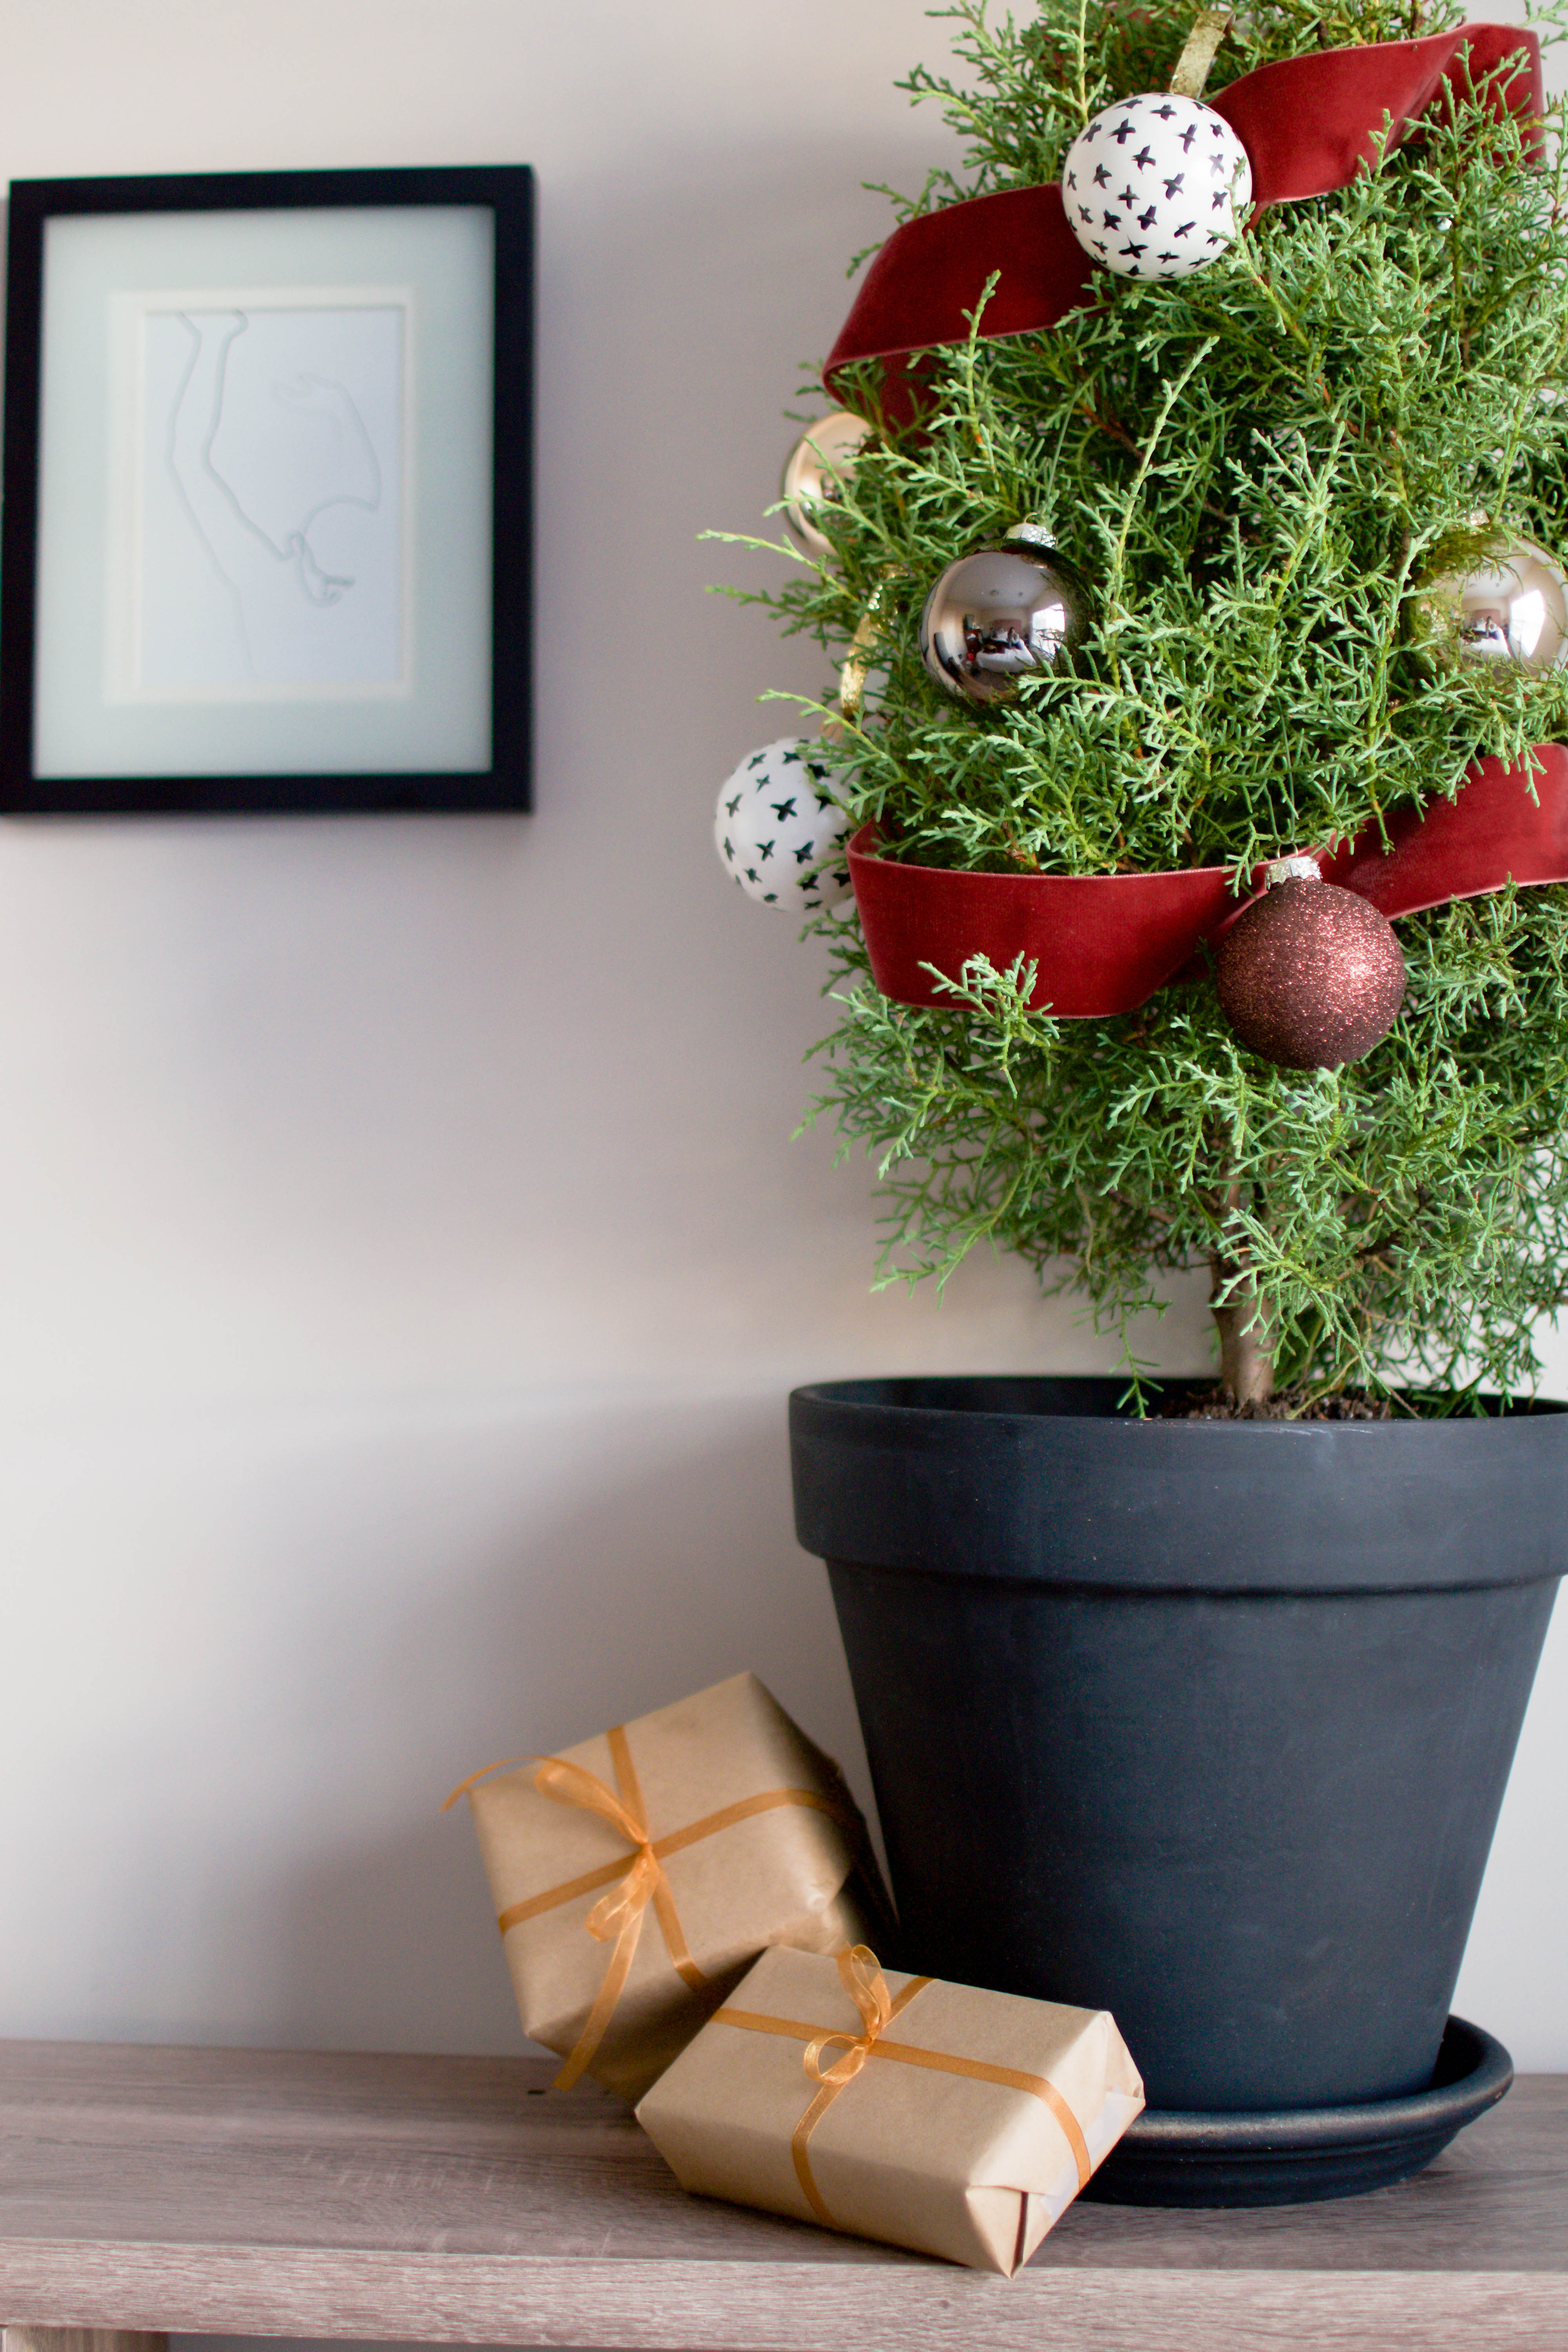
Finally, deck out your tree in your new stylishly glam ornaments.
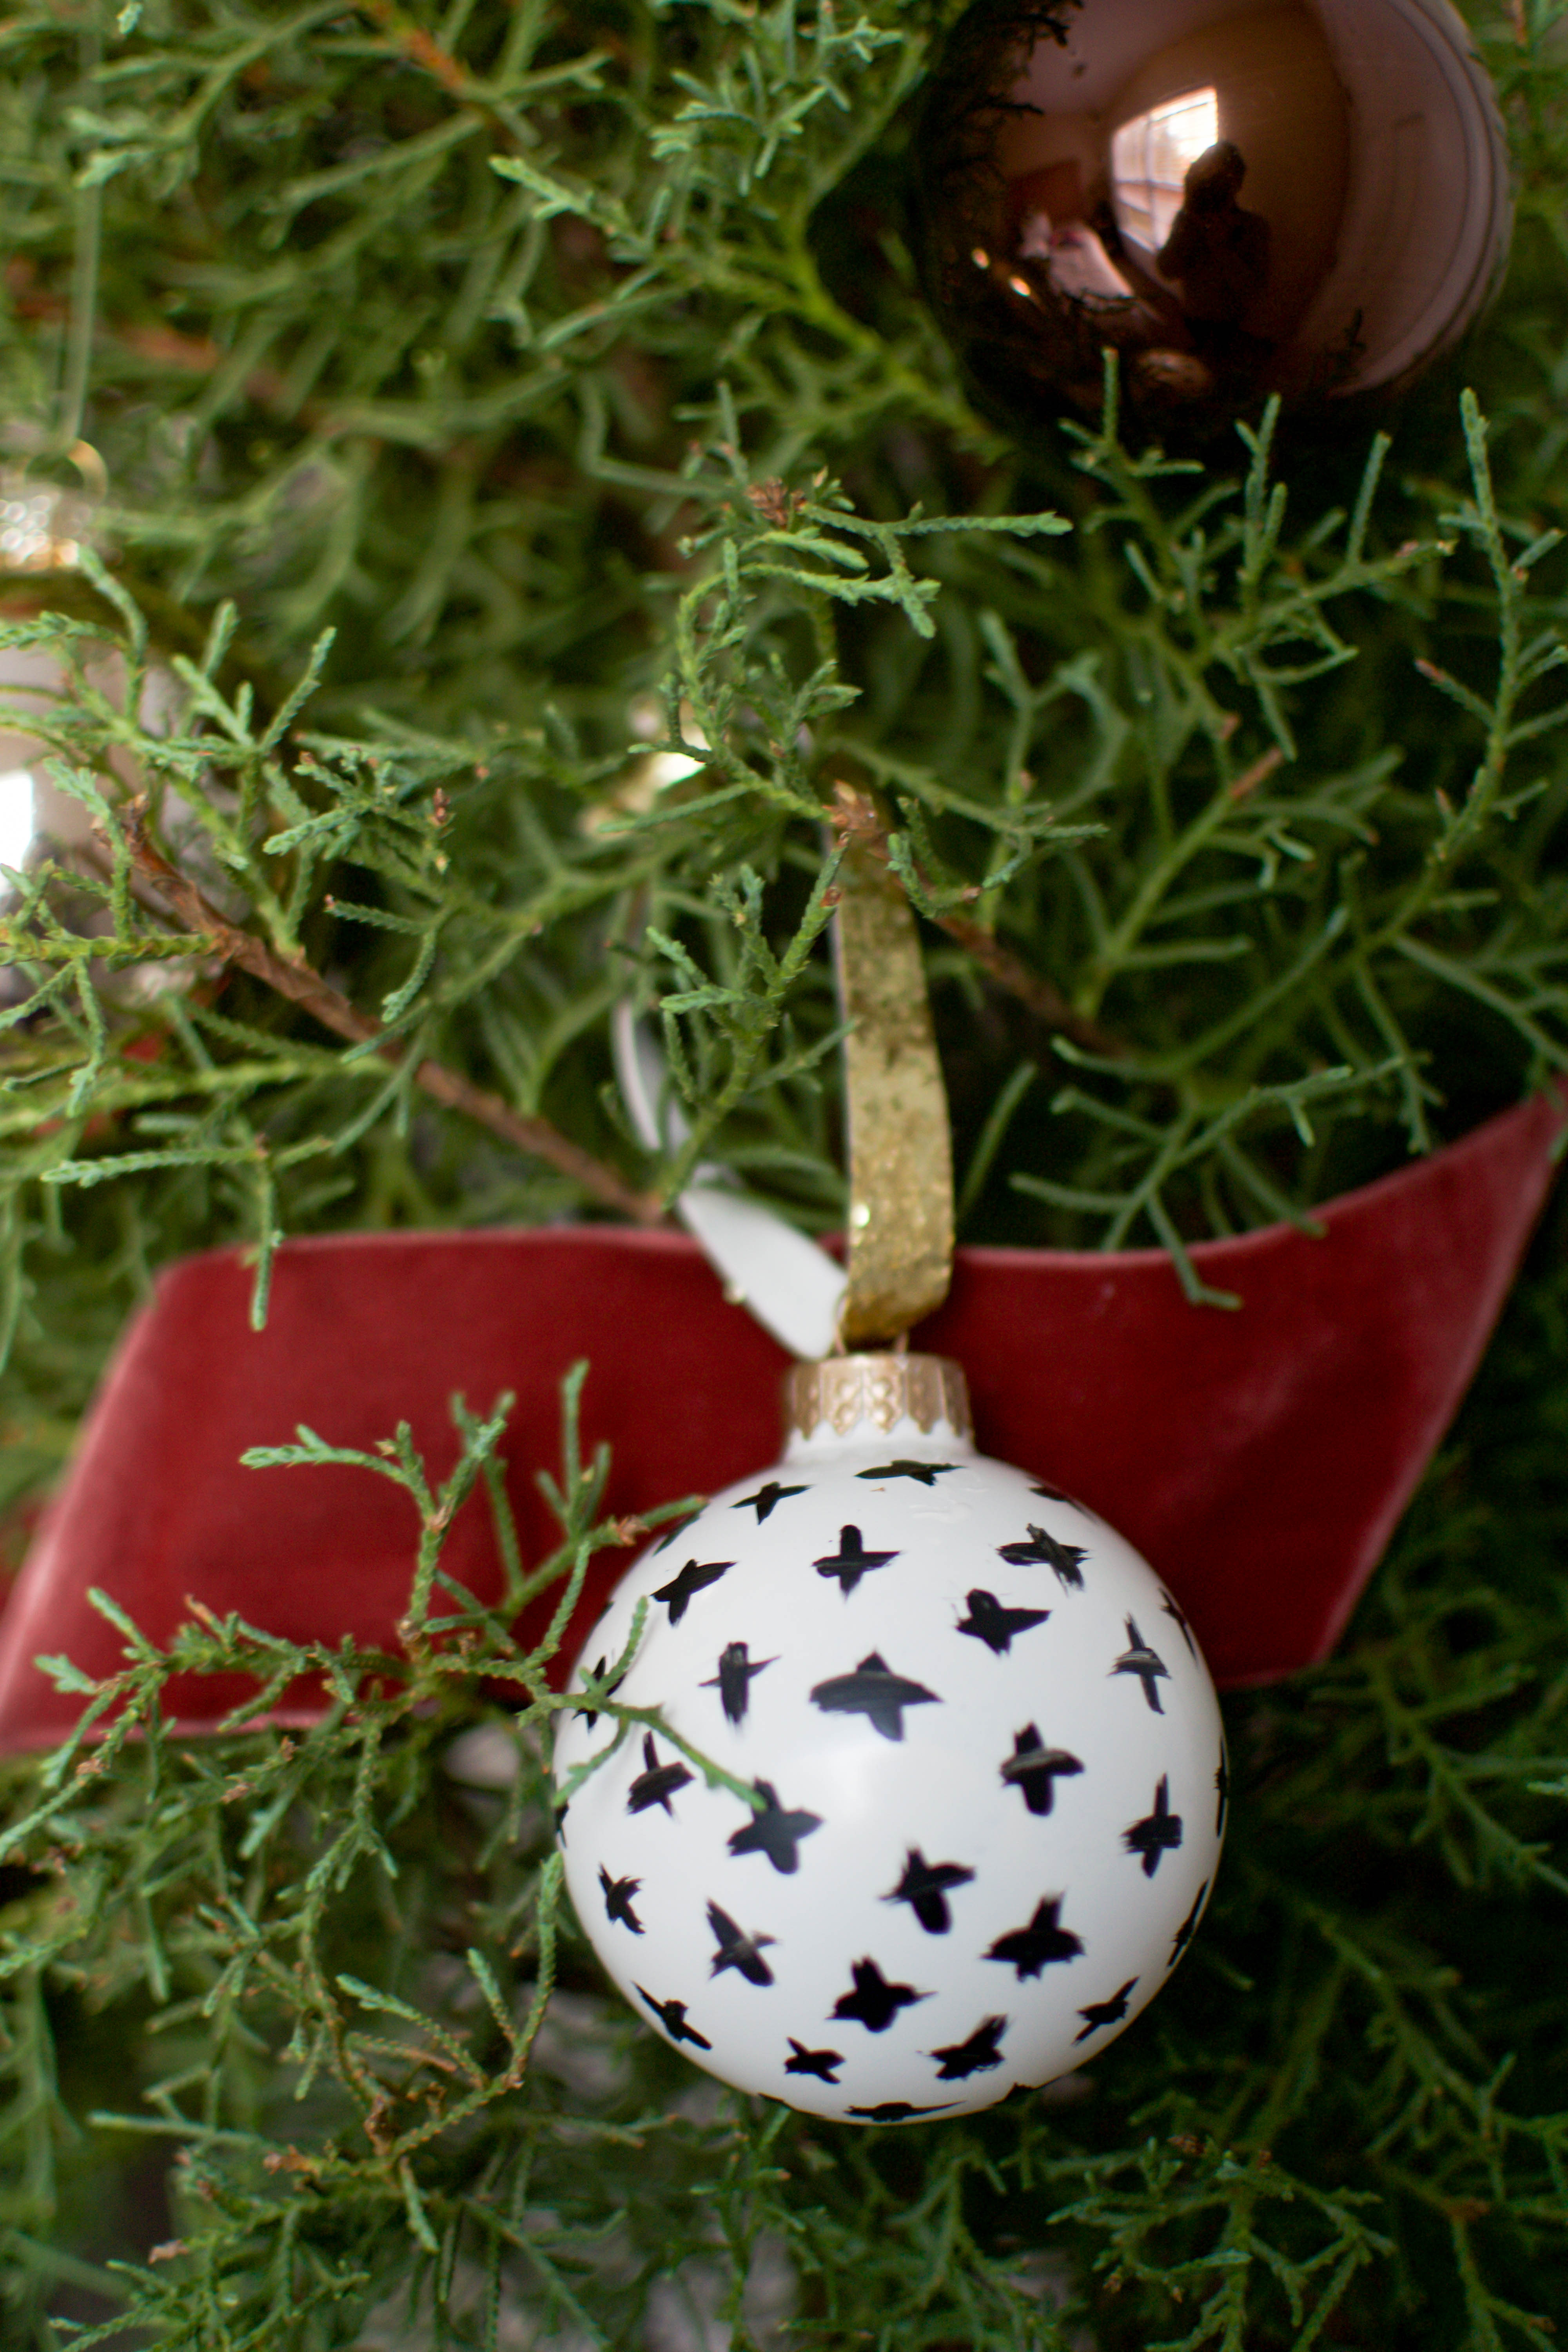
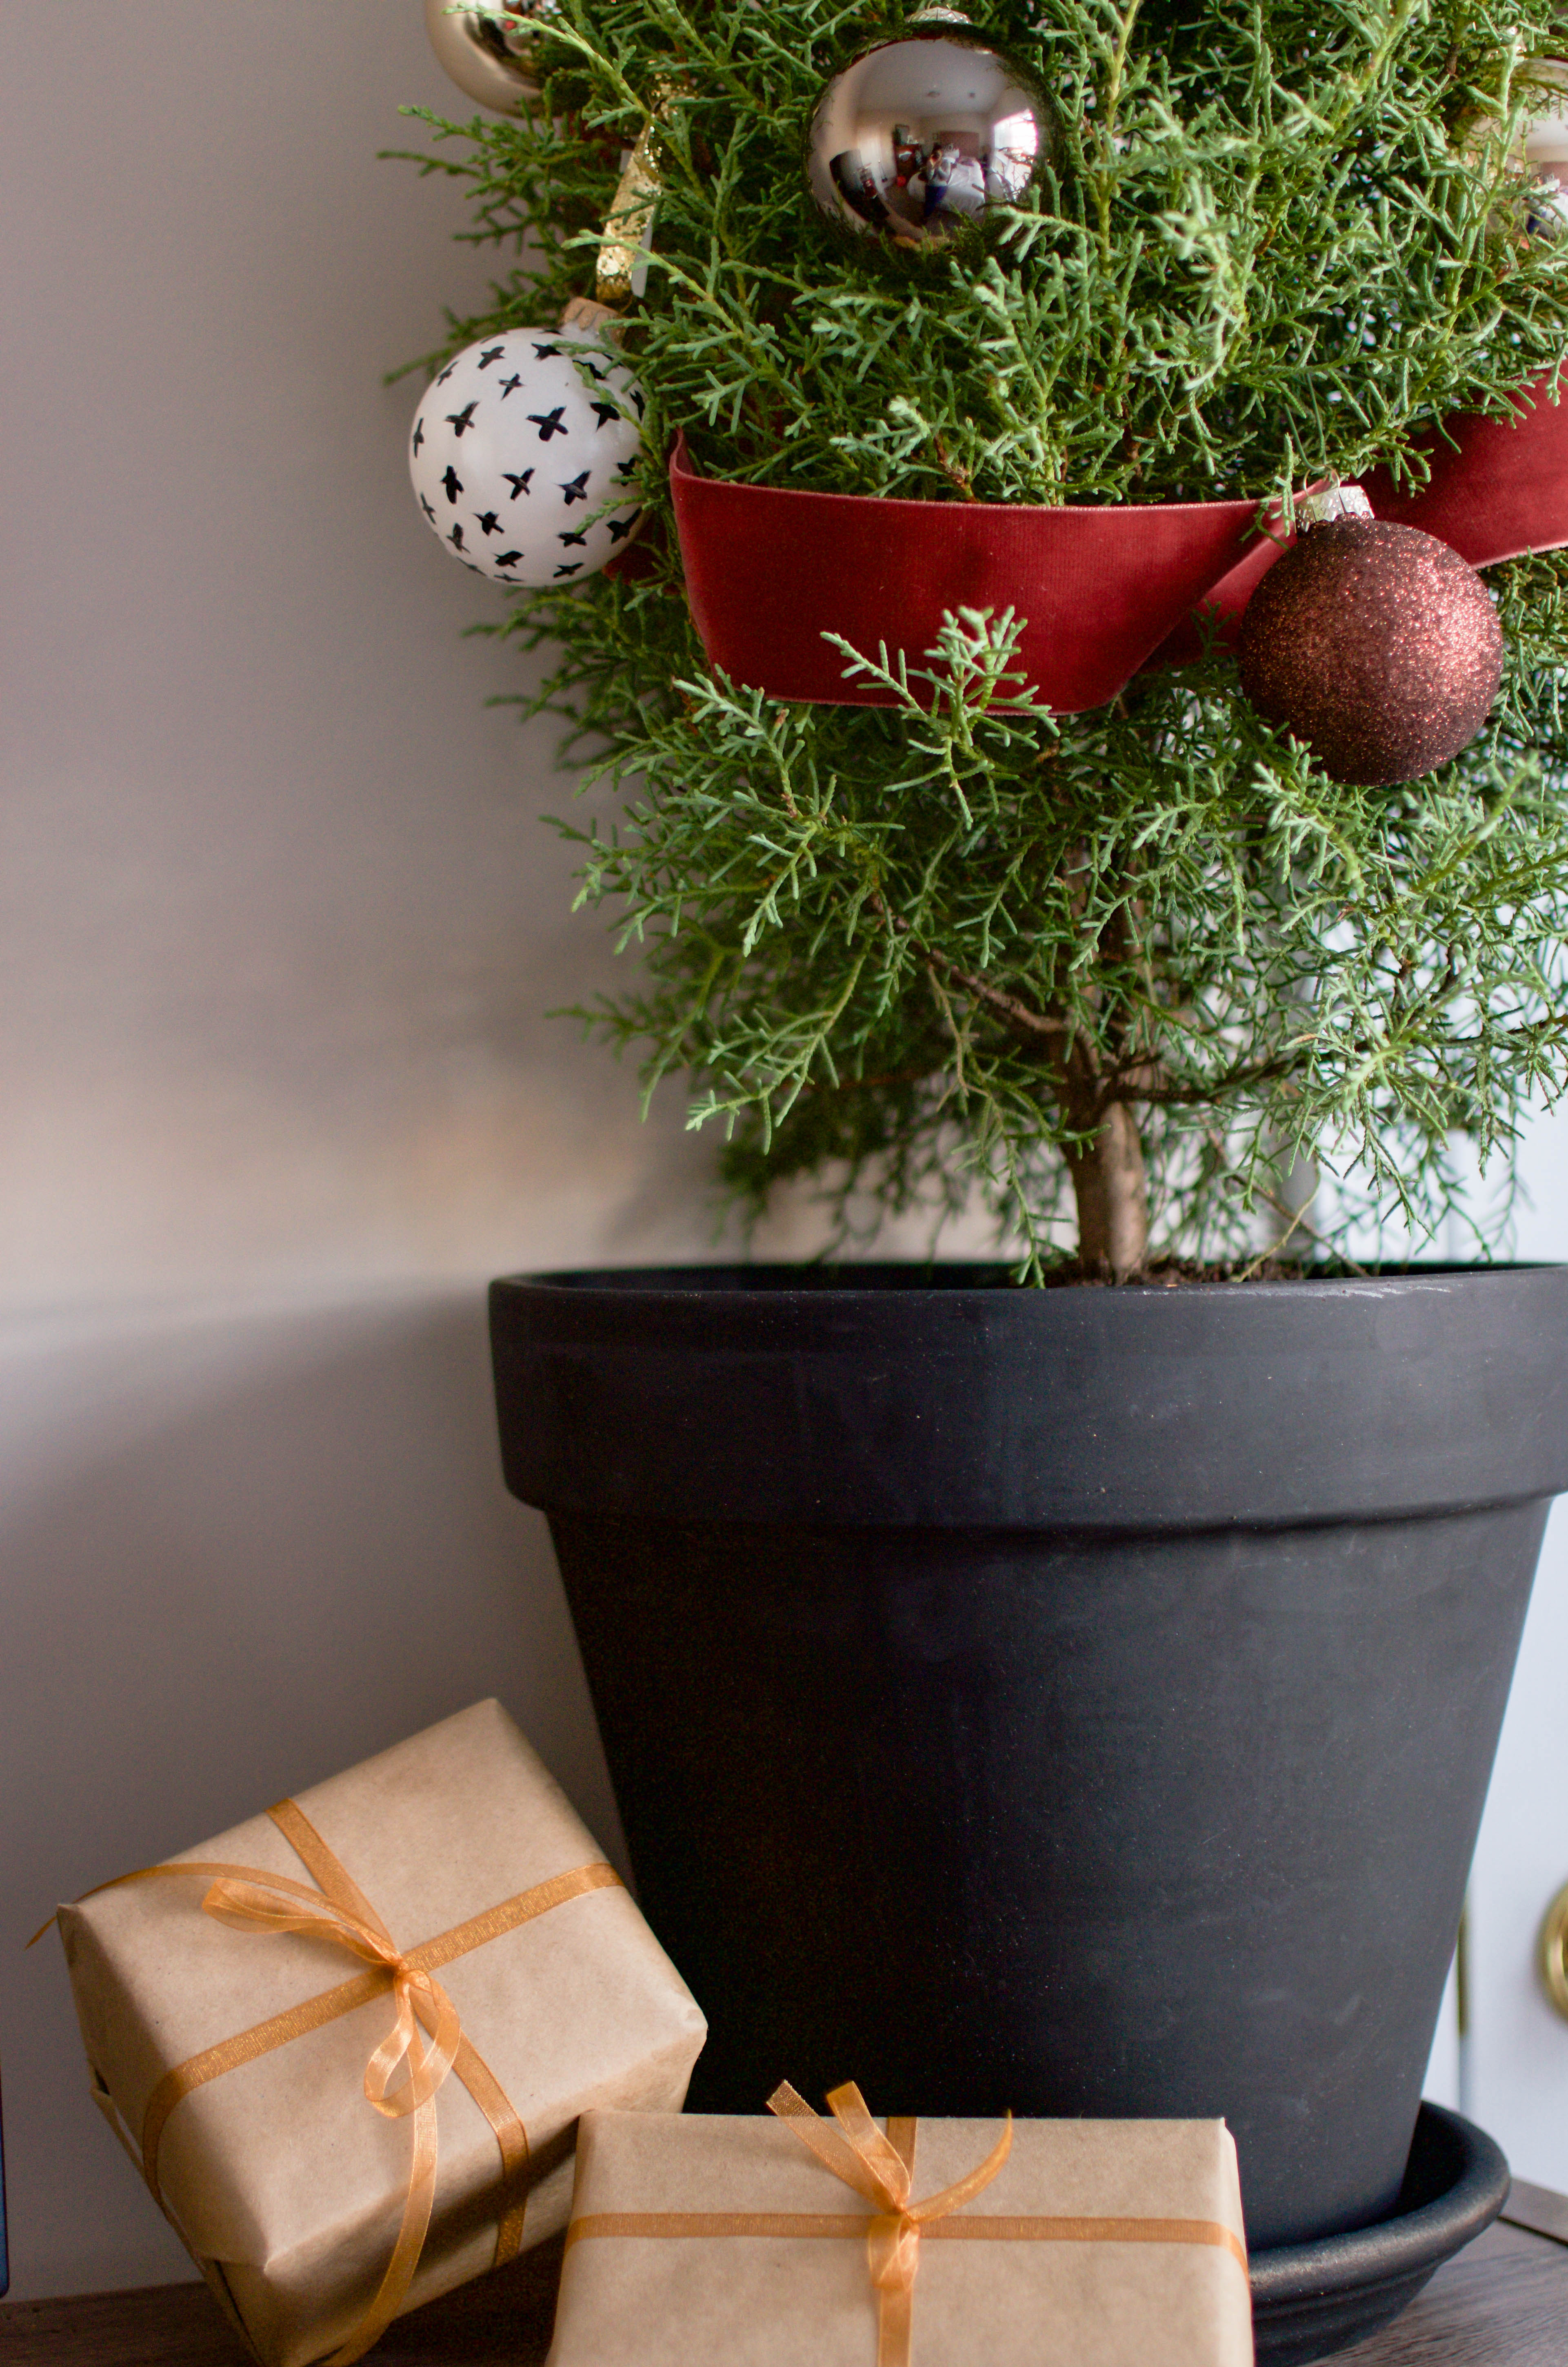
Wasn’t that easy? Now you’ve got customized ornaments, that can easily transition through years of Christmas tree designs. Also, its sparkle, ribbon, and handmade design embody the feel of Christmas while kicking up the flair a notch. It’s just what a DIY Christmas ornament needs.
These are your DIY Christmas ornaments so feel free to tailor them to your own design scheme, with a different base, ribbon colors, etc. Don’t be afraid to take it in any color direction your heart desires. Don’t forget to tag me in your ornament designs online using #TMABlog cause I want to see how you put your own spin on this awesome design.
Latest posts by Jennifer Nesbitt (see all)
- Bring an Old Nightstand Back to Life with This D.I.Y. Nightstand Makeover - January 9, 2018
- Holiday Crafting: Creating Chic DIY Christmas Ornaments - December 19, 2017
- Do It Yourself: Chic Cubic Wooden Photo Holder - November 15, 2017


