
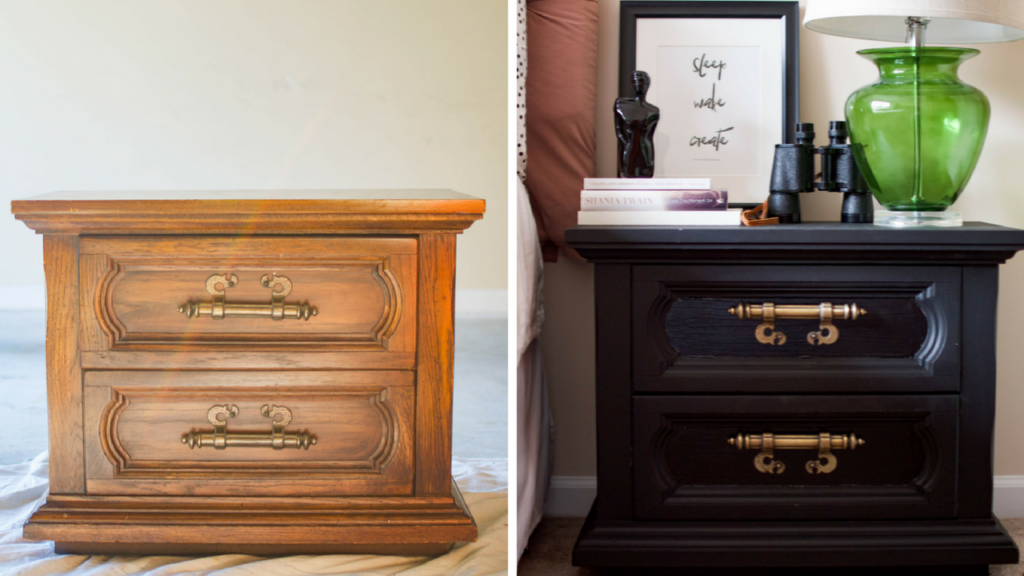
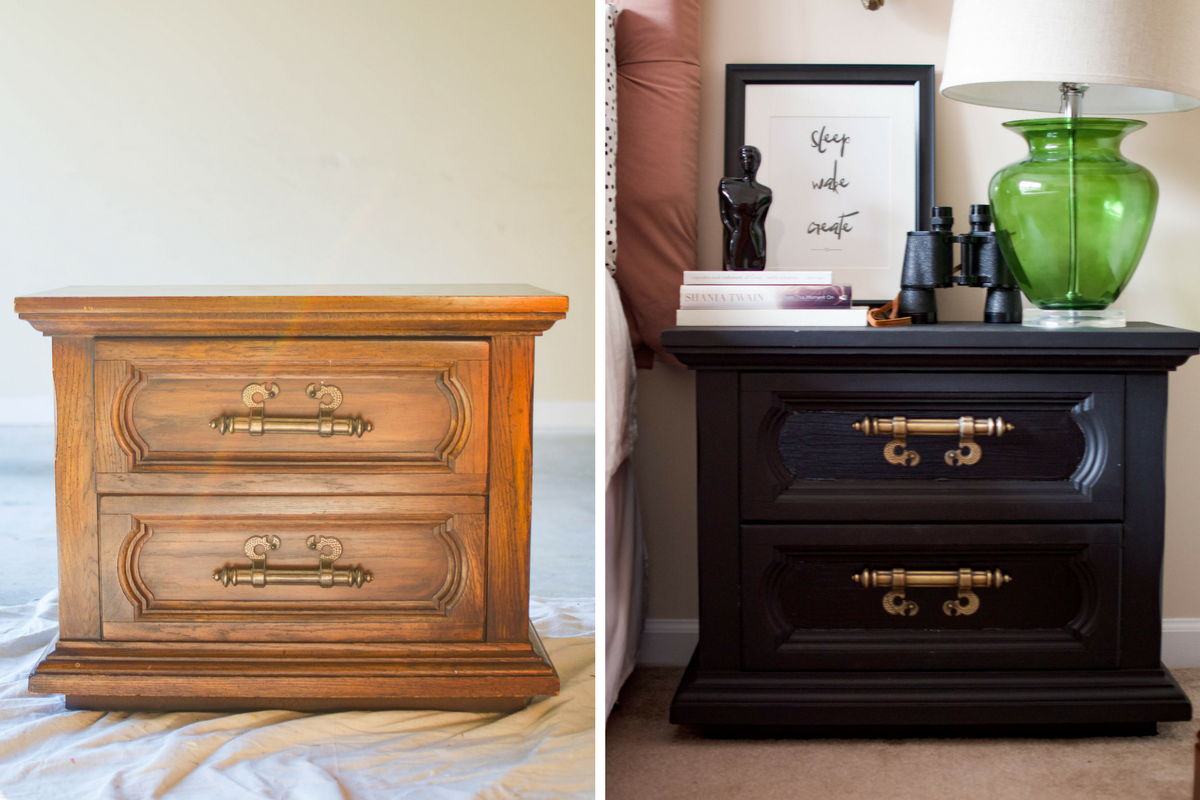
Sometimes waiting to find the perfect piece for your space can be an adventurous ride. One that ends in delight and great fulfillment after having spent months on the hunt. Then finally becoming convinced that your decor fantasy is just a dream. This is why I am super excited to bring you today’s D.I.Y. nightstand makeover. Not because I almost gave up hope on my own finished space, but because I know a lack of buyable options does not have to be the end of the road. If what you’re looking for exists in that beautiful mind of yours, surely it can be brought to life. With a little paint, and hardware, any piece can undergo a complete makeover.
My motto: If you can’t find it, make it. In many cases, making it benefits both your wallet and the overall originality of your design, so why not? The nightstand used for this project was purchased at my local Habitat for Humanity Restore for only $15.
Though it is traditional in its original form, the bones are good and solid wood at this price couldn’t be beat.
Let’s jump right in.
Items needed:
Nightstand
Screwdriver/drill (for hardware removal)
Zinsser Cover Stain primer (1 can)
Glidden Onyx Black paint (flat, 1 quart)
Glidden Black exterior paint (high-gloss, 1 quart)
4 in. mini foam Roller (two rollers)
Trash bag
Wooster Pro angled paint brush
Painters tape
Lint free cloth
Fine sanding block
Step One:
First, unscrew the drawer hardware with a drill or screwdriver and set aside.
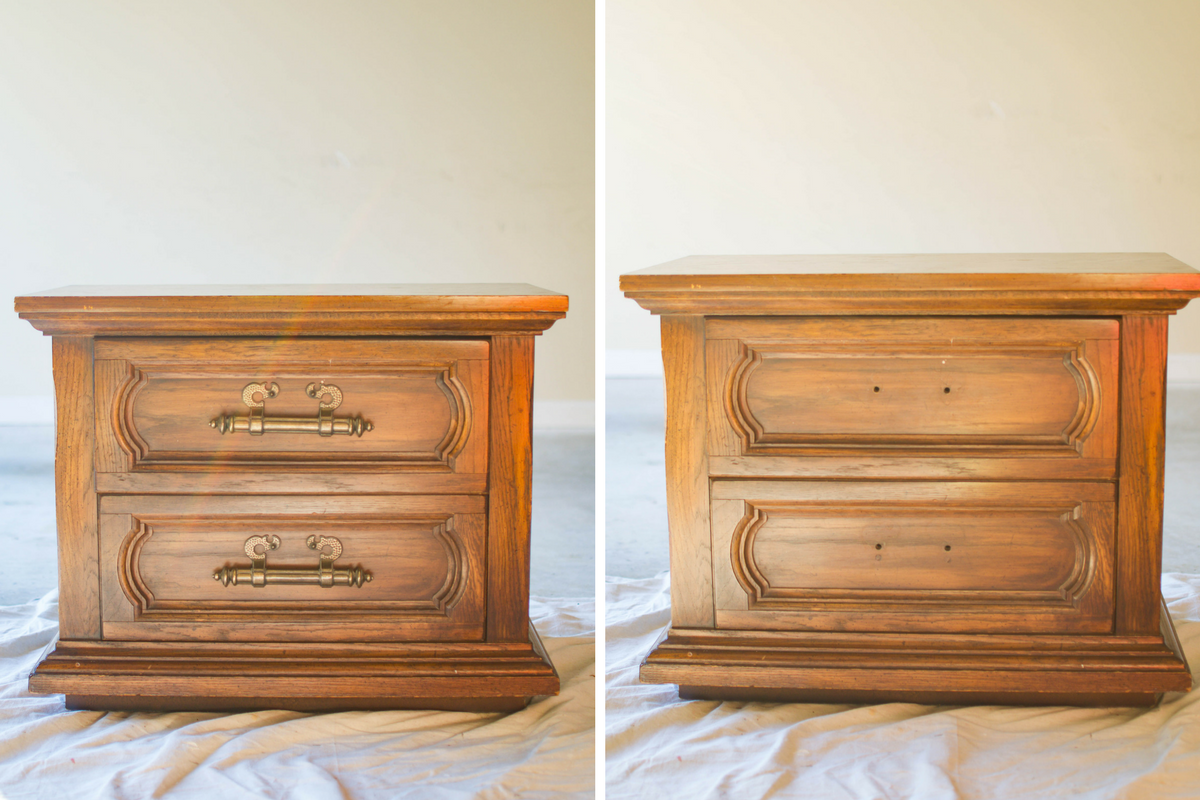
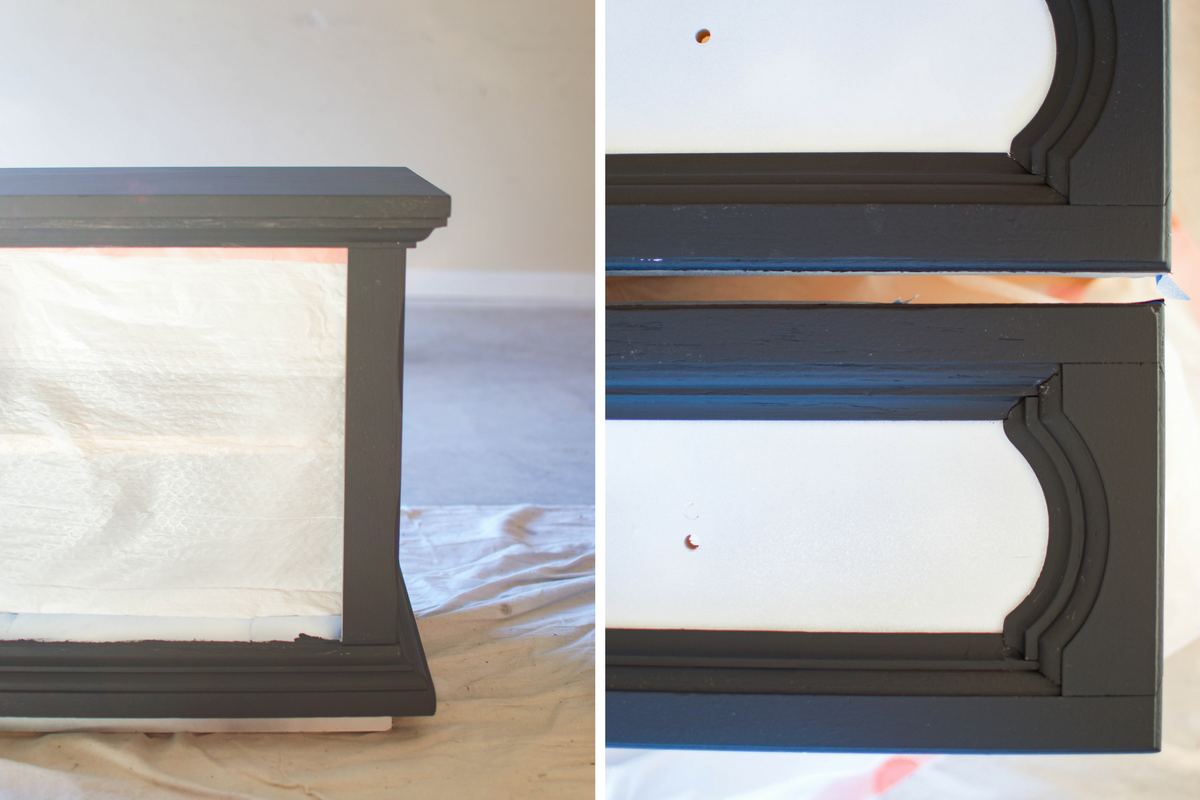
Then remove each drawer from its place. Wipe your piece down with a damp lint free cloth and rid it of any dust or dirt. Next tape off any exposed edges you do not wish to be painted, in order to protect from paint drippings. If you’re anything like me and are afraid of making any painter errors feel free to cover exposed areas with what I like to call “trashbag panels”.
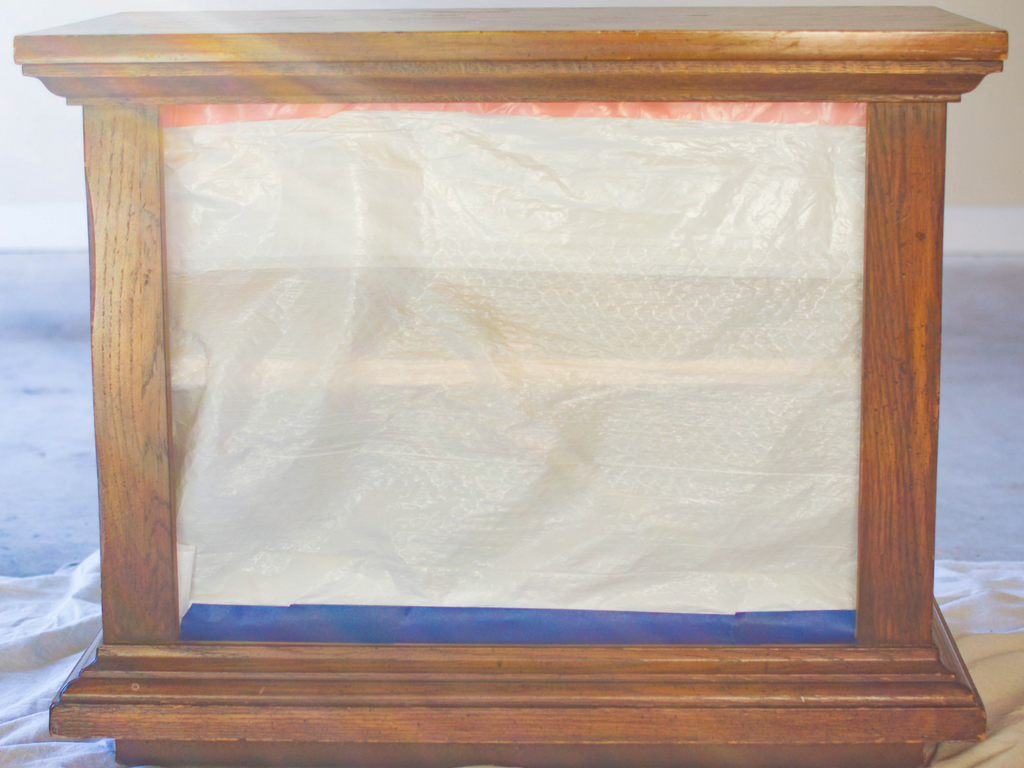
They’re not fancy at all as you can see, but they get the job done.
Step Two:
Using Zinsser Cover Stain apply one coat of primer.

Enough primer should be used to create a cloudy layer. If a bit of wood is visible through the coat of primer that’s ok. One cloudy coat will be enough to protect and adhere to smooth surfaces, or pieces with minimal scratches, and increase the adhesion of paint to the surface. If your piece contains large scratches or breaks in the wood and wood filler must be used, consider applying two coats of primer, with light sanding in between.
I must say Zinsser Cover Stain Primer has been my saving grace for many projects. It may cost a tad more than other primers (by only a few cents), but its quality and consistency allows me to only apply one coat of primer without the hassle of extra coats and heavy sanding needed before or after the primer is applied.
Allow the primer to dry for one hour. Lightly sand away any dripping, and wipe down with a damp cloth.
Step Three:
Using a small foam roller, and an angled brush for those nooks and crannies, apply one coat of Glidden Onyx Black paint to your piece.
Allow to dry for 2 hours. Then sand down any dripping and apply one more coat of paint. After one hour of dry time, remove your painter’s tape to eliminate any tears in the paint surface during tape removal. Then allow to dry for one more hour.
Next tape off the front panel area of each drawer to protect the outer painted area during the application of the high-gloss paint . I chose to use high gloss black paint in each drawer panel for a little visual contrast. However, feel free to use the same paint overall, or put your own spin on your piece by using a highly contrasting color.
Using a mini foam roller, apply high-gloss black paint to the front drawer panels. Allow to dry for 2 hours, then apply one more coat of paint. Allow to dry for 2 hours (don’t forget to remove the painter’s tape after 1 hour).
Finally, place your hardware back on each drawer, and re-insert drawers. I chose to flip my hardware over for style and ease of drawer handling while in bed. Depending on your hardware design, try it out and see how you like!
Now, place your nightstand in it’s newly designated spot, and stand back in awe of the work you’ve done.
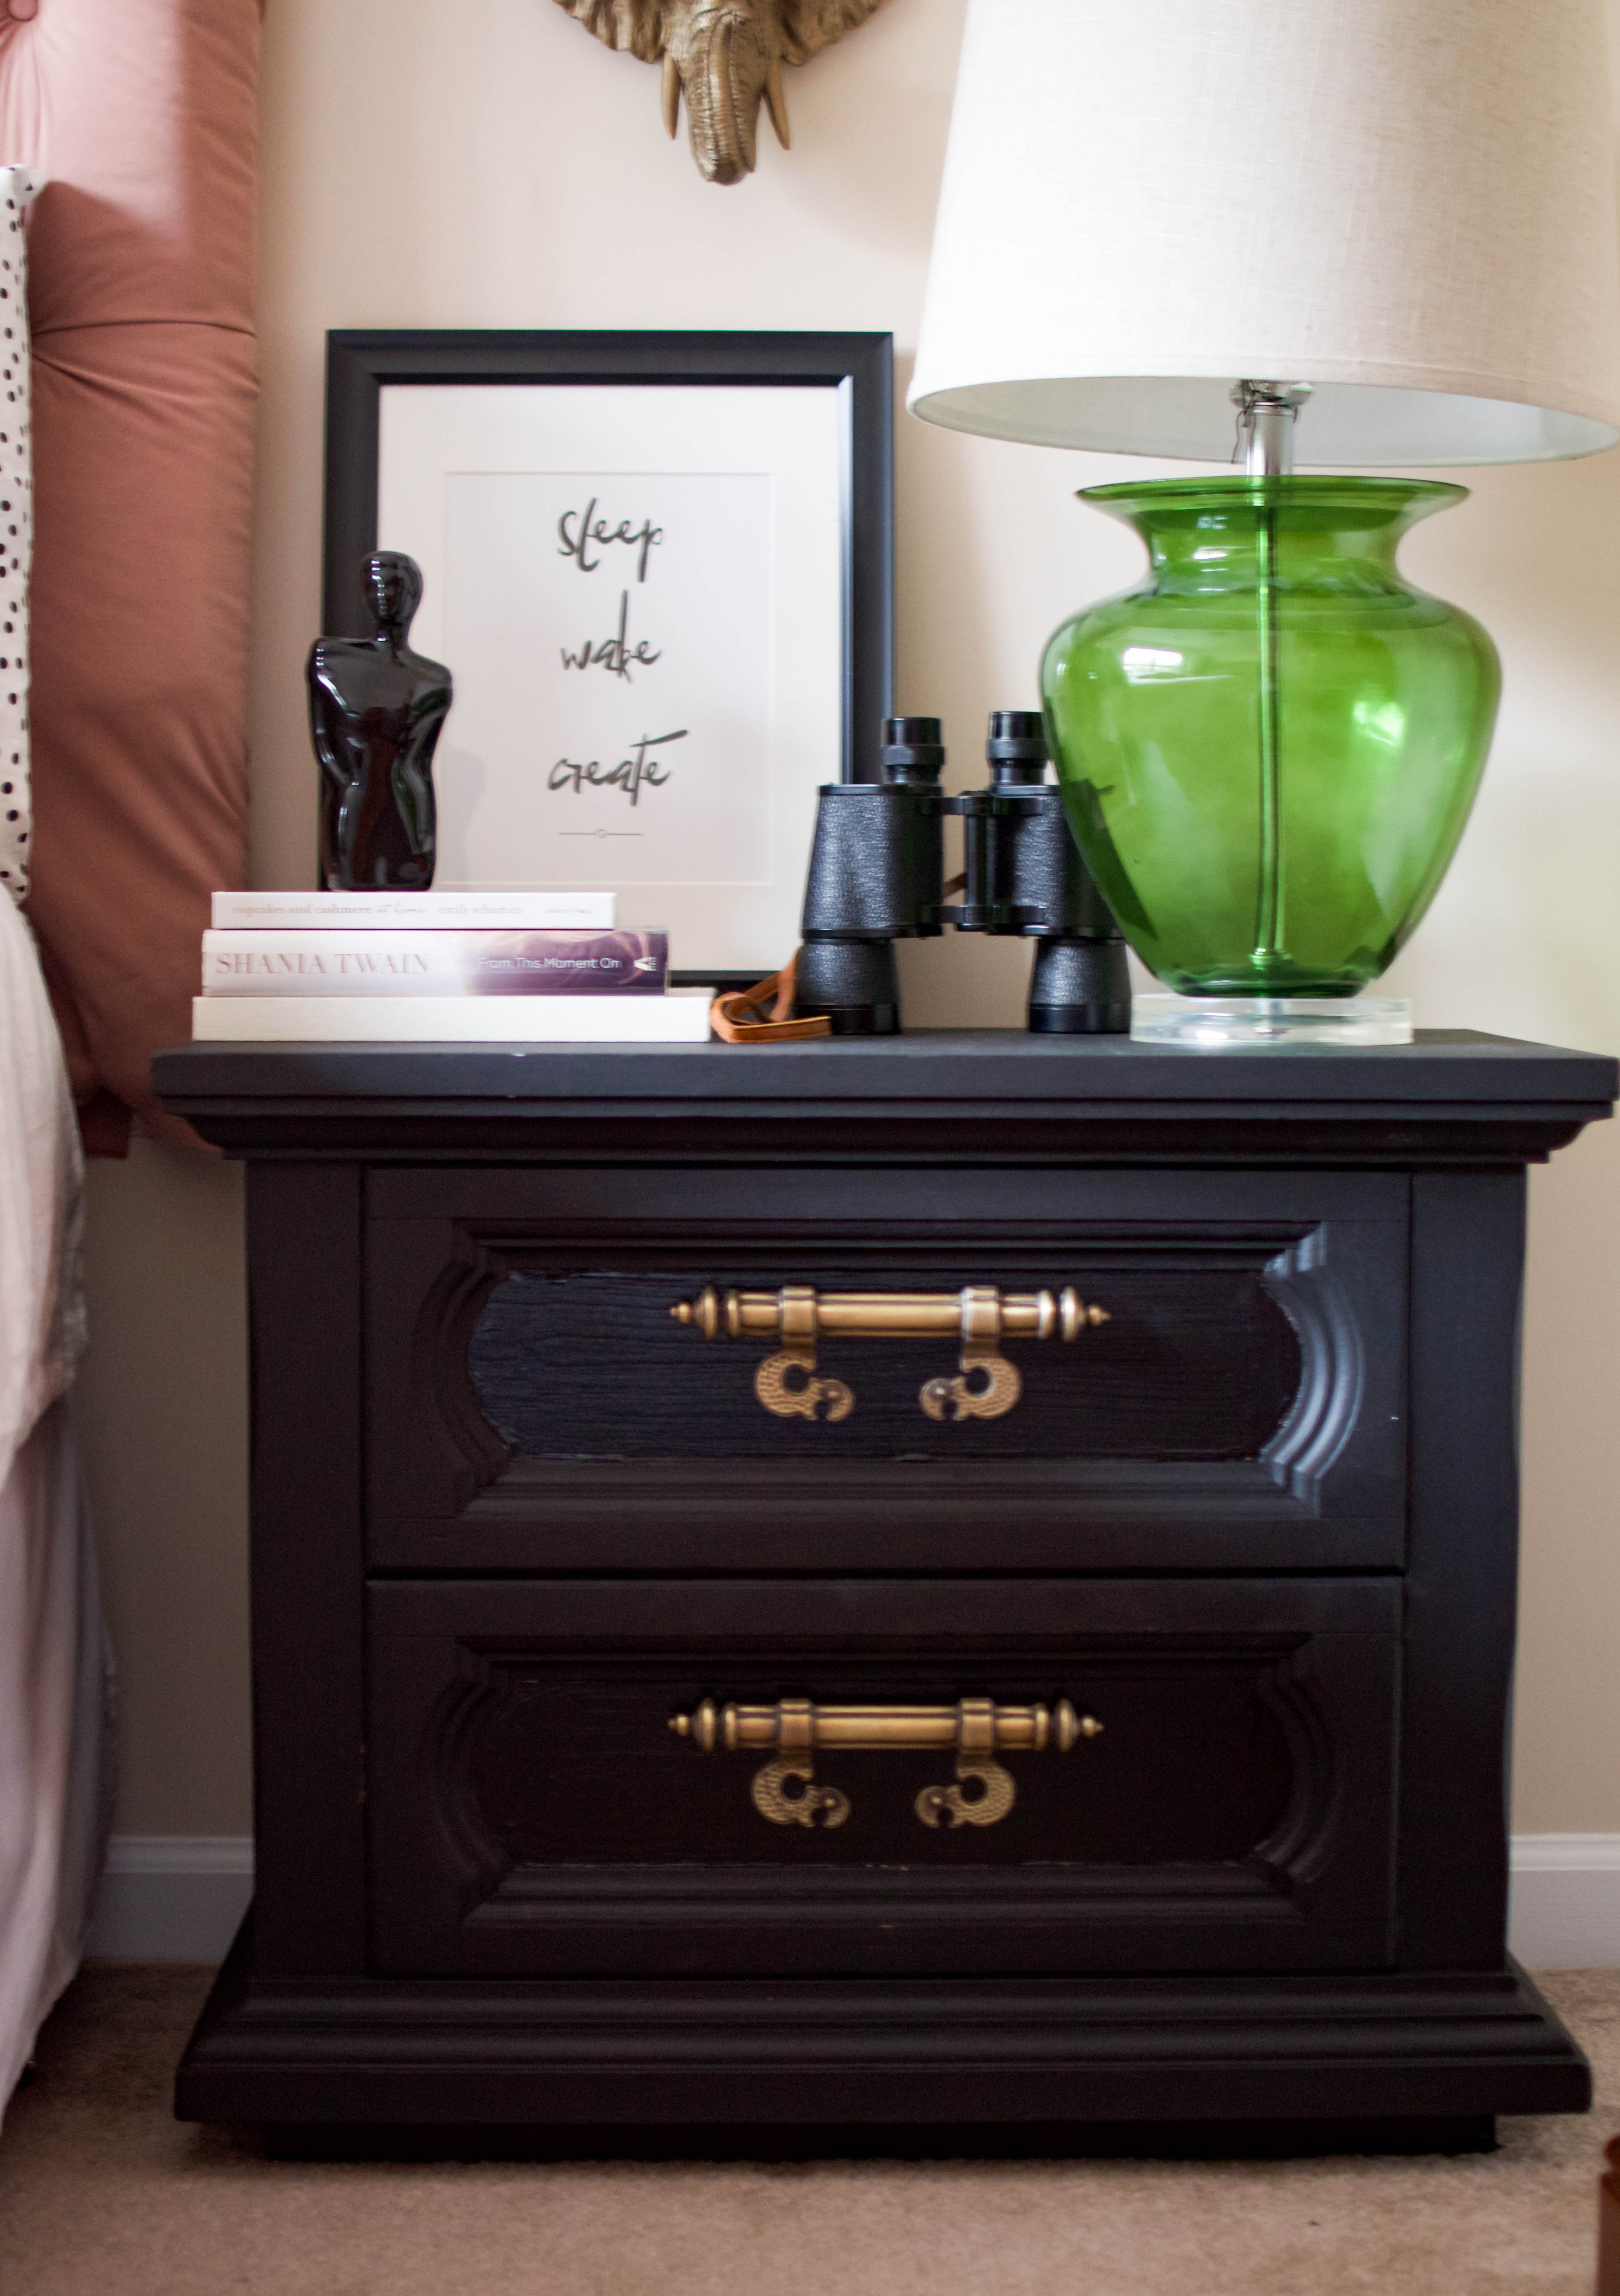
This piece is both eclectic and chic, and has given my space a custom look I love. I hope you love it too. Thinking of giving your own piece of furniture a facelift? Let us know below what project you’re tackling next!
Latest posts by Jennifer Nesbitt (see all)
- Bring an Old Nightstand Back to Life with This D.I.Y. Nightstand Makeover - January 9, 2018
- Holiday Crafting: Creating Chic DIY Christmas Ornaments - December 19, 2017
- Do It Yourself: Chic Cubic Wooden Photo Holder - November 15, 2017


