With school back in session, I’m sure that most of us are searching for the perfect protective styles for our children. If you are like me and have multiple heads to tame, then you already understand how much time it would take to do hairstyles for each child every morning before school (I’m exhausted just thinking about that task). In a previous blog, we discussed how to prep your child’s hair to ensure having the perfect twists! If you missed it, no worries, you can catch up and read it right here
.
Now that your child’s hair is prepped and ready to go, now it’s time to style. There are my five simple go-to protective twist out styles:
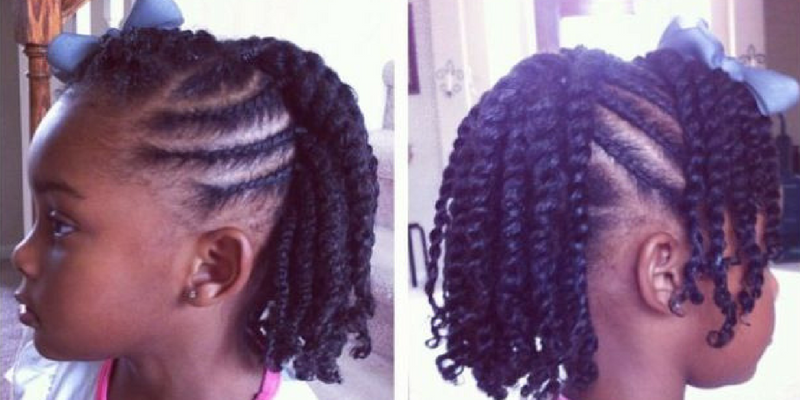
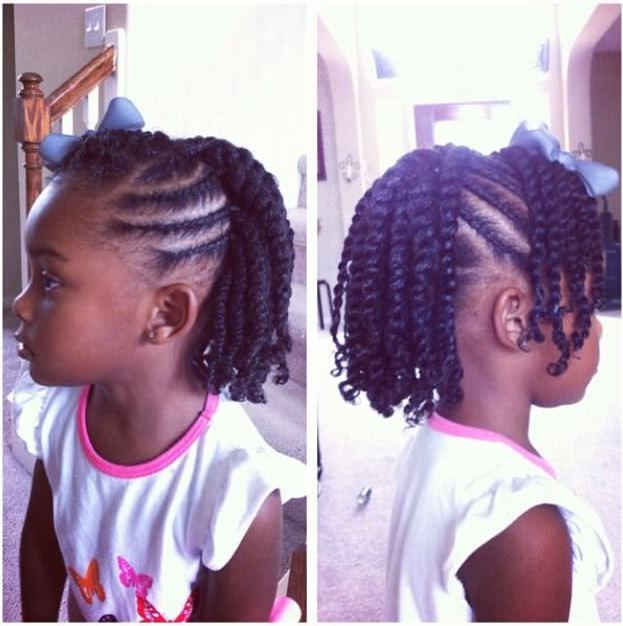
Mix flat twist and two strand twist
By combining these two type of twists you will be adding versatility to the hairstyle. With the ability to change the look daily your little one will be able to rock all of her favorite updo’s and ponytails. Or leave it down and add ribbons or other hair accessories.
Mini twists
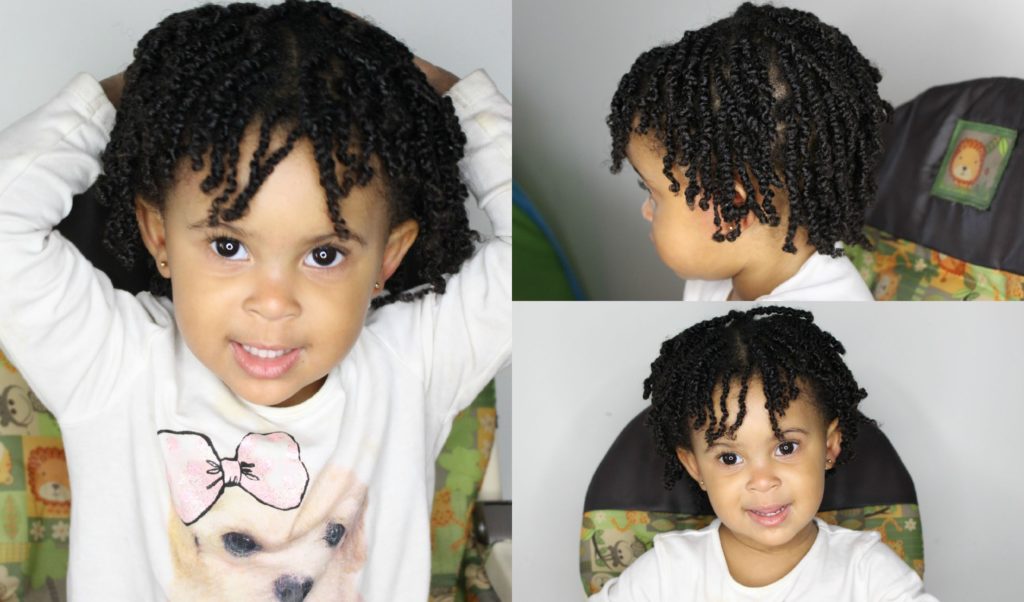
Photo Credit: Jessica Pettway
This is by far my favorite option! Even though it does take me a bit longer to install the mini twists, it is definitely worth the time considering they can last a couple of weeks! You may have to touch up the nape area and edges, but other than that it is a pretty low maintenance hairstyle. Jessica Pettway gives a great tutorial on how to install mini twists over on her YouTube channel. Watch here.
Mini twists and buns
Just in case you get bored with the twist you can always jazz it up by adding some buns or a top knot! I love implementing these styles after the twists have been in for about a week.
Chunky twists and pigtails
If you need a protective style that does not take as along to install, try doing chunky twists up in pigtails! This could take anywhere from thirty minutes to an hour to initially style, depending on the hair texture, thickness, and length. If your child has thinner hair, or hair that is very silky, it maybe difficult to create “chunky” twist. Typically this style will last anywhere from 3-5 days and I may need to touch it up once.
Twisted Mohawk
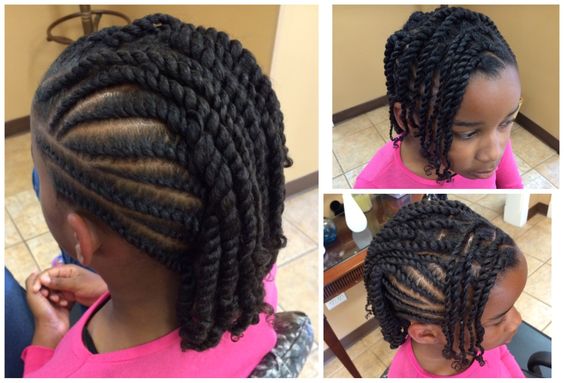
Pinterest
If your little one has a spunky attitude try a twisted mohawk style! I do believe every diva child needs to rock this look at least once in life. There are a couple of ways to do this style on your child. You can flat twist the sides and then two strand twist the rest. A time saving option, my preferred method, is to make 4-5 ponytails going down the middle of their head and then two strand twist each ponytail. After a few days of wearing it twisted, take down the twist and just let your diva wear her mohawk curly!
Now that you’ve got your styling ideas, here are a couple tips for upkeep:
To help keep the hair looking fresh and hydrated, you can mist some water over the twists. Next, I apply my favorite sealing oil and then put on their protective caps for the night. Nighttime maintenance is essential to preserve these styles. When dealing with children, especially toddlers, this can be difficult. My recommendations are to use a satin pillowcase and also a protective cap. As a safety precaution, I stay away from any type of protective scarf that needs to be tied.
Thank you so much for reading! What are your favorite ways to style your child’s twists?
For more “twistspiration” , check out posts from me and the girls over on my IG @intobritsworld!
Latest posts by Brittany Spencer (see all)
- Healthy Kid Friendly Valentine’s Day Dessert Recipes - February 9, 2018
- Six Steps to Effectively Implement Your Goals for the New Year - January 18, 2018
- Four IG Fitness Accounts Serving #BlackGirlMagic & Motivation - December 26, 2017

