
*This post contains Amazon affiliate links that earn this website a small commission that goes towards creating new content.
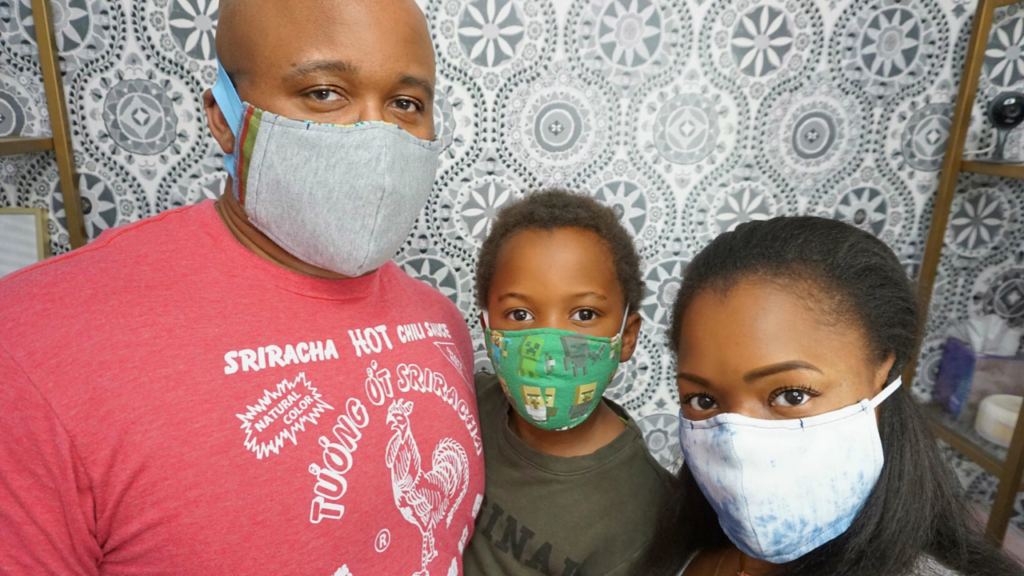
Due to the shortage of N95 masks, I’m going to show you how to create your own DIY face masks with a filter option to help give you and your family some protection against the virus spreading across our country.
Now before I get into this DIY I want to briefly talk about the type of material you should be using to make your masks. Will this mask be the equivalent of the hospital-grade protective mask that will prevent you from contracting Coronavirus? No. But it will reduce the number of germs you breathe in.
Keep in mind, there are several materials you can use to make your masks. According to Smart Air Filters, who tested a number of fabrics that include scarfs, t-shirts, pillowcases, and vacuum filters found while vacuum filters and doubled dishcloths worked at blocking out germs up to 97% they weren’t great for breathability.

Chart Credit: Smart Air Filters
However, what did have better breathability as well as blocking up to 71% germs were doubled cotton t-shirts. So while there was a 26% difference in how the fabrics blocked germs the cotton proved to be a better choice, because at the end of the day you need to breathe while wearing the mask. Which is why for this craft I’ll only be using cotton materials. You can read more information on which fabrics work best for DIY face masks HERE.
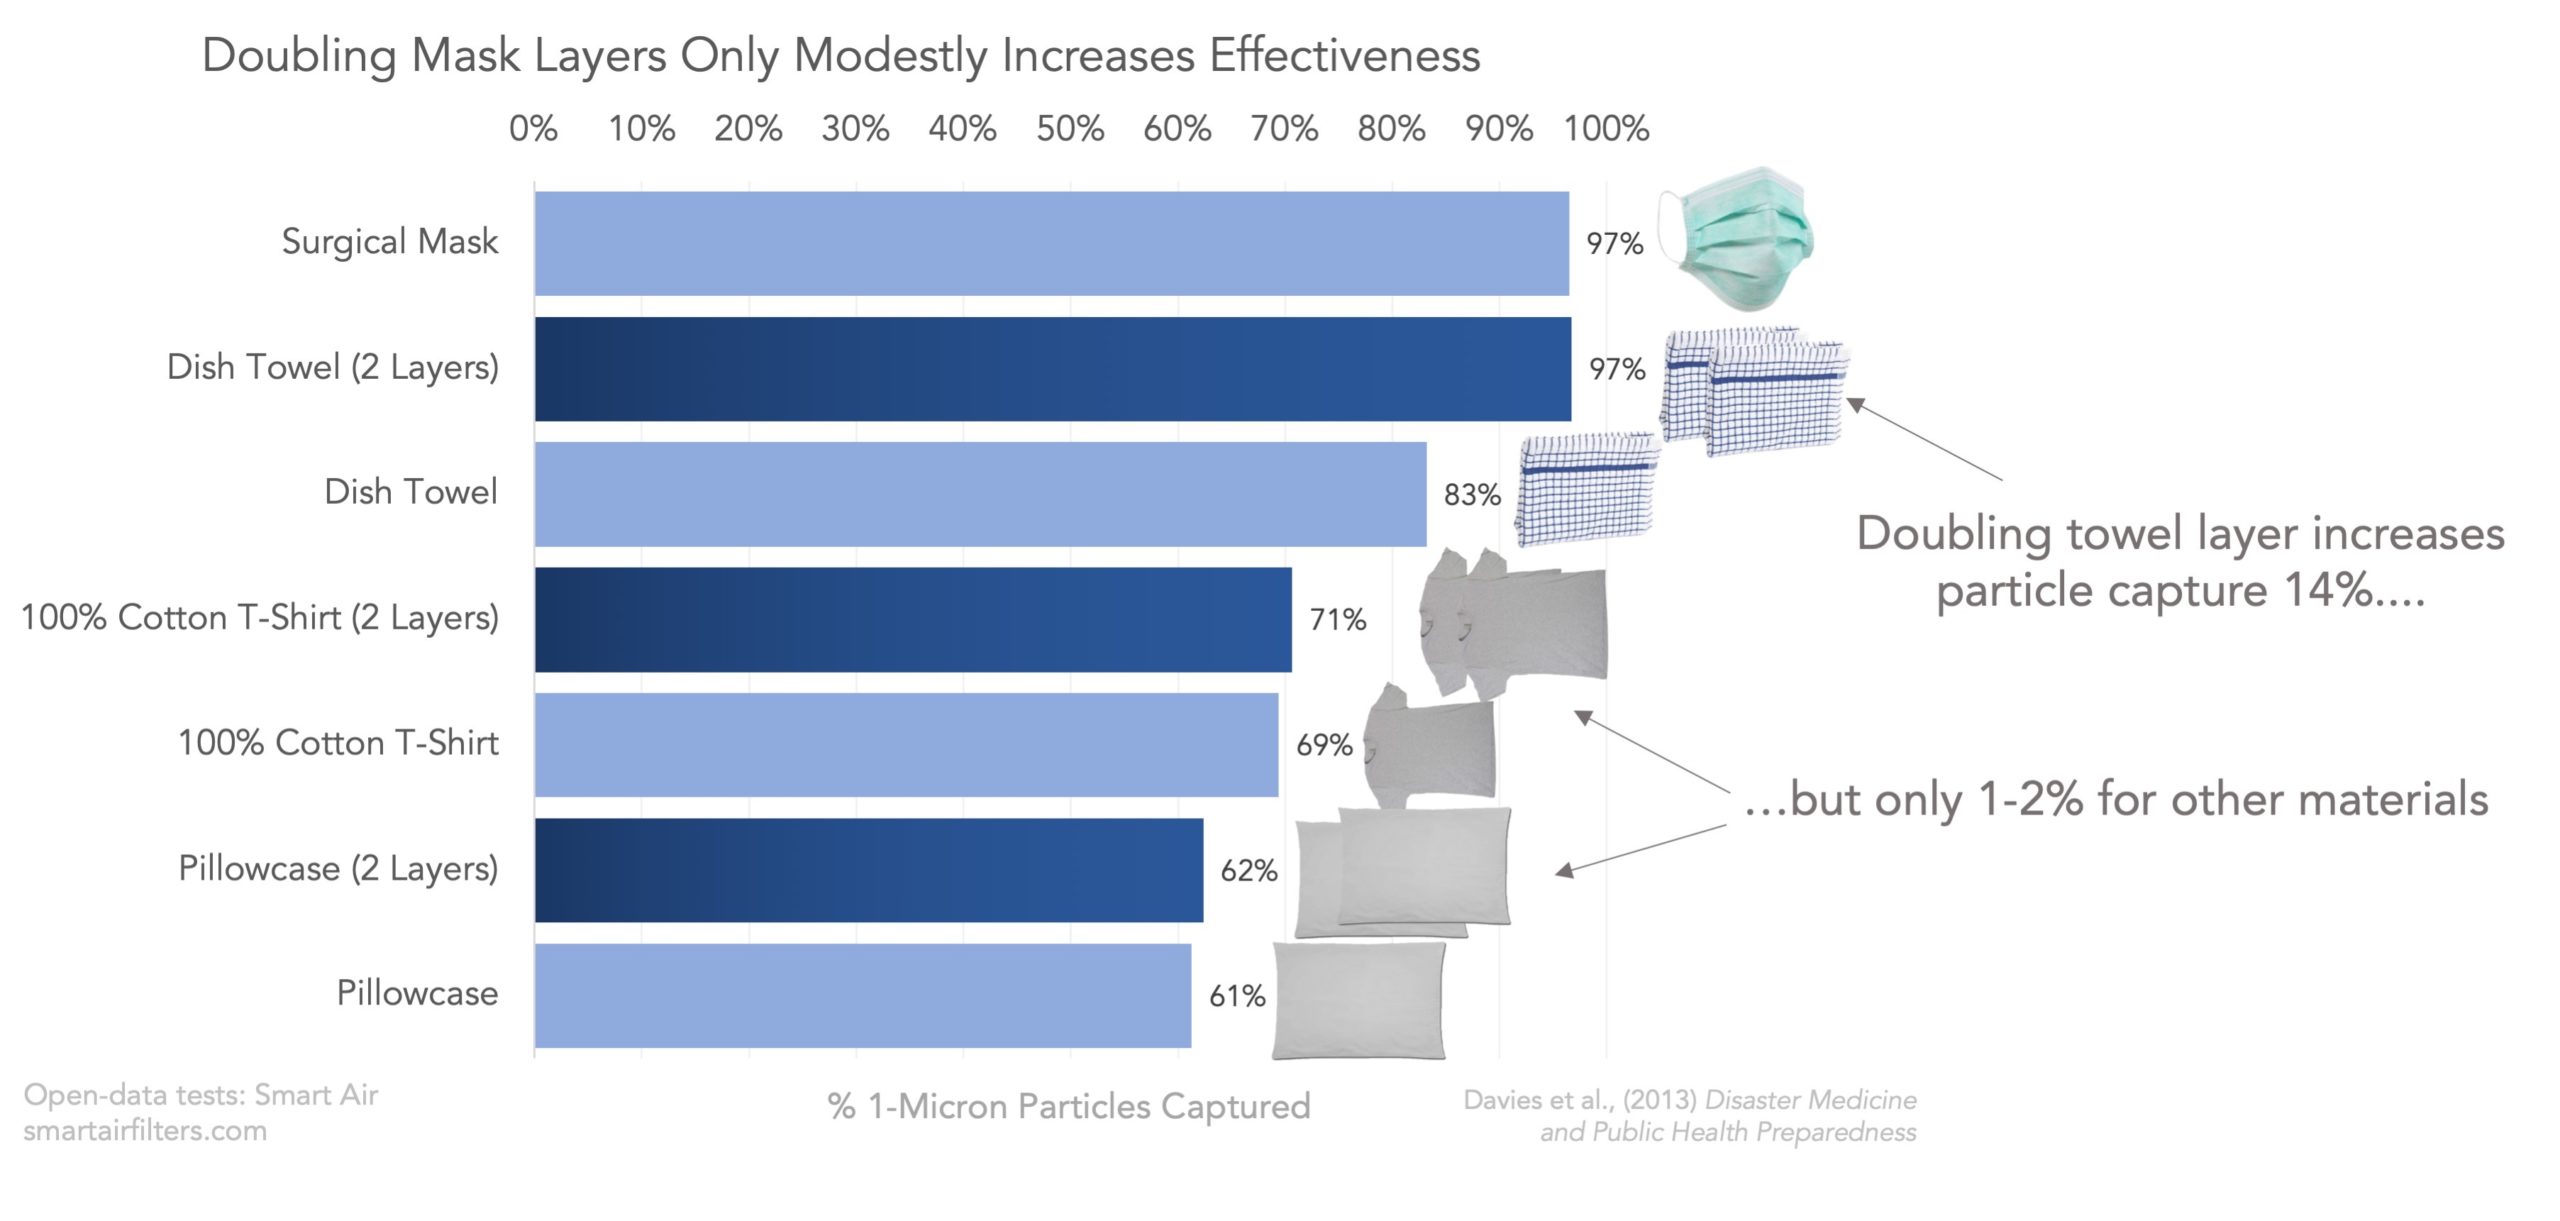
Chart Credit: Smart Air Filters
Follow These Steps To Create Your Own DIY Face Masks
*I cannot stress enough the masks you’re going to make are NOT substitutes for the N95 masks. These masks will prevent you from breathing in some germs but not all.
What you will need:
Three big pieces of 100% tightly-woven cotton quilted fabric, elastic bands 1/8″ x 7″ (or whatever size you want), as well as clips, scissors, bendable wiring, 3M Filtrete Ultrafine Particle Reduction Healthy Living filter, and a sewing machine.
Pattern Sizes & Measurements


*Remember your measurements won’t be the exact same as mine because we all have different face sizes. This meant to be a guide based on size.
Let’s Make Some DIY Face Masks!
Watch the video and follow along with the written instructions below.
Step One:
Chose the size you want to make and measure the wearer’s face from ear to ear and nose to chin. Use the pattern guide above for sizing and mask shape.
Step Two:
After you have all your patterns made and your fabrics cut to size it’s time to make some masks. You should have three pieces of fabric. The outer shell (which people will see), the lining, and the pocket. Lay the outer shell fabrics flat facing each other. Meaning, the outer design fabric is on the inside. Pin those two fabrics into place.
Step Three:
With everything pinned into place you’re going to sew a 1/4 seam onto the outer shell fabric, lining, and pocket. When you’re done remove the excess thread. Now cut small slits just under the fabric. This will allow me to open the mask. You can also iron this section to make it flat and smooth.
Step Four:
Now take the pocket piece of fabric and fold it over 1/4in on each side, iron them into place and sew each one of these sides down. This will make it easy for you to remove the filters. After your ends are sewn down remove the excess thread.
Step Five:
Let’s put your mask together. Place the lining face down with the seam facing whatever surface you’re using. Then take the pocket and lay it right on top in the same position. Now match up the seams and pin it into place.
Next, take your outer shell and turn it inside out. You want the design that people will see on the inside – for now. Pin all the pieces into place.
*You should be at the sewing machine with all three pieces of fabric pinned together.
Sew a 1/4in seam on just the outsides of the mask. Once you’re done cut those small slits again so that it curves and has flexibility. When you’re done turn the mask inside out. Stretch out all your seams. You can iron it to make it flat and smooth.
Step Six (Wiring Optional):
If you don’t want to add wiring to your mask skip to the next step.
For those adding wire take a 4-5in piece of 14 gauge wire and follow it along the seam of the mask. With your fingers push it right up to the top of the seam making sure it’s between the extra fabric that it’ll be comfortable on your nose. Pin it into place.
Step Seven:
Fold the fabric in about half an inch on the sides and take one side of the elastic and place it in one corner then take another piece and place it in the other corner. This will allow the mask to hook over the ear. Pin into place. Then you’ll do the other side.
*Make sure your elastic is straight and not twisted.
Step Eight:
Let’s add the filter. I’m using 3M 2800 MPR Filterete Filter. Remember, the higher the MPR the better it prevents small particles and viruses from penetrating. Why a furnace filter? If you look at the composition of the N95 mask you’ll see Polyurethane listed which is the same material in the filter I used for my masks.
For the filter to fit snuggly in your mask measure the inside of you’re mask using the original pattern. Make sure it fits perfectly with the pocket size. Place the pattern on the filter and cut out the shape. Do not mark or pin the filter. Now fold the filter and side it into the pocket. Use your fingers to open and adjust it.
All done!

If you looking for some fabric for your DIY face masks you can use household items such as dishcloths, pillowcases, and old tee-shirts or you can stop by Joann‘s. They’re leading the charge by giving out materials and offering free classes (in accordance with social distancing rules) to help communities make masks for themselves and for donations. This is a great family craft, especially for children as it will allow them to create their own masks.
What do you think of these DIY face masks? Share your creations on social with me at #TMABlog.
Latest posts by Maria Antoinette (see all)
- 10 Romantic Date Night Ideas For Any Time of The Year - January 26, 2023
- Tips To Help You Reconnect With What Brings You Joy - January 19, 2023
- Planning A Road Trip? Here Are Some Key Tips You Should Know - January 12, 2023


Are these washable or reusable?
The best out all very clear at a speed everyone can learn n make a face mask! Thank you so much. Sending love, Take care and stay safe everyone
You may also like these masks:
16 How To Make A 5 Minute Face Masks
https://www.diytomake.com/how-to-make-face-mask/
FABULOUS instructions!!! I need to make at least ,80 masks for the staff and residents at the care home where my handicapped son lives. I have been trying to find a pattern that will fit everyone from the small very slim younger women to big bearded men as all of us come in different sizes. Yours makes so much sense and when I managed to find it I breathed a big sigh of relief. Thank you so much for sharing this. I am starting tomorrow and will initially make 10 of the size you did for yourself and 10 of the size you made for your husband, then see who needs a different sizes. Will let you know what happens. Love to you and your family, stay safe and well xx
2 Quick questions :
can I wash the DIY mask with the filter inside or should I remove it first?
How often should I switch out the filter in the mask for a new one?
Regarding the DIY mask. I may have missed this but did you mention the lenght of the elastic for both over ears and around the head
Are you making these mask for sale?
Hello what length of elastic are you using for behind the ears? I asked family for their measurements out of state and am making them all custom masks with multiple filters. Thanks!
Hello Cathleen this is a tough one. I no for women 6 inches and men do 8inches. Hope this helps
Thanks so much for your video on making masks – your instructions and demonstrations were just what I needed. I ended up modifying mine because I didn’t have any elastic, but otherwise, it’s the best mask pattern I found online (and I looked at a lot!) and I appreciated how much research you did prior to posting.
Good evening! I love your tutorial! Im excited to get started. I have a quick question. I have my ear to ear and nose to chin measurements. How did you come up with the centimeters to get your curve connecting lines? Thank you I look forward to hearing back from you.
Wow! I so much love this diy face mask.
Thanks for the good work.
Question:
People here recommend dry babe wipe for filter, what can you say about it. Thanks