
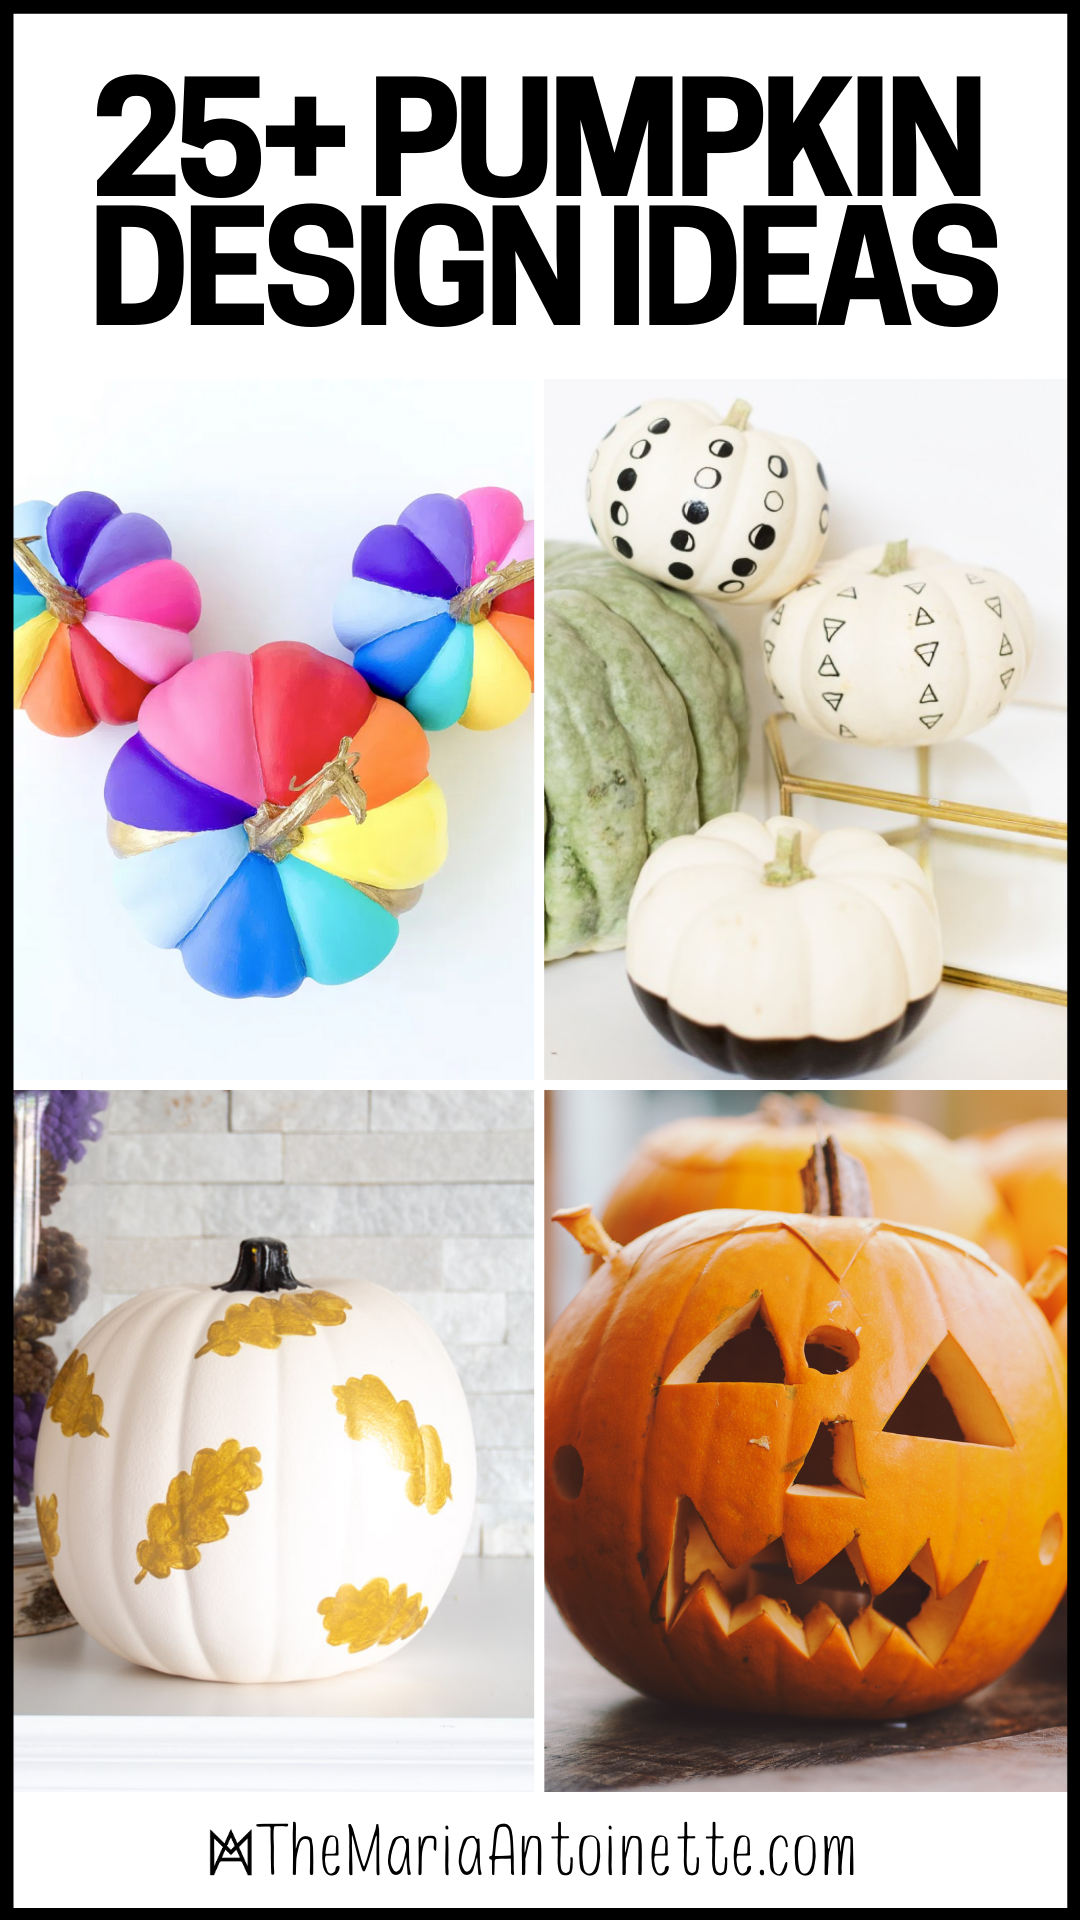
The fall season’s undisputed star is none other than pumpkins, and the time to shine is here as Halloween season approaches. When it comes to decorating for the holiday season, many people choose to carve pumpkins while few decide to avoid the hassle of carving and wish to go for uncarved pumpkin décor. If you are planning to paint pumpkins this Halloween season, then you can be assured to experience a lot of fun as this activity is excellent for the entire family and offer you a chance to showcase your creative skills.
If you are stumped on a design for your perfect carved pumpkin, then there are many paths you can choose, including a creepy or gruesome face. There are also several no-carve options as well, including paint and stencil. Though these work the best on full-size pumpkins, they work just as well on small ones too.
Let’s get started!
How To Carve A Pumpkin
I’ll be honest with you, basic pumpkin carving isn’t difficult. You just have to have a plan prior to starting. Before designing a pumpkin, you should have all your design and preservation materials, after all, you want this pumpkin to make it to and through Halloween.
Now the first rule of pumpkin carving is to do it somewhere where it is okay to get a little messy. You need to line your work surface with something which you won’t be using in the future, including newspaper or brown paper grocery bags. After your workspace is ready, you need to assemble all the tools correctly. Ideally, you can get your pumpkin carving tool kit from a local drugstore or a supermarket. You can also use some tools from the kitchen. You can toss the seeds or save them to roast with oil and salt – it’s up to you.
After drawing the design, you need to remove a circular lid around the pumpkin stem and a notch at the back. You can use a slim pumpkin carving knife to cut along the outline of the pumpkin lid. You need to ensure that you cut the pumpkin slice at a 45-degree angle, which will enable you to replace the cover without letting it fall. It would be best if you cleaned inside the pumpkin using a spoon or scraper. Later it would be best if you made straight cuts into the pumpkin along the lines of the design. Lastly, insert a light tea candle in the bottom of your pumpkin.
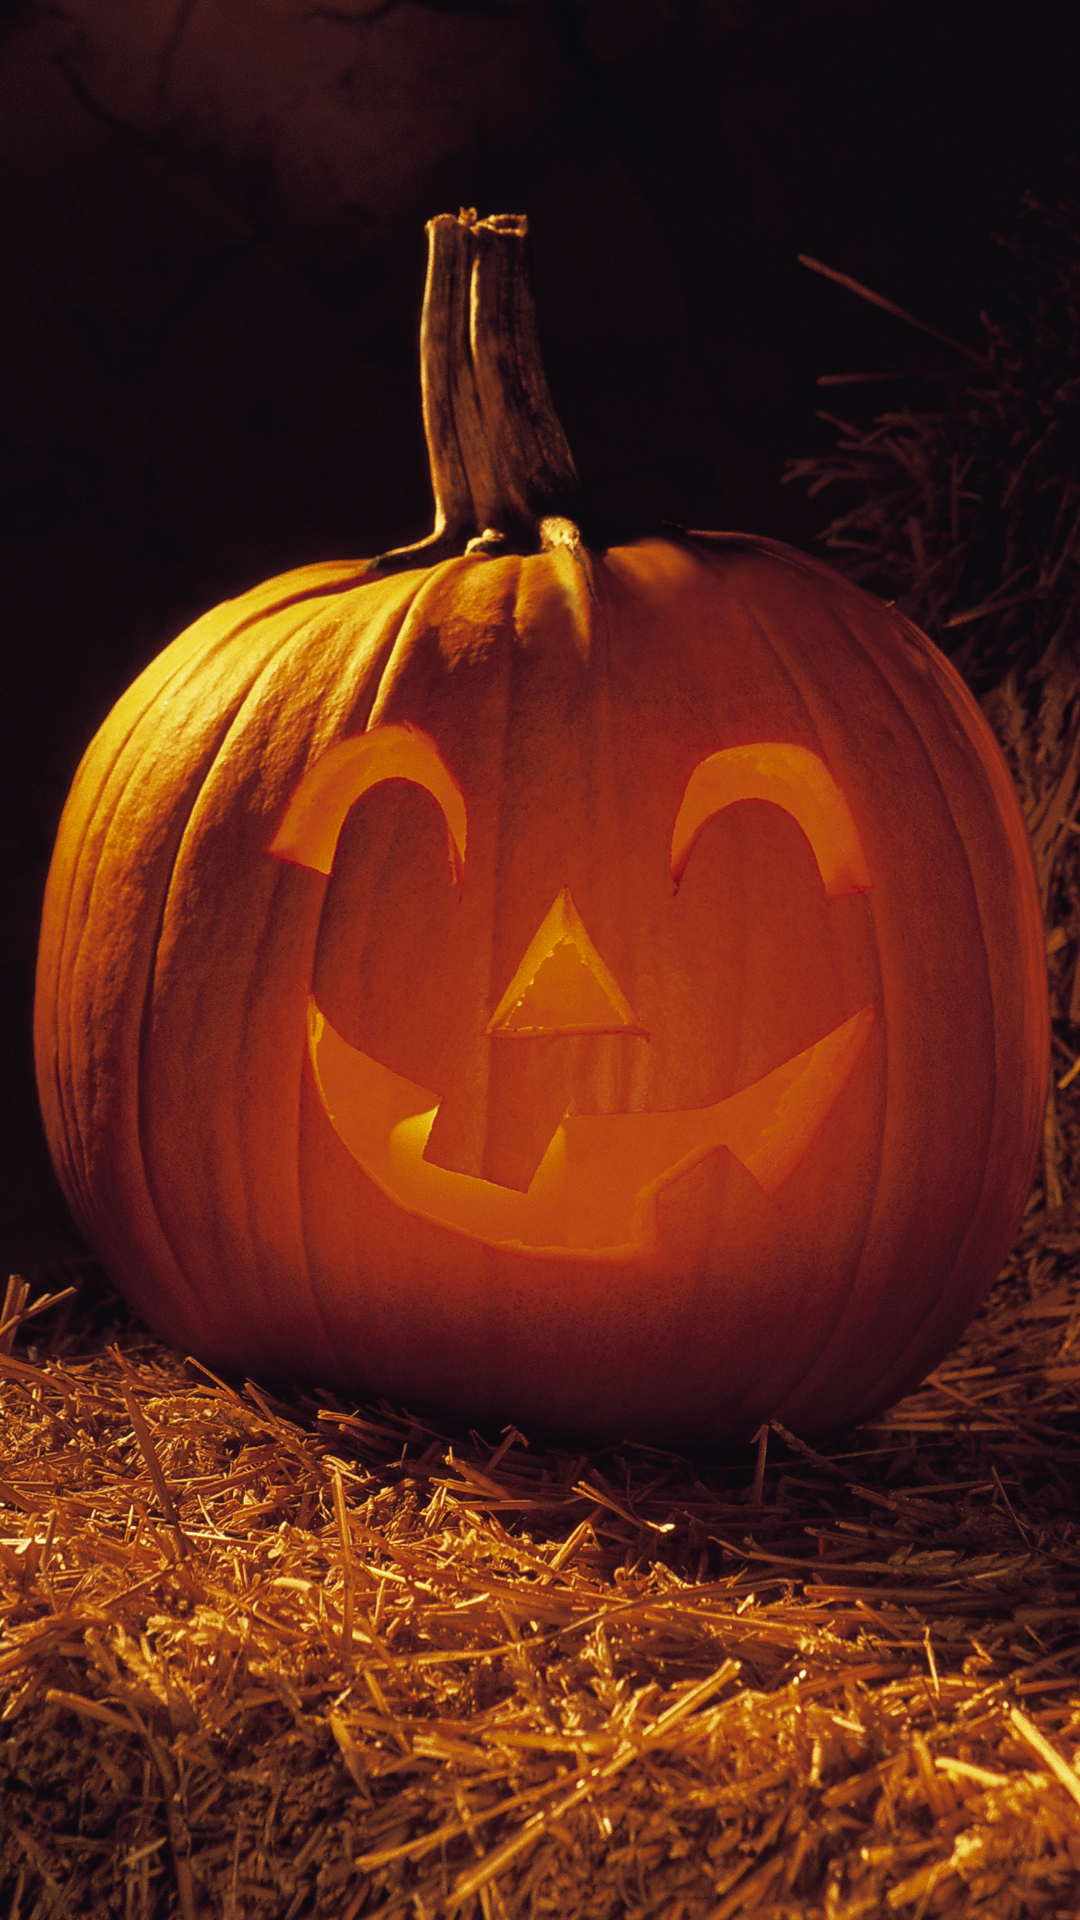
Simple Carved Pumpkin Idea
Now that you know how to carve a pumpkin here is a kid-friendly carved pumpkin design.
Solar Light Jack O’Lantern
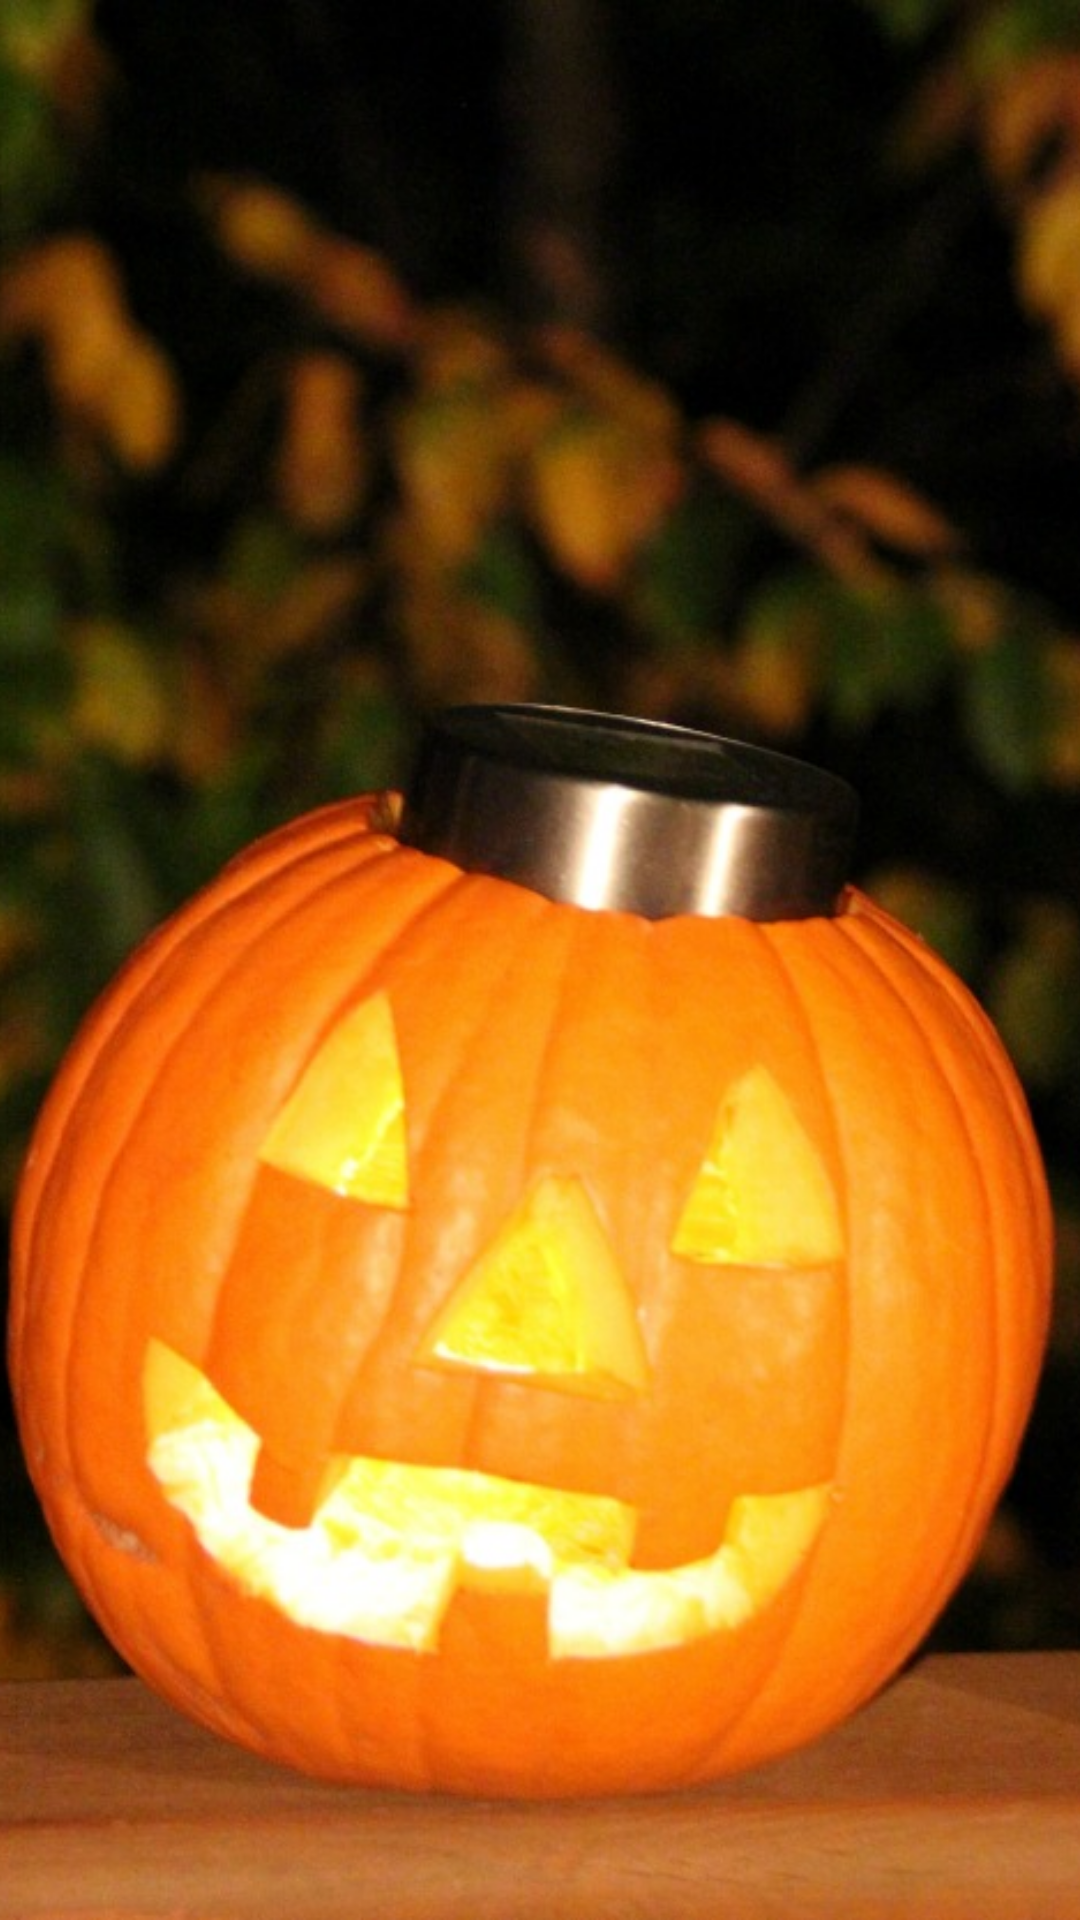
Craft and Photo Credit: Bitz n Giggles
Don’t like going outside every night to turn on your porch jack o’lanterns? Install solar lights. For this project, you’ll need a pumpkin, outdoor solar lights, a carving knife, spoon, pencil, paper, scissors, and a bag for trash. Continue reading here to complete this craft. Use these spooky printable stencils printables from Men with Kids to create various carved pumpkin faces.
No-Carve Painted Pumpkin Design Ideas
No-carve pumpkin designs allow you to get even more creative. Here are some designs that the whole family will enjoy making.
Luxury Pumpkins
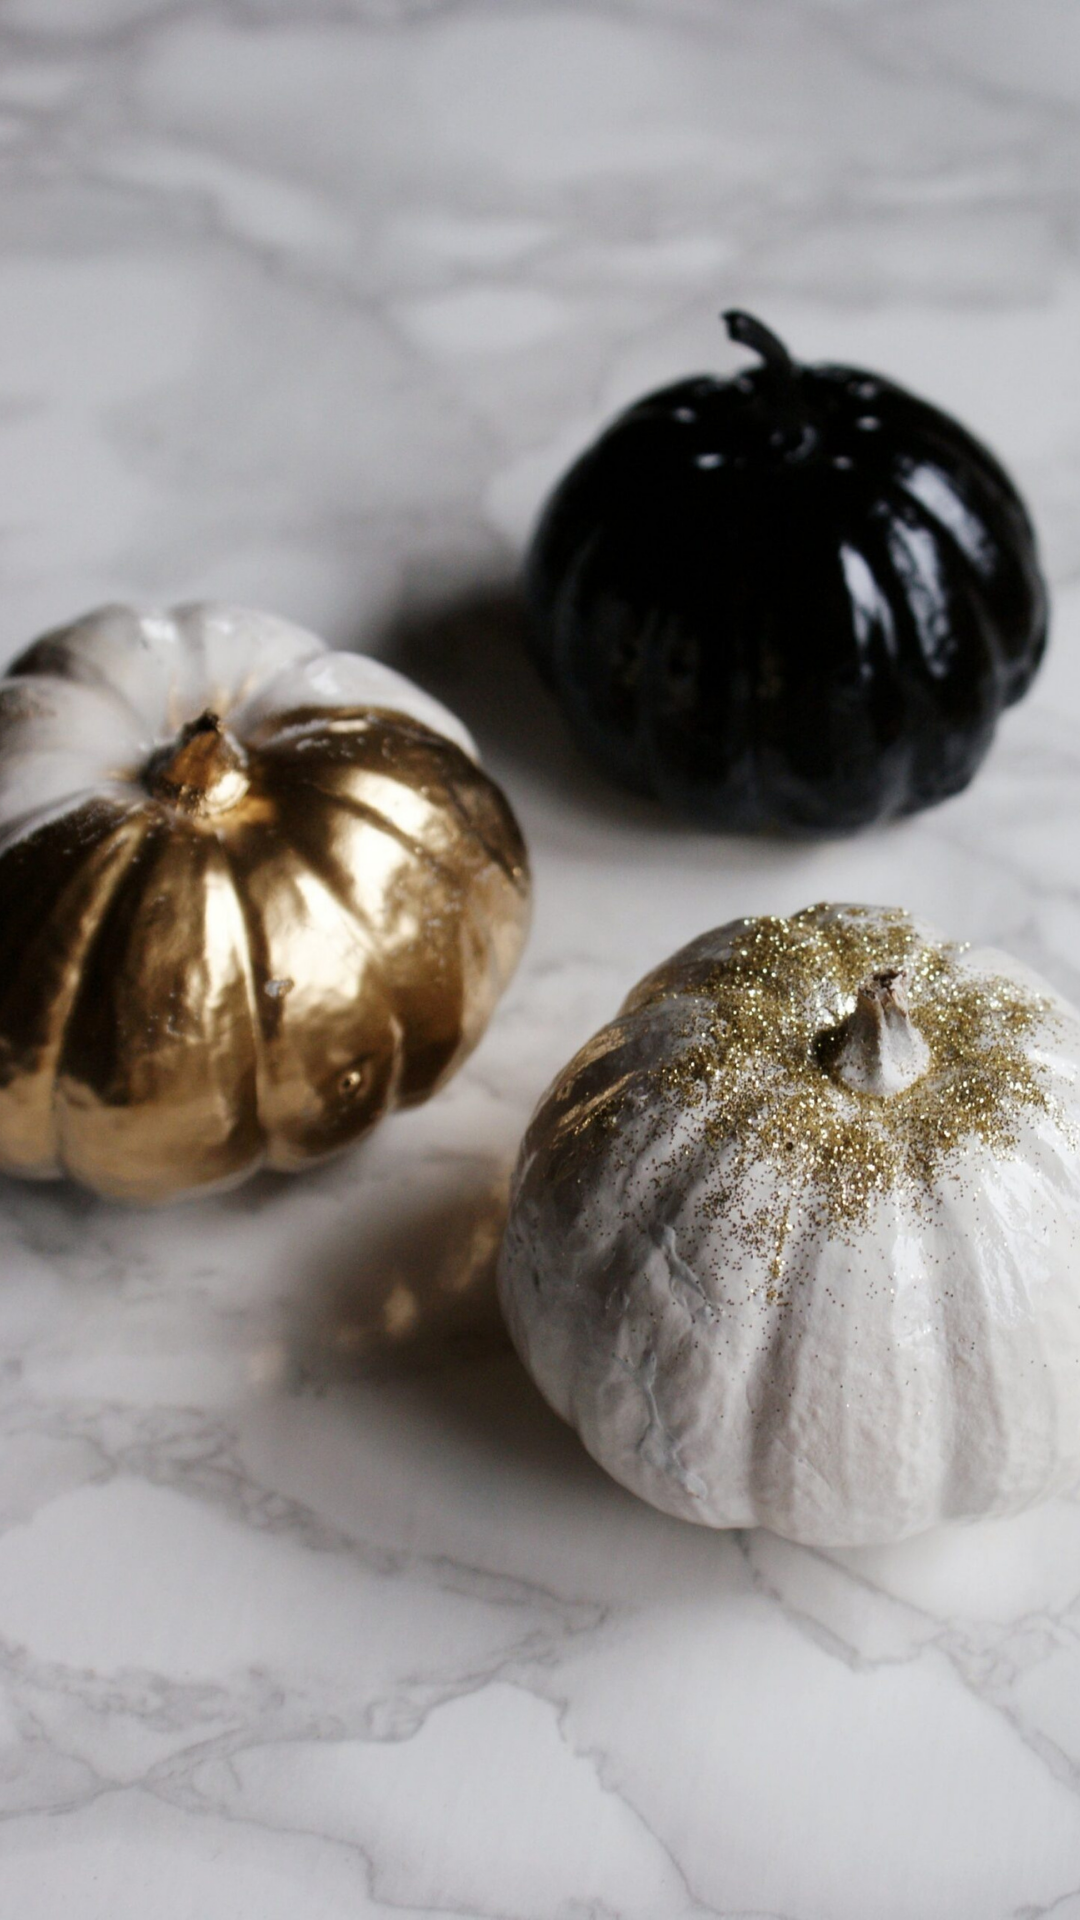
Craft & Photo Credit: Francine’s Place Blog
Want to create some luxury pumpkins this season? This craft is easy. All you need are decorative pumpkins, white, black and gold spray paints, glue, and glitter. Continue reading here to complete this craft.
**Want to add more glam to your luxe pumpkins? You can never go wrong with more glitter and sparkle. You can do this make this easily by increasing the amount of glitter you’re using or you can glue 1 to 2-inch circle sequins on the pumpkin.
Chevron Pumpkins
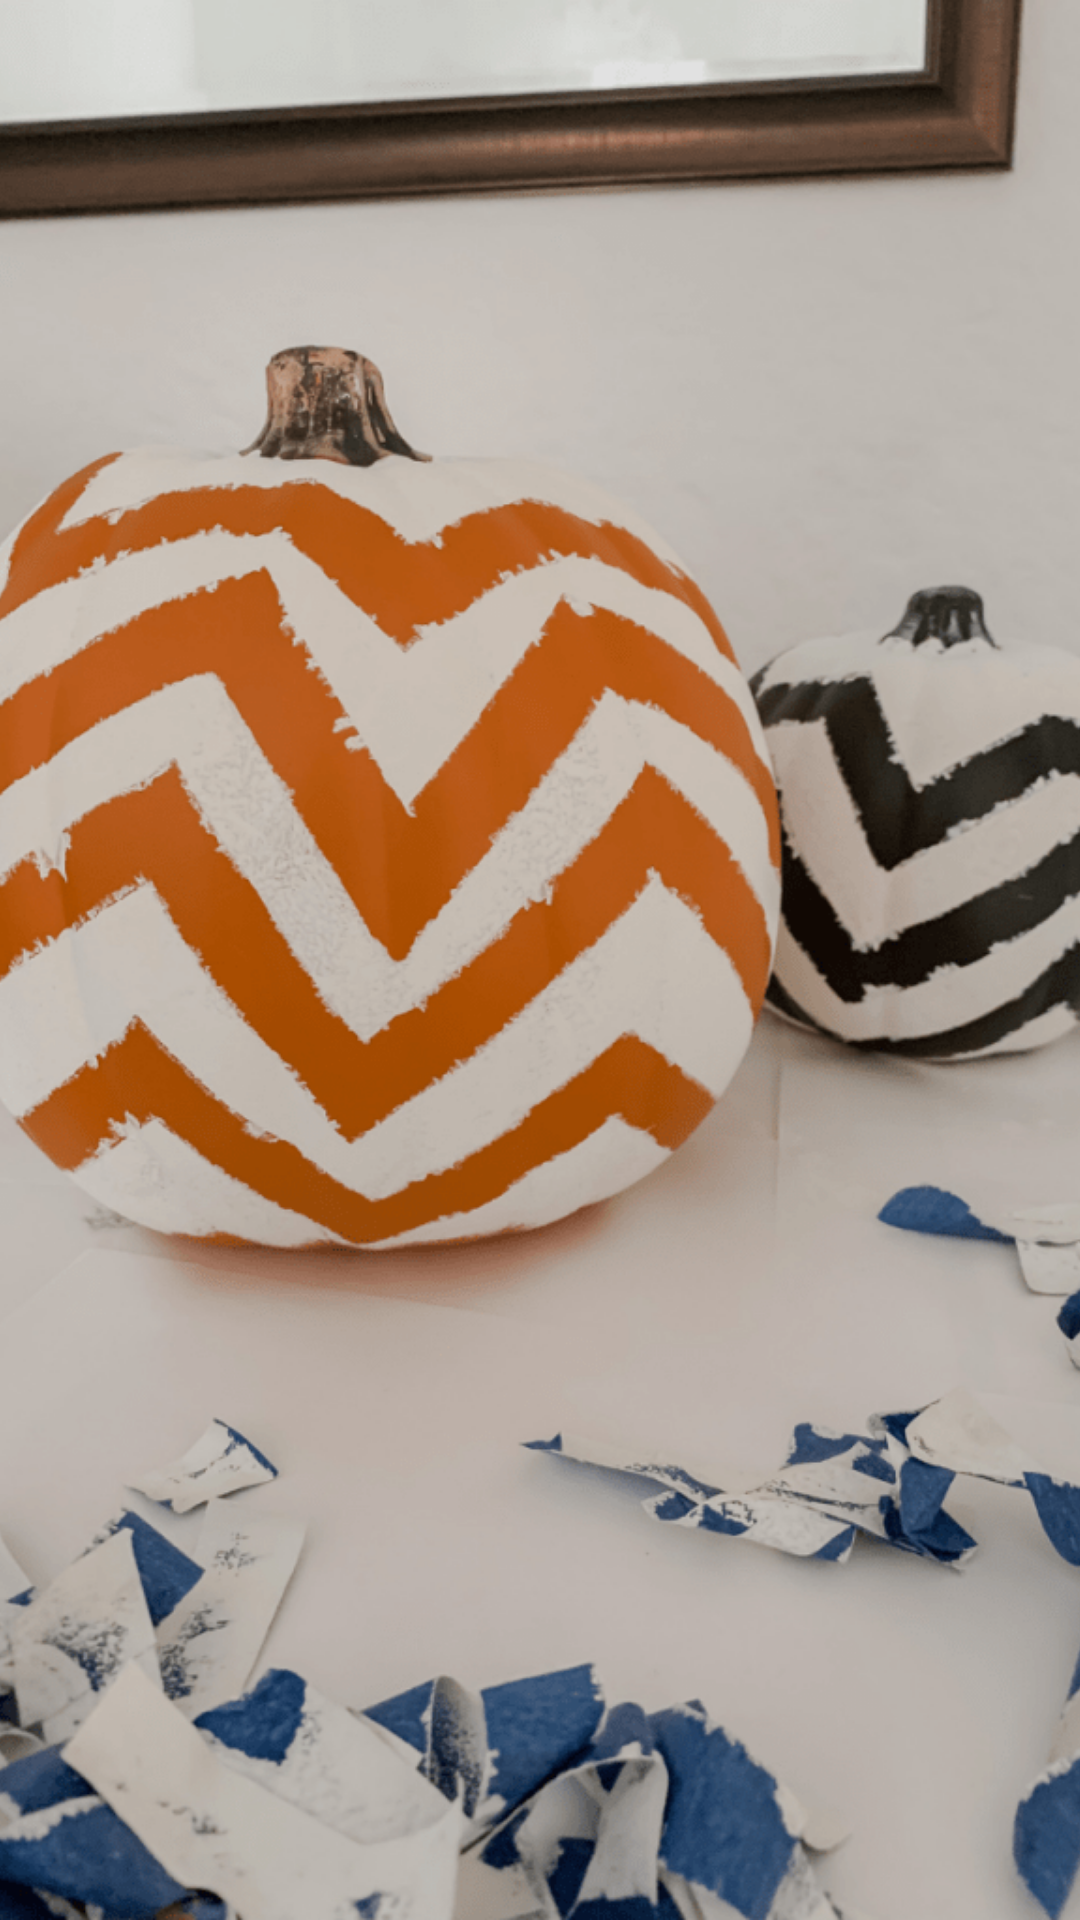
Craft & Photo Credit: My Wabi-Sabi Life
Who doesn’t love chevron design? In order to make this design, you’re going to need plastic pumpkins, acrylic paint, a sponge or brush, painter’s tape, and scissors. Continue reading here to complete this craft.
Patterned Pumpkins
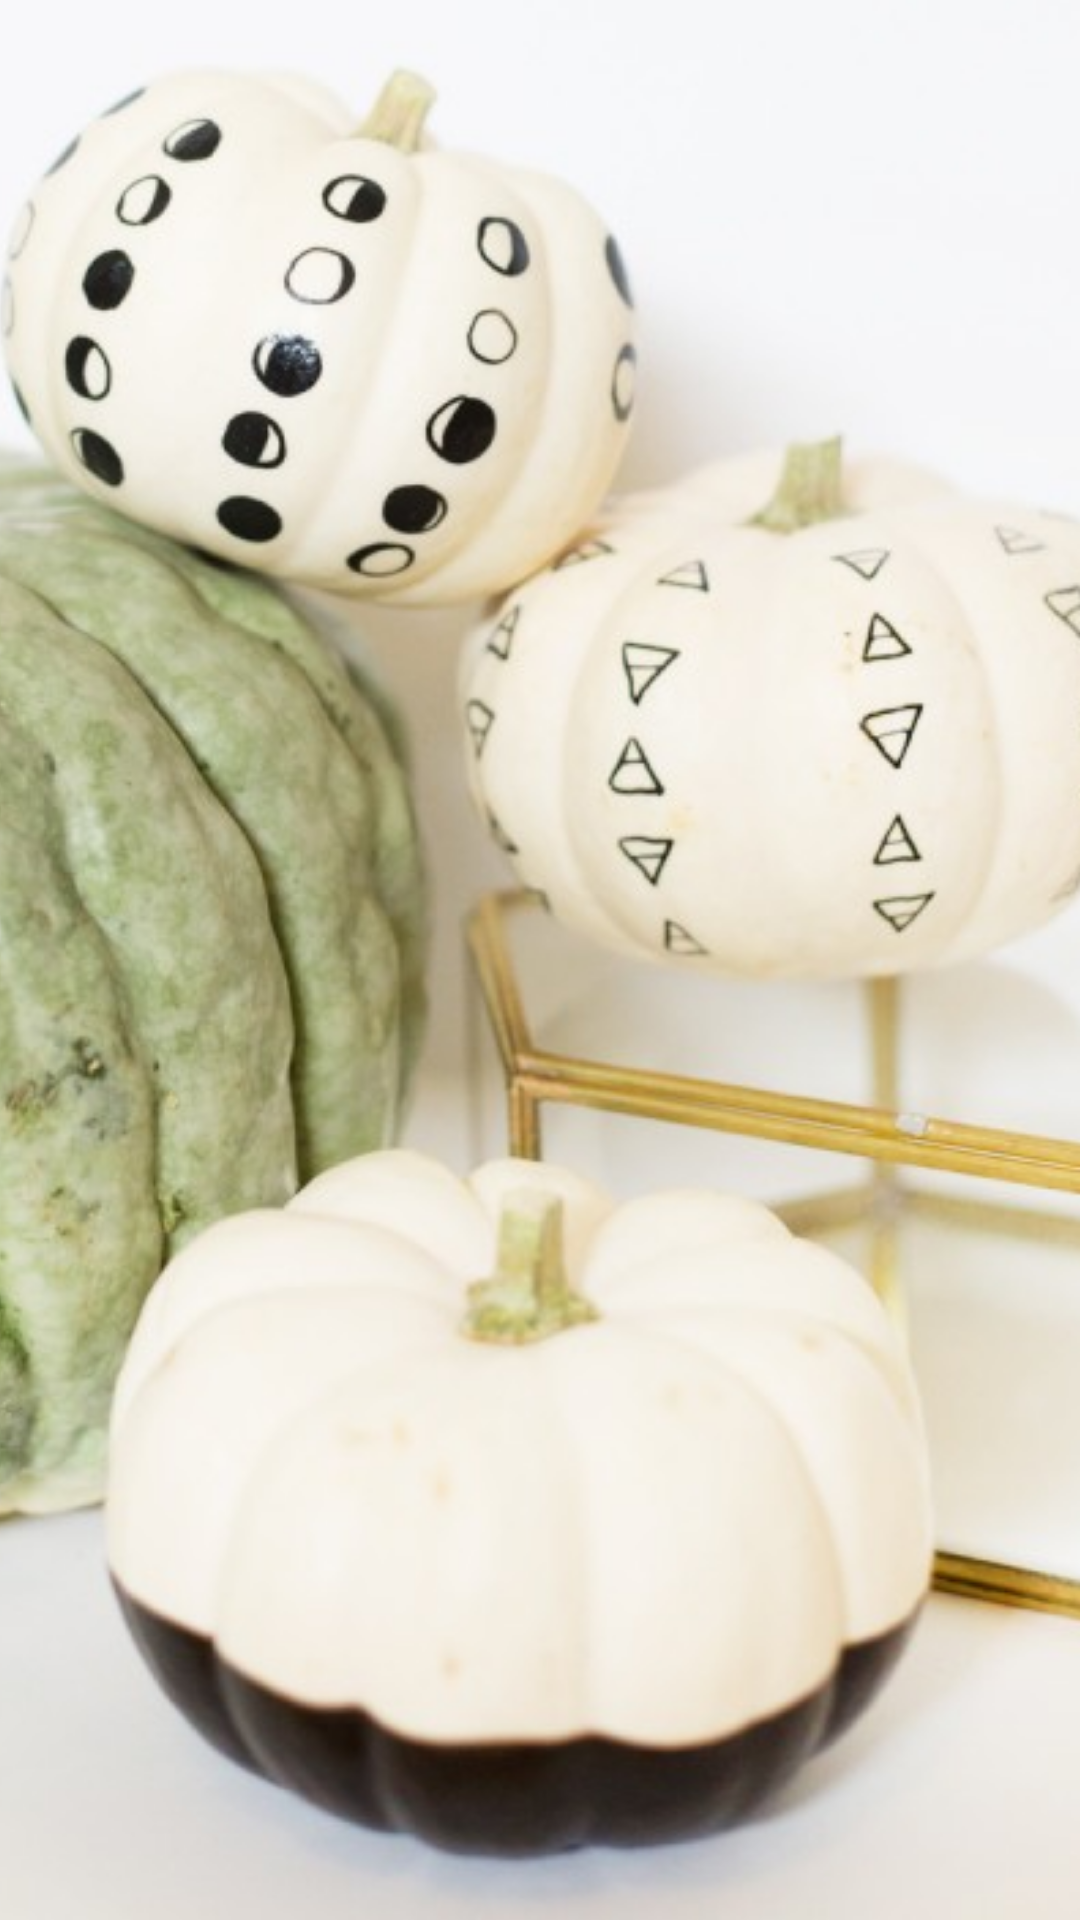
Craft & Photo Credit: Lovely Indeed
If you love patterns and geometric shapes then this pumpkin is for you. To create you’ll need small or medium-sized white pumpkins size is up to you, paint pens, and craft paint. Continue reading here
to complete this craft.
Paint Drip Pumpkin
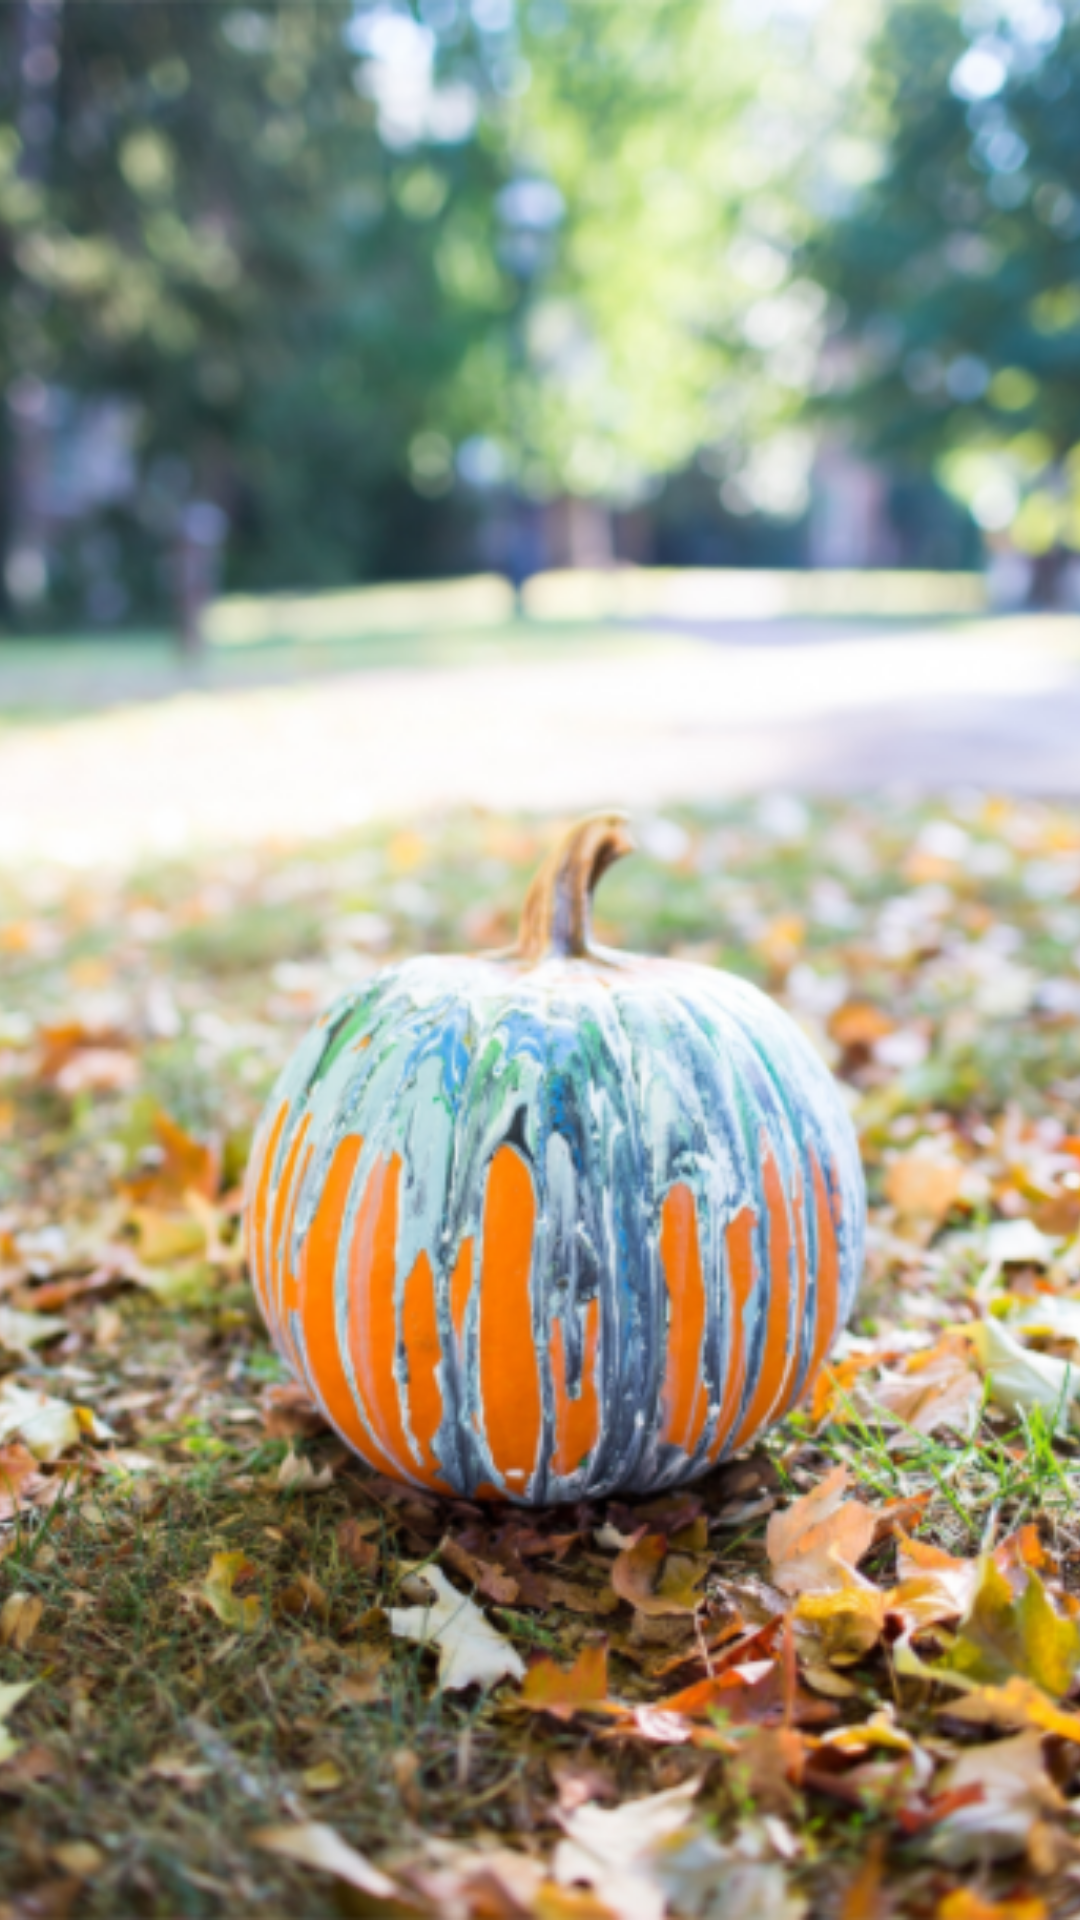
Craft & Photo Credit: Hill City Bride
The best thing is that these painted pumpkins are they can be made in a variety of colors to match your Halloween decor. Here’s what you’re going to need pumpkins, waxed paper, spray paint, and acrylic paint. Continue reading here to complete this craft.
**No paint? Use crayons instead. If you don’t want to use or have paint you can use crayons instead. I recommend using old crayons that don’t get used anymore or you can visit your nearest dollar store for some. To create this pumpkin you’ll start by removing by crayon’s paper wrapper and then break the crayons into small pieces. Place crayons near the pumpkin stem and melt them down with a high dryer on low heat. Slowly swirl the pumpkin around as the crayons begin to melt.
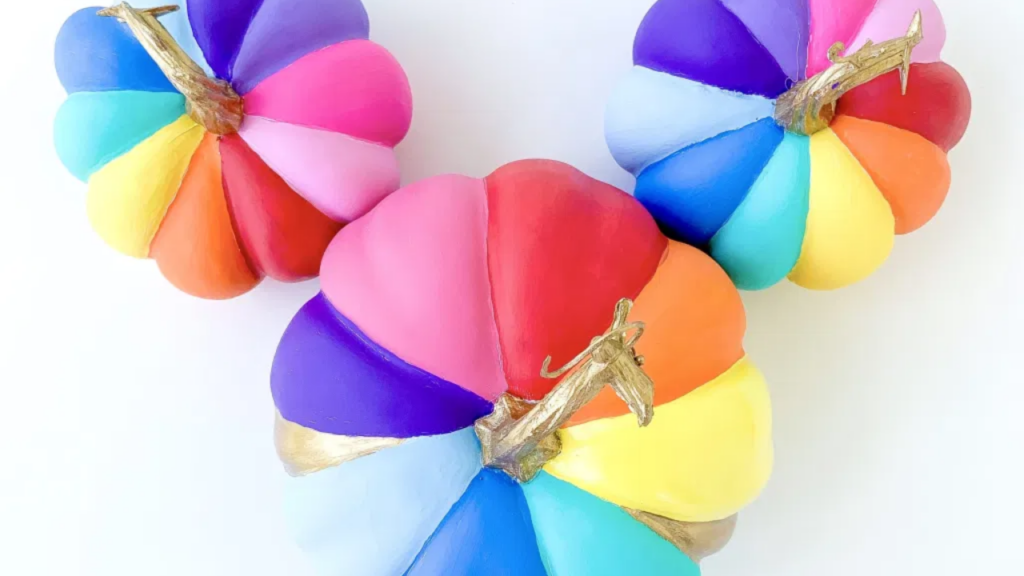
Rainbow Pumpkins
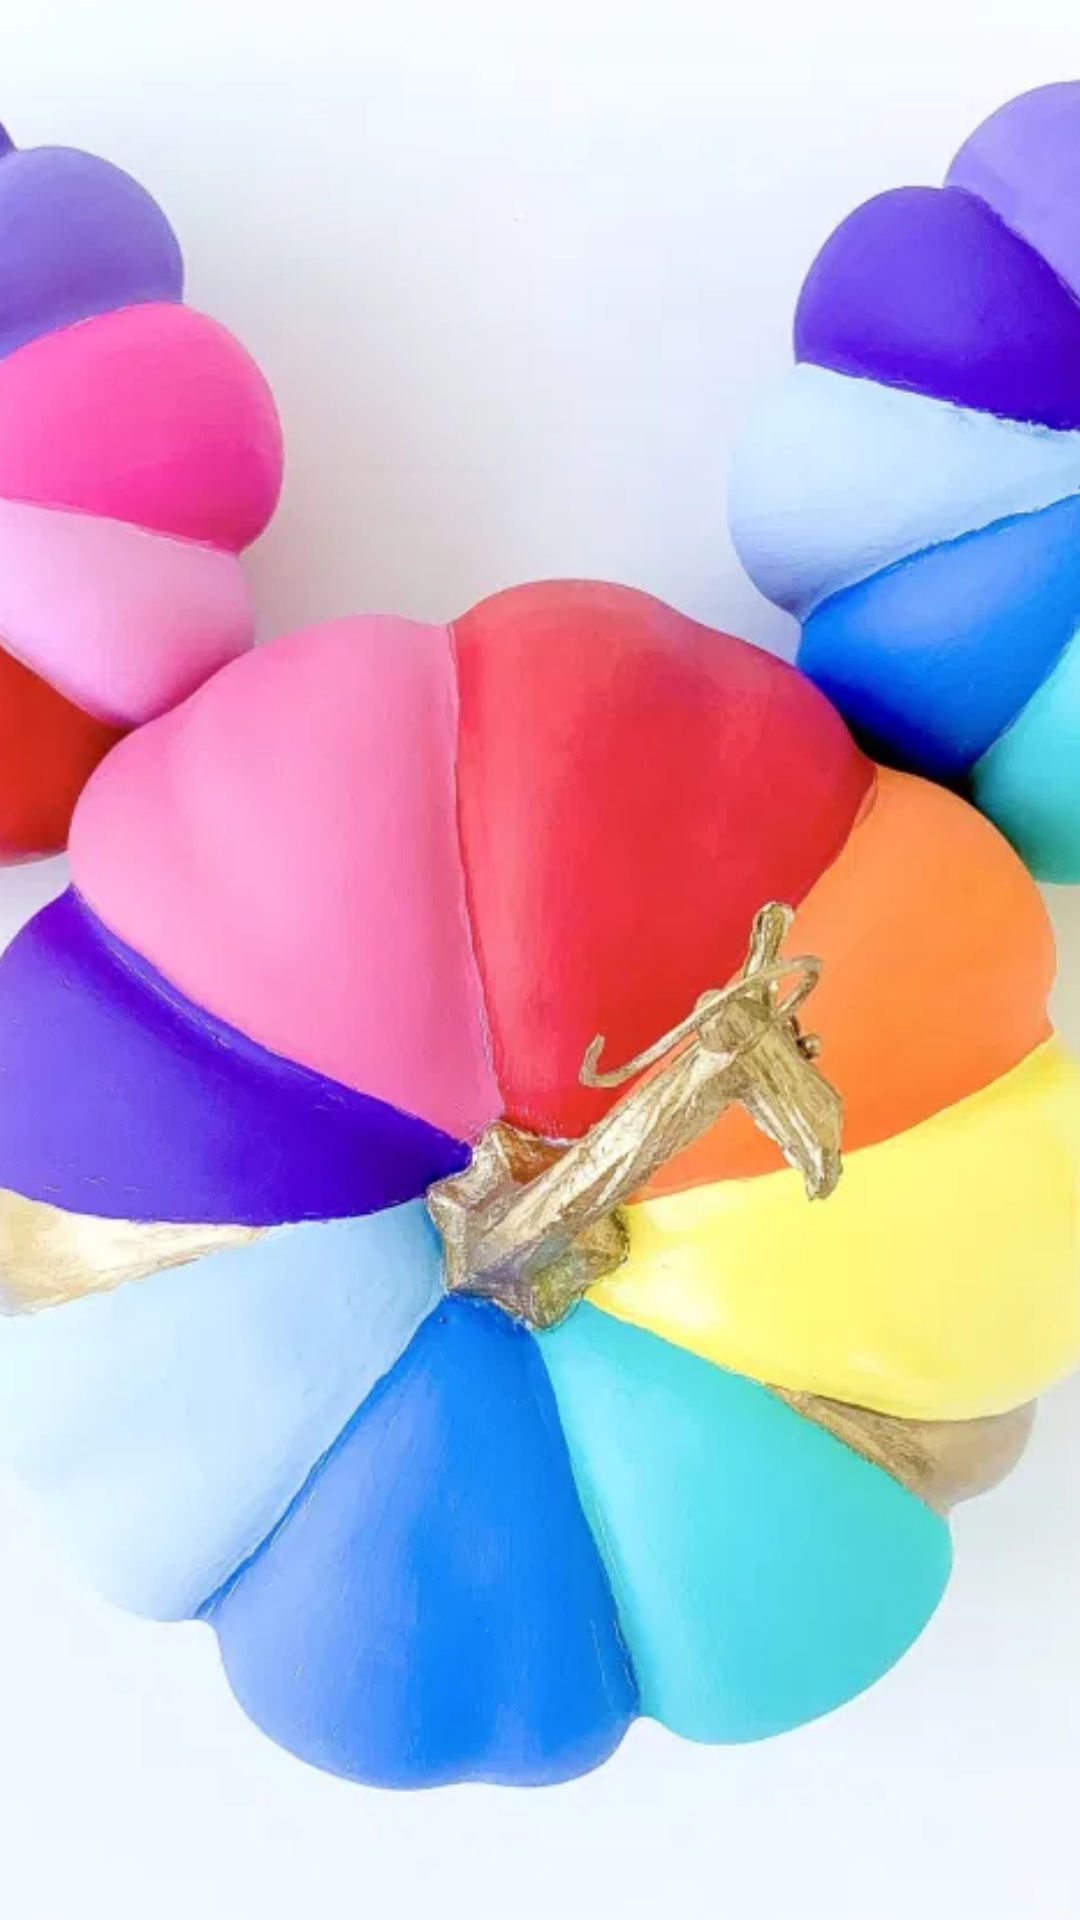
Craft & Photo Credit: Grace Giggles and Naptime
Rainbow pumpkins are a perfect way to still bask in the summer while also celebrating the arrival of fall. To create this pumpkin you’ll need white or cream-colored pumpkins, primer, acrylic paint, brushes, and sealer. Continue reading here to complete this craft.
Black & White Pumpkin
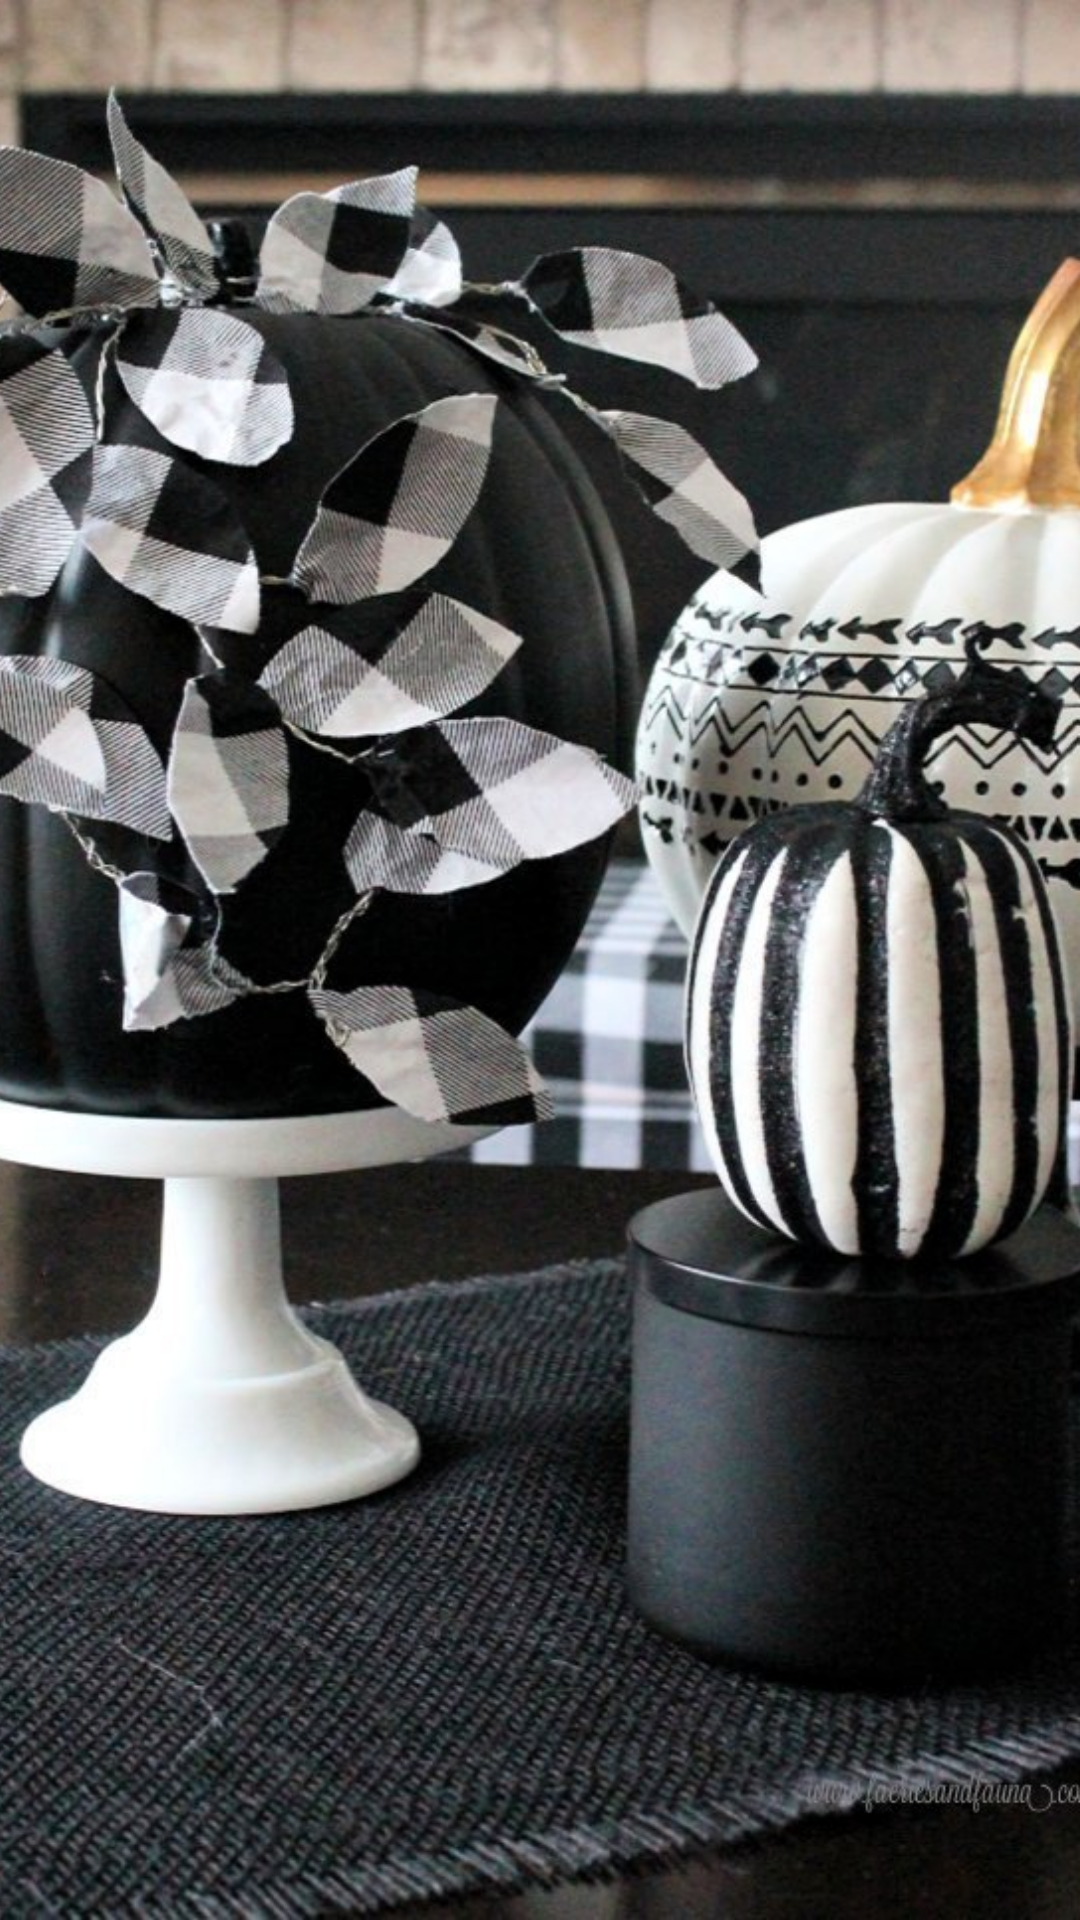
Craft & Photo Credit: Pretty DIY Home
Creating the perfect black and white theme is easy as pie with this fun DIY. To make this you’ll need a plastic pumpkin, duct tape, black and white checked cloth, and thin silver wire. Continue reading here to complete this craft.
**Make your black and white decor to spooky by adding spider webs to your black pumpkins. Create a web-like pattern using the long strips of white tapes or by using a white marker. If you’re unsure about drawing the web correctly make a paper spider web and draw it onto the pumpkin.
Leaf Pattern
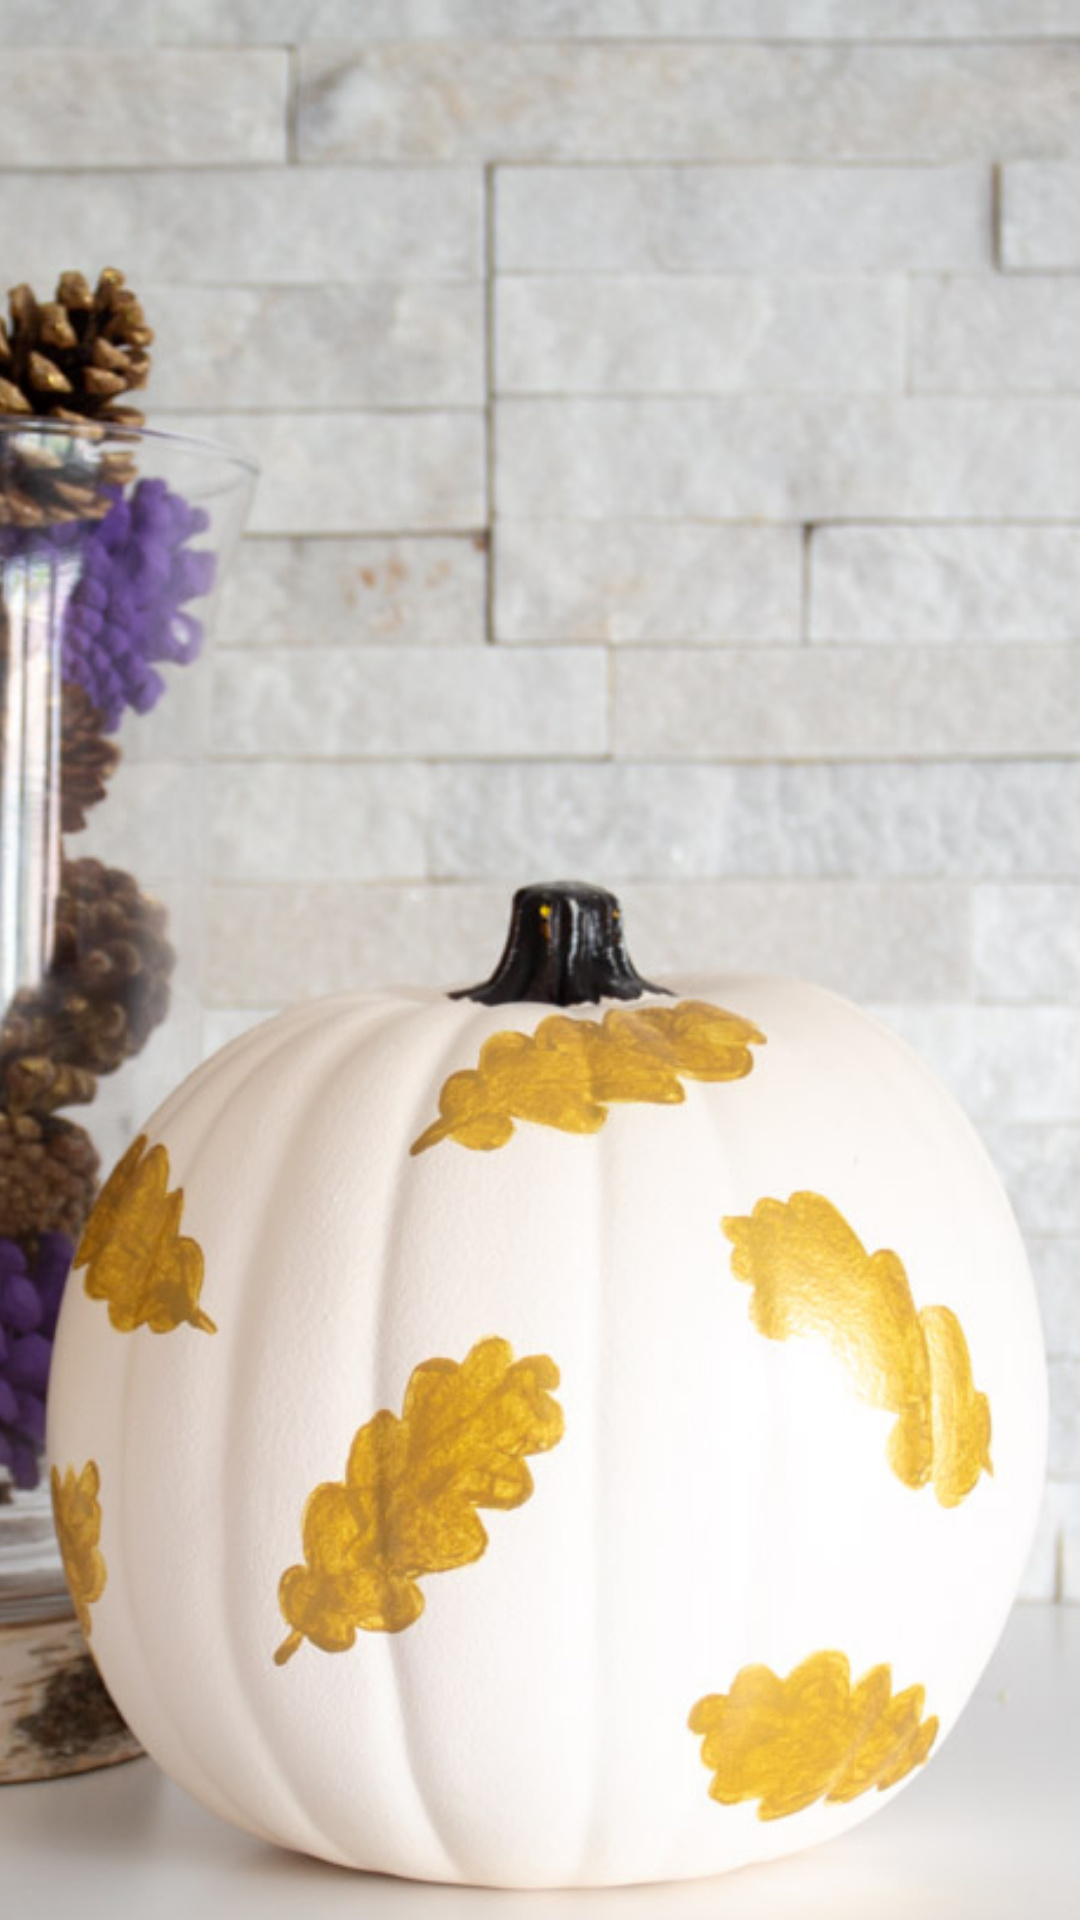
Craft & Photo Credit: Sustain My Craft Habit
Noting says fall like falling leaves. I don’t know about you but they’re the best thing about the autumn season and what better way than to display them on your pumpkin. To create this design you’ll need a large white craft pumpkin, fine tip paint brushes, and gold metallic paint. Continue reading here to complete this craft.
Here are even MORE pumpkin design ideas from my friends at HGTV Handmade
Flashback to the time I hosted a pumpkin carving competition. This is a great game to do at home with your family.
By following the step-by-step instructions for these pumpkin design ideas your family will create not only cute and spooky pumpkins but fun memories that will last a lifetime.
Which of the pumpkin design ideas will you create this Halloween season? Share with me in the comments below and tag me in your pumpkin design projects using #TMABlog.
Latest posts by Maria Antoinette (see all)
- 10 Romantic Date Night Ideas For Any Time of The Year - January 26, 2023
- Tips To Help You Reconnect With What Brings You Joy - January 19, 2023
- Planning A Road Trip? Here Are Some Key Tips You Should Know - January 12, 2023


