

For this post, I’m super excited to be teaming up with Blueprint DIY for our #DopeDenimChallenge! This is a challenge where we show you how to upcycle your old jeans into a dope new pair. Let’s face it we all have a lot of jeans in our closet that go unworn for a number of reasons. But why let them linger in there collecting dust and taking up space? Let me show you how easy is to breathe new life into your old jeans without spending a ton of money. Don’t worry if you’re not a crafty person. These upcycle DIY’s take no time with every little effort.

Metallic Cuff
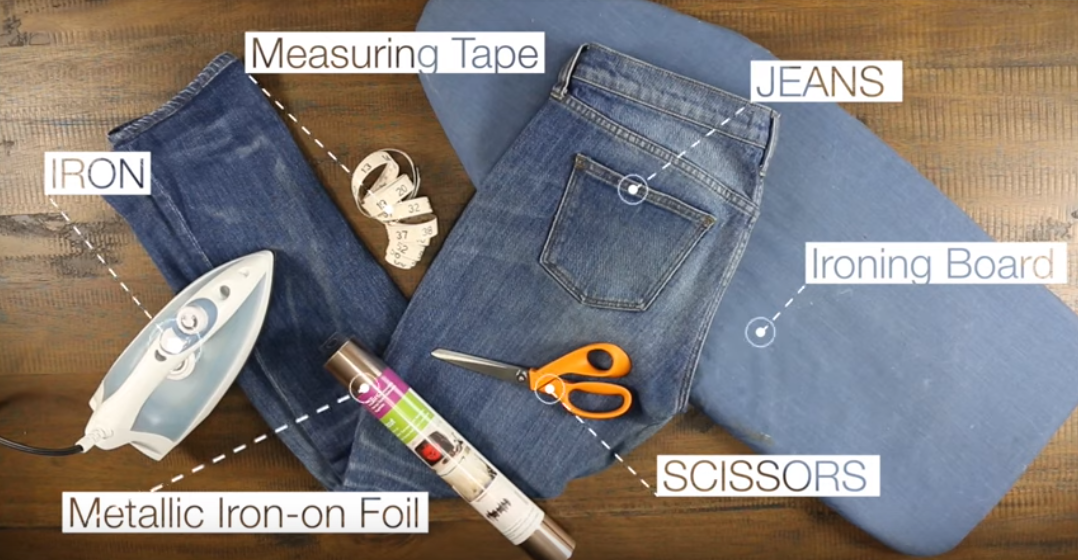
Here’s what you’ll need to create this look:
To achieve this look use tapered, straight leg or mom jeans.
Step One: Measure out your cuff. This is how high you want your metallic to come. You’re going to do this on the front and back of your jeans. I’m using 5-inches but you choose what works best for you.
Step Two: Measure and cut out your iron-on metallic foil. I got this from Cricut. I’m going to cut 5-inches like my measurements. You will cut to what your measurements are. Remember you’re going to cut 2 strips, one for each leg.
Step Three: Lay the strips out on the cuff of your jeans and iron it on. DO NOT remove the top plastic covering until AFTER you’ve ironed the metallic onto the jeans. Your iron should also be on the ‘wool’ setting for good heat distribution. Now you can wrap the foil around the jean like I did or you can cut it to work on one side at a time. The choice is yours. If you make a mistake that’s okay. Just use the plastic covering, which you will remove once you’re done completely ironing the foil on, and use it to iron out your errors. Never put the iron on the foil without that protective plastic.
Step Four: Now it’s time to measure the new length of your jeans. You can cut this to whatever width and design you want. I chose to have a cutout where the front hem of my jeans is short in the front and long in the back.

Materials for this design
Cricut Foil Iron-on
Scissors
Measuring Tape
Iron
Ironing Board
Cutting Board
Rotary Cutter and Ruler
Tuxedo Jeans
Here’s what you’ll need to create this look:
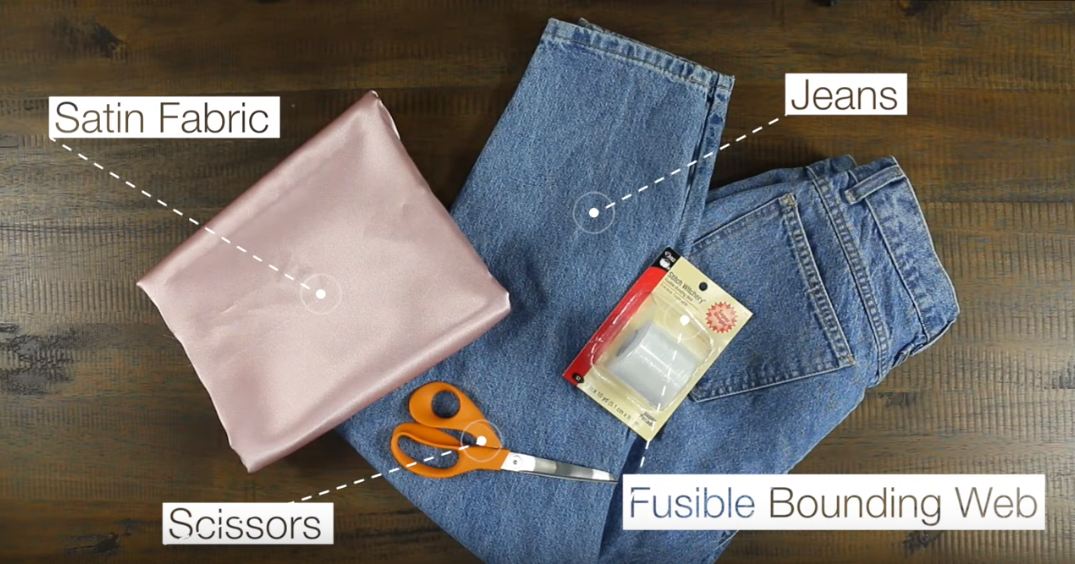
To achieve this look use tapered, straight leg or mom jeans and crepe back satin – .5 yards or more depending on your height. You’ll also need an ironing board and iron – forgot to add that in the picture.
Step One: Begin by prepping your satin for the strip that will be on the side of your jeans. I am measuring out 4.5-inches wide and my fusing bonding web is about 2-inches wide. You want that satin to be doubled over perfectly. You don’t want any gaps.
Step Two:
Once you have your first stip complete. Measure it to the length of your jeans and then make your second strip. Be sure to leave a little extra ribbon material at the bottom of your jeans.
Step Three: This is the only sewing you’ll be doing in any of these DIY’s. Set your machine to 2.0 and do a small stitch on both sides of your ribbon. You want this to look as professional as possible and the stitch gives it a great finish. You could also not stitch it and leave it rough around the edges giving it a distressed look.
Step Four: With your jeans secure on the ironing board you’ll take your fusible bonding web. You’re gonna place it on the bottom side of your ribbon. Be sure to leave a little bit of it sticking out so you can tuck it into the small area in the top area of your jeans. You’re going to work in small sections so that you can make sure the ribbon is attached smoothly and evenly. To do this you’ll need a damp cloth and your iron. It’s okay if the satin gets wet. It will dry. Don’t put the hot iron the satin directly.
Step Five: Now that you’ve attached the ribbon all the way down to the bottom of your jeans you’ll notice you have a little extra ribbon. You’re going to fold it over to the inside of your jeans and sew in the same spot your jean hem is sewn. Oh, I put my machine back on 2.5 cause I like the way it looks aesthetically. Cut off the excess from the inside of the jean.

Materials for this design
Scissors
Measuring Tape
Iron
Ironing Board
Cutting Board
Rotary Cutter and Ruler
Layered Hem
Here’s what you’ll need to create this look:
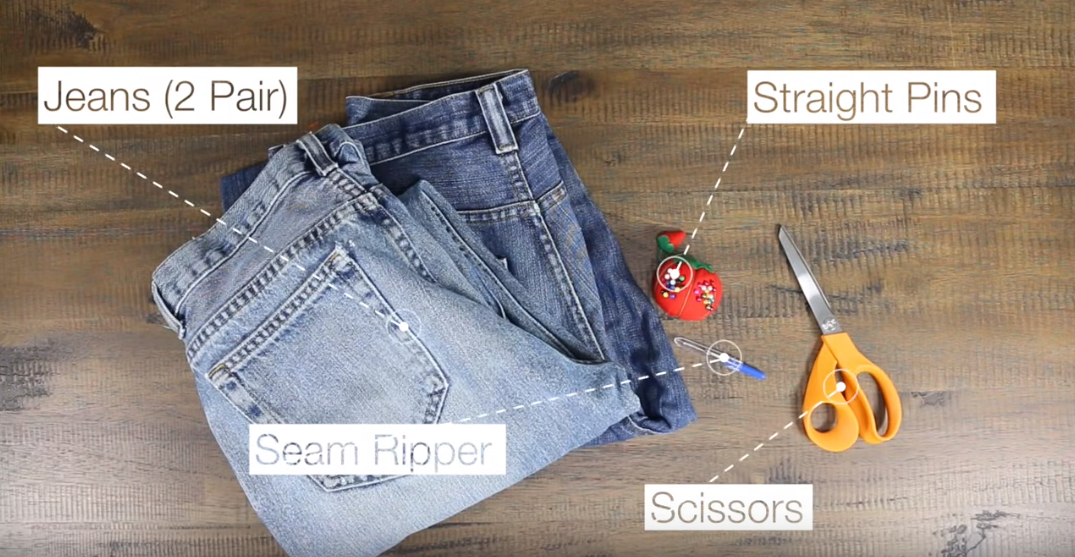
To achieve this look use men relaxed fit jeans.
Step One: Make new hems for your jeans. Since I’m wearing men’s jeans they’re super long on me so I’ll need to cut them to a shorter length. If you’re by yourself it’s okay you can simply cuff your jeans and use a marker to mark the new length of your jeans. Adjust the fold of the jeans until you get the length you want.
Step Two: Get your second pair of jeans and lay them out. Cut a straight line mid-leg. You only want these jeans for the bottom portion. You won’t need the top.
Step Three: Take your first pair of hemmed jeans and cut at the length you marked off removing the excess. You will no longer need the bottoms of those jeans.
Step Four: Get your first pair of jeans and the cuff from the second pair of jeans and line them up. Turn them both inside out. Now pull the cuff over your jeans. Make sure the stitchings are all lined up. Pin the top part of the cuff to the jeans.
Step Five: Turn your jeans back onto the appropriate side. Now that cuff from your second pair of jeans is pinned and now on the inside of your first pair of jeans. Take your scissors and start cutting in no particular way the bottom part of your first pair of jeans. Do not cut the cuff of the second pair of jeans. Get creative here with your ripping and cutting. Rip and cut as much as you want. The more you rip and cut the more of the cuff from the second pair of jeans will be exposed. But don’t go too high. Cut just enough.
Step Six: To really distress the ends of your first pair of jeans use your seam ripper to really fray those edges. Do both sides and don’t worry if the legs don’t match cause they’re not supposed to. They’re not identical twins but more like distant cousins.
Step Seven: Now that you have your jeans ripped to your liking turn them inside out once more. Remove the pins and secure with the fusible bonding web. Take your time and make sure everything is aligned. Take the bonding web and put a piece on the inside near the top of the cuff of your second pair. This will keep that top part from fraying. Get your damp cloth and iron it secure. Your jeans may have a little buckle cause they most likely won’t be the same width. To fix this cut a little of the jean in the middle or off to the side (not the seam) and add a little web and iron down.

Materials for this design
Seam Ripper
Scissors
Measuring Tape
Iron
Ironing Board
Cutting Board
Rotary Cutter and Ruler
Here are 3 more ways to upcycle your old jeans from Blueprint DIY
Which of these DIY’s was your favorite? What’s your favorite way to upcycle your old jeans? Share with me in the comments below.
Latest posts by Maria Antoinette (see all)
- 10 Romantic Date Night Ideas For Any Time of The Year - January 26, 2023
- Tips To Help You Reconnect With What Brings You Joy - January 19, 2023
- Planning A Road Trip? Here Are Some Key Tips You Should Know - January 12, 2023


