

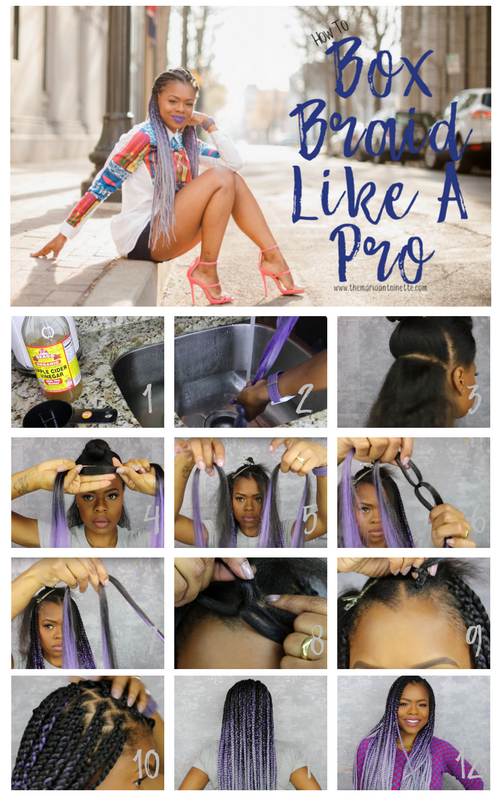
Box Braids are THE go to protective style for plenty of naturalistas. Low maintenance and long lasting. However, they can be intimidating if you are considering doing them yourself. The amount of installation time is daunting, but…it is well worth it! This post will teach you how to box braid like a pro, on your own head! We will be sharing what products, tools and helpful tips to make this process easy. Don’t over think the process, take a deep breath and lets get ready to learn How to Box Braid like a Pro!
What I used:
- 8 bags of Ombre Braiding Hair (Black, Lilac and Grey)
- Cantu Coconut Curling Cream
- Cantu Edge Stay Gel
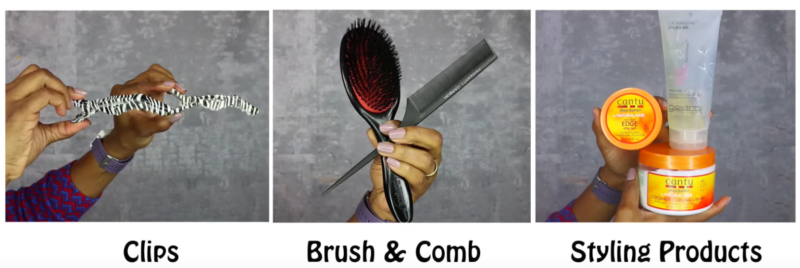
- Rat Tail Comb
- Brush
- Clips
Directions:
Prep your braiding hair:
- Fill sink with warm water and add 1 cup of apple cider vinegar.
- Soak “roots” of your braiding hair for twenty minutes.
- Rinse ALL of the braiding hair.
- Notice water is cloudy since removing Alkaline. (This helps with itching).
- Let braiding hair dry over night.
Prep your hair:
- Start with freshly washed, deep conditioned, and blown out hair.
- Apply moisturizing creme.
- Part hair into three working sections. Secure each section.
Installation:
- Measure out your braiding hair using one finger.
- Make sure measured hair is thick enough on one side of the braid, not folded over.
- Stretch your braiding hair. (Pull at the ends to avoid blunt ends)
- Pre-measure your hair as you open each pack.
- Place each measured section of braiding hair off to the side.
- Part your hair for individual braid installation.
- Apply edge control to the root of your hair.
- Split your measured braiding hair into 3/4 and 1/4. Remove tangles.
- Split your real hair section in 1/2. Add in 1/4.
- Loop through adding in another 1/4.
- There should now be three sections. Start braiding.
- Add a dab of gel as you braid in your real hair. Braid to the end.
- Repeat process over entire head.
- Dip ends of braids into boiling hot water. (Seals & softens the braids)
TIP: As you install at the back, be sure to part straight across and use brick lay method. As you install at the top, be sure to diamond part.
What is your learning style? Maybe you are more of a visual learner. Don’t worry, I’ve got you covered too. Press play for the full video:
So…are you feeling like a pro? I hope so! This style took a total of 12 hours. Well worth it! Lots of compliments and lots of convenience for about 4 weeks. Is this something you can see yourself trying? Chime in below I would love to hear from you! You are also invited to sign up for my newsletter so you will always be in the know with all things MA. If newsletters aren’t your thing simply download my App!
~MA
Latest posts by Maria Antoinette (see all)
- 10 Romantic Date Night Ideas For Any Time of The Year - January 26, 2023
- Tips To Help You Reconnect With What Brings You Joy - January 19, 2023
- Planning A Road Trip? Here Are Some Key Tips You Should Know - January 12, 2023


You are amazing Women??❤
Thank you!