

*This DIY was created and filmed with my friends over at HGTV Handmade.
Today I’m going to be making a wooden bead chandelier. I know you’ve seen these everywhere and I also know you’ve seen how expensive they can be, but I’m going to show you how to make your own. This will save you a lot of money while also making it a completely customizable decor
piece for your space. Just so you know, you can use wooden beads, pearls, or gemstones for this project. It’s really up to you and the design you want to create.
STEP 1:
The first step is to find where the 19-inch macrame ring seams together and drop a little bit of hot glue on it. Then take the yarn and start a knot right on there so it secures it and holds it in place. Now take the tail put it along the edge of the ring (it doesn’t matter which side you choose) and wrap the yarn around the ring. Now this next step you don’t have to do but I do – pull the amount of yarn that I’m going to need for the ring and cut it from the base. This makes it easier to work with and wrap because you don’t have to wrap that huge ball of yarn around the ring.
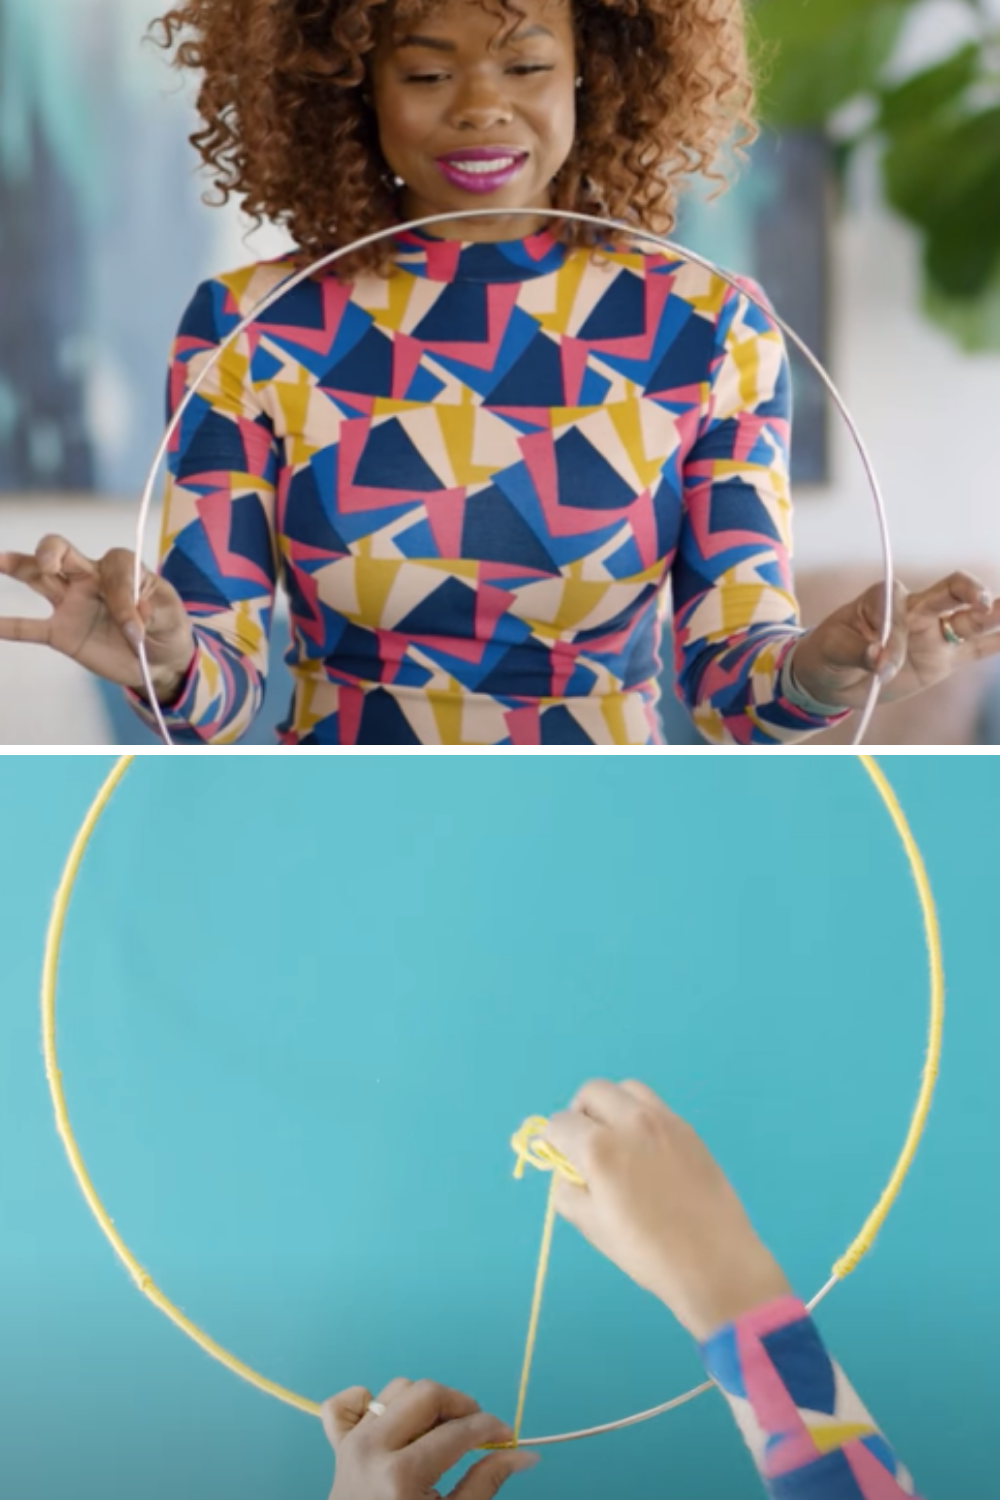
Wrapping the yarn around the ring is very time-consuming because you want to make sure you’re wrapping enough to get the ring covered. So get comfy on the couch or in bed and put on your favorite show.
Something I found to be super helpful is while wrapping about every six inches or so dab a little hot glue on the ring to keep it secure while you keep wrapping. This allows everything to stay secure and doesn’t unravel. If you have to walk away and take a break it’s a lifesaver.
So we’re at our endpoint – go ahead and make this easier to work with by cutting off at all excess. Do a single knot and add a little bit of glue. It doesn’t have to be perfect because you’re going to be adding more stuff to this. Once you have the final knot secure cut off the remaining string.
STEP 2:
Now we’re going to measure out our yarn. The easiest way to measure (for me) is by my own arm span and I’m going to do that twice. We’re now going to take one end and tie a single knot into it. For the sake of this craft, I used a piece of bendable wire but you can use a yarn needle. That’s up to you. If you’re using wire wrap it around the bottom of the knot and that wire will be what you’ll use to thread through your beads.
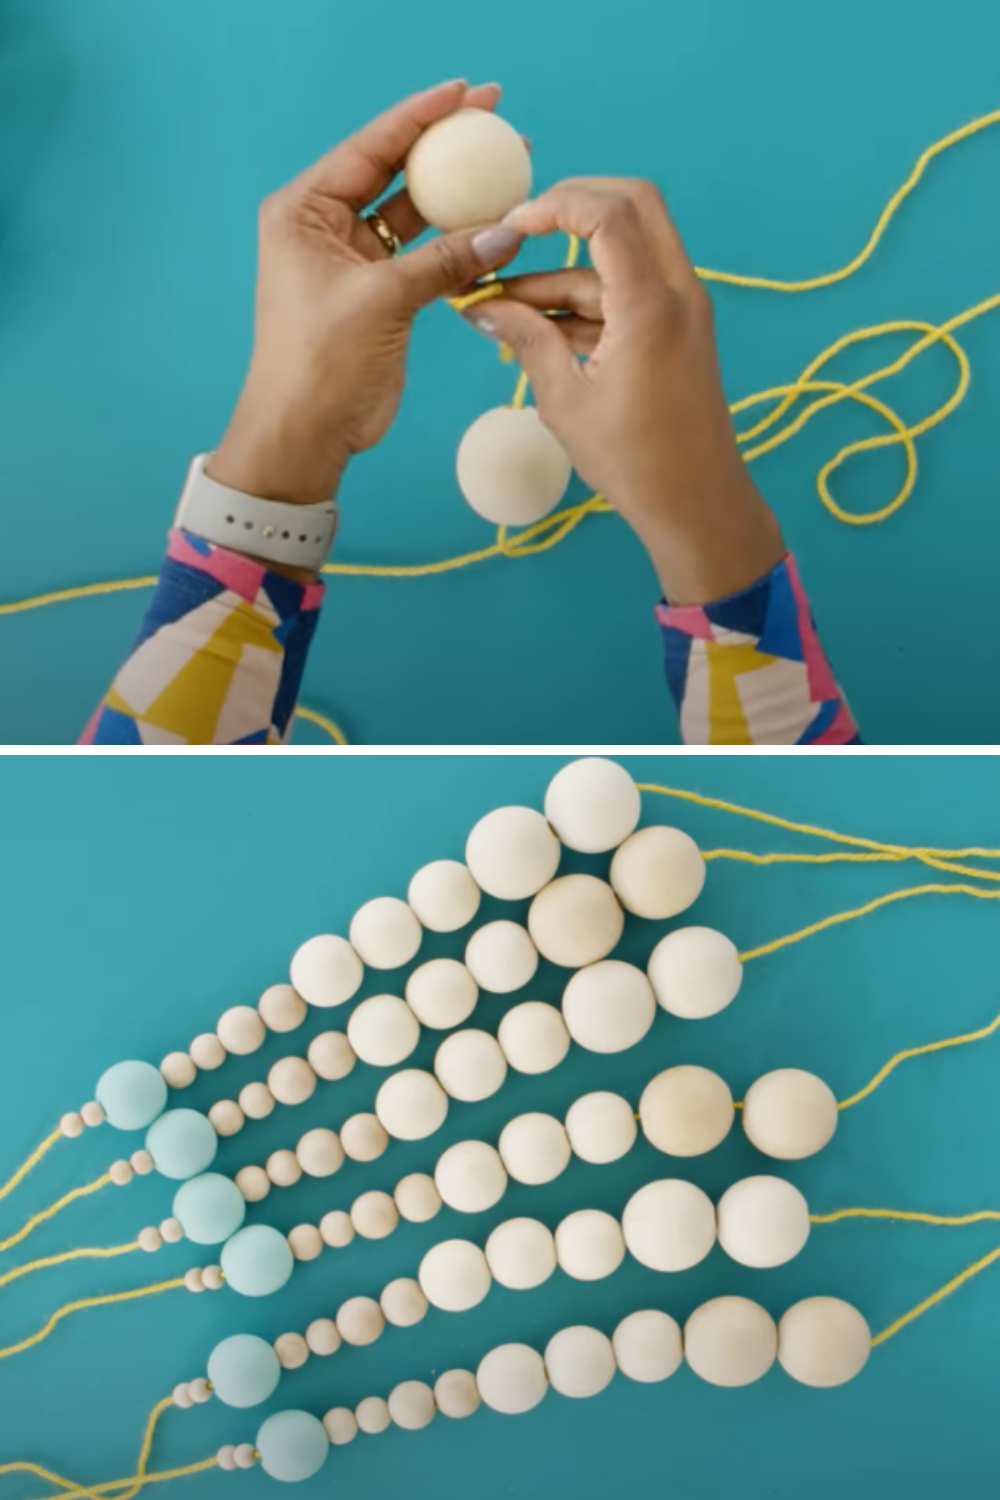
Let’s begin to thread the beads. My suggestion to you is to sketch out what you want your chandelier to look like on paper this way you know what size beads to buy and what order to thread them in. This is a major timesaver.
But back to this design, I’m going to thread 12 various-sized beads onto this yarn and I’m going to do this six times. Then I’m going to move these to the side. Remember to hold both ends of the yarn as you move them out the way there is no knot holding the beads in place. I’d hate for you to do all that work and the beads slide off the yarn onto the floor.
For the next six, you’re only going to need about an arm’s length. Then you will attach your wire or yarn needle and proceed to thread your next set of beads or gems. Once those are done put them to the side. Finally, for the last six, you’re going to measure another double arms’ span worth of yarn, just like the first time. Thread your beads or gems, and that’s the end of the bead work.
STEP 3:
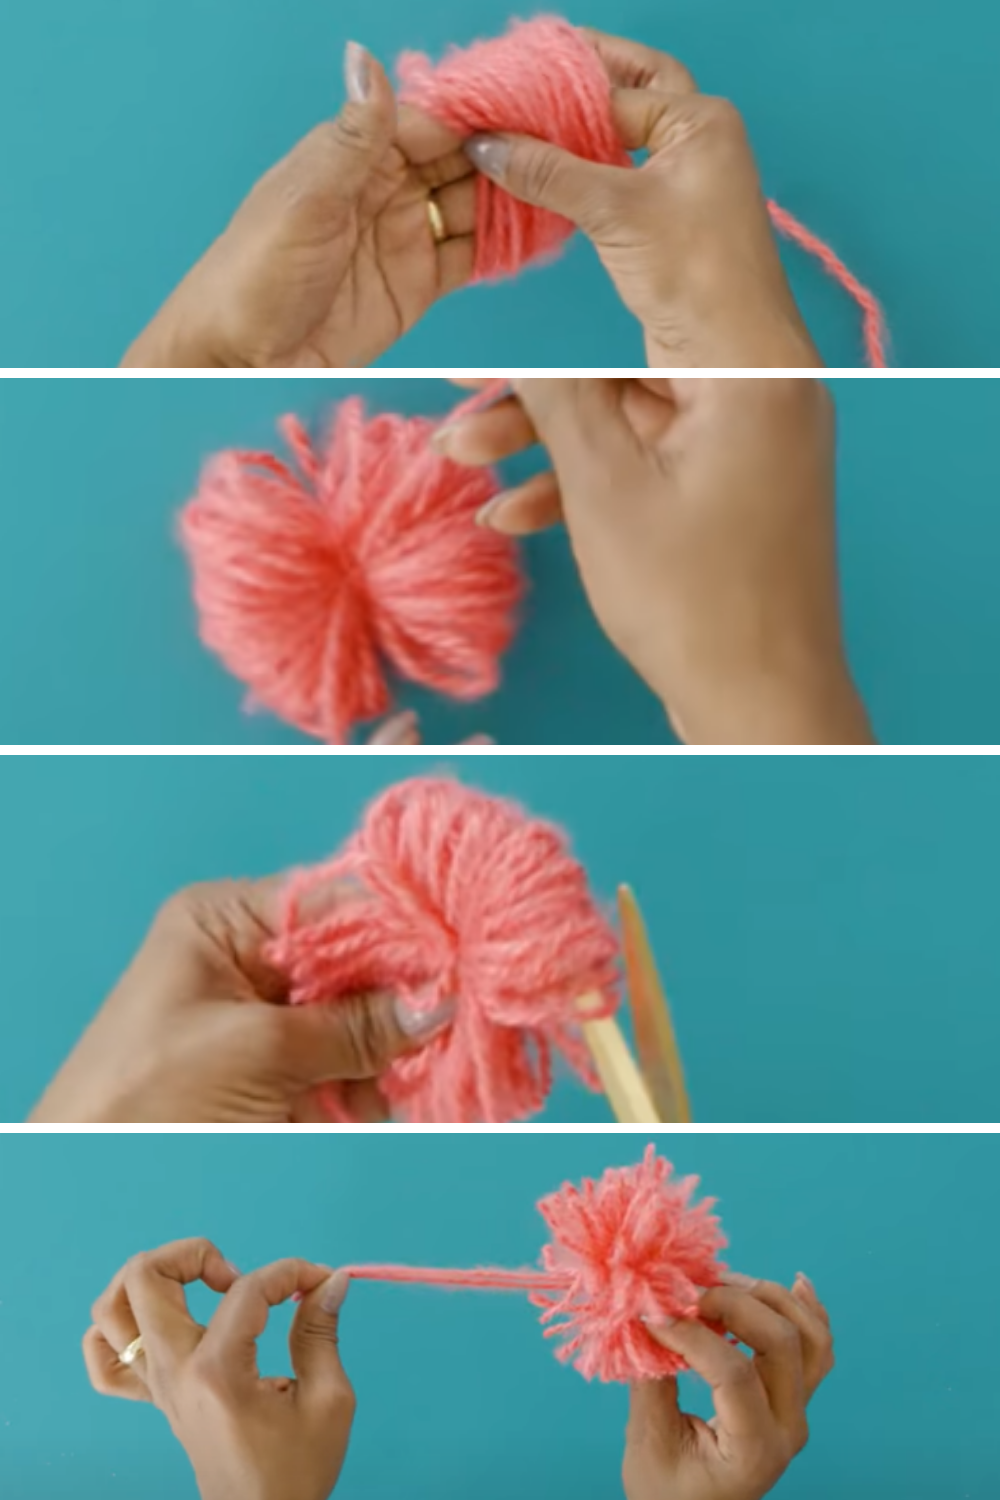
Now before you start to assemble the chandelier let’s make 6 pom-poms. I love pom-poms, don’t you? We’re going to make them quick and easy. Open up your hand and wrap, wrap, wrap like crazy. Once you get the pom-pom wrapped as big as you want, cut the string. Then cut another piece to serve as your tie-off string. Now side the wrapped yarn off your hand, gather it in the middle, and tie the tie-off string around the center. Make sure the string that you use to close off your pom-pom is a little bit longer that way you have something to tie it onto your chandelier. Don’t forget to cut the wrapped edges once you have it tied. I did this 6 times. You do it as many times as your design requires.
Let’s assemble a chandelier!
Step 4:
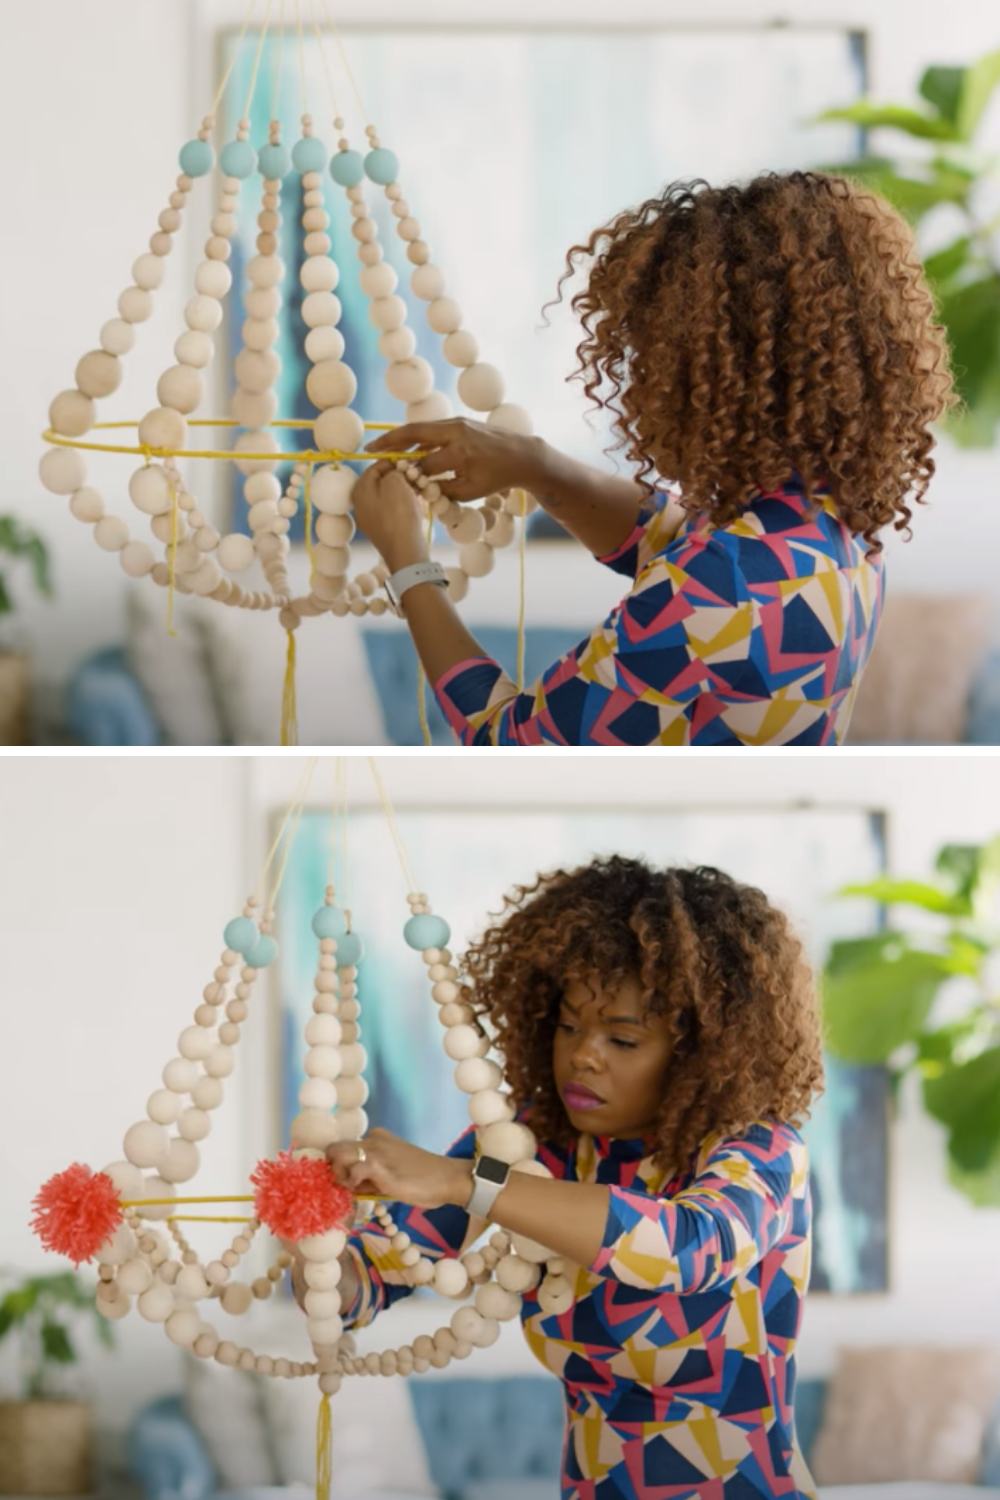
Grab your yarn wrap macrame ring and your first set of string beads that you did. For this next step, it’s very important that we have the weight distributed evenly on the ring. So it’s going to matter where you place the string beads.
No need to break out a ruler or anything like that you can definitely do it by sight. Take one bead string straight across and use that as a guide to making sure they’re equally attached. Always securing with two knots. If you have a little bit of string leftover that’s totally fine all of that can be clipped off. Once that first set is tied to the ring now it’s time to gather the loose strings and add the final bead. This makes sure it’s secure and tight. You can take this time to even off those end strings. So get your wire or needle and thread each string into your last bead.
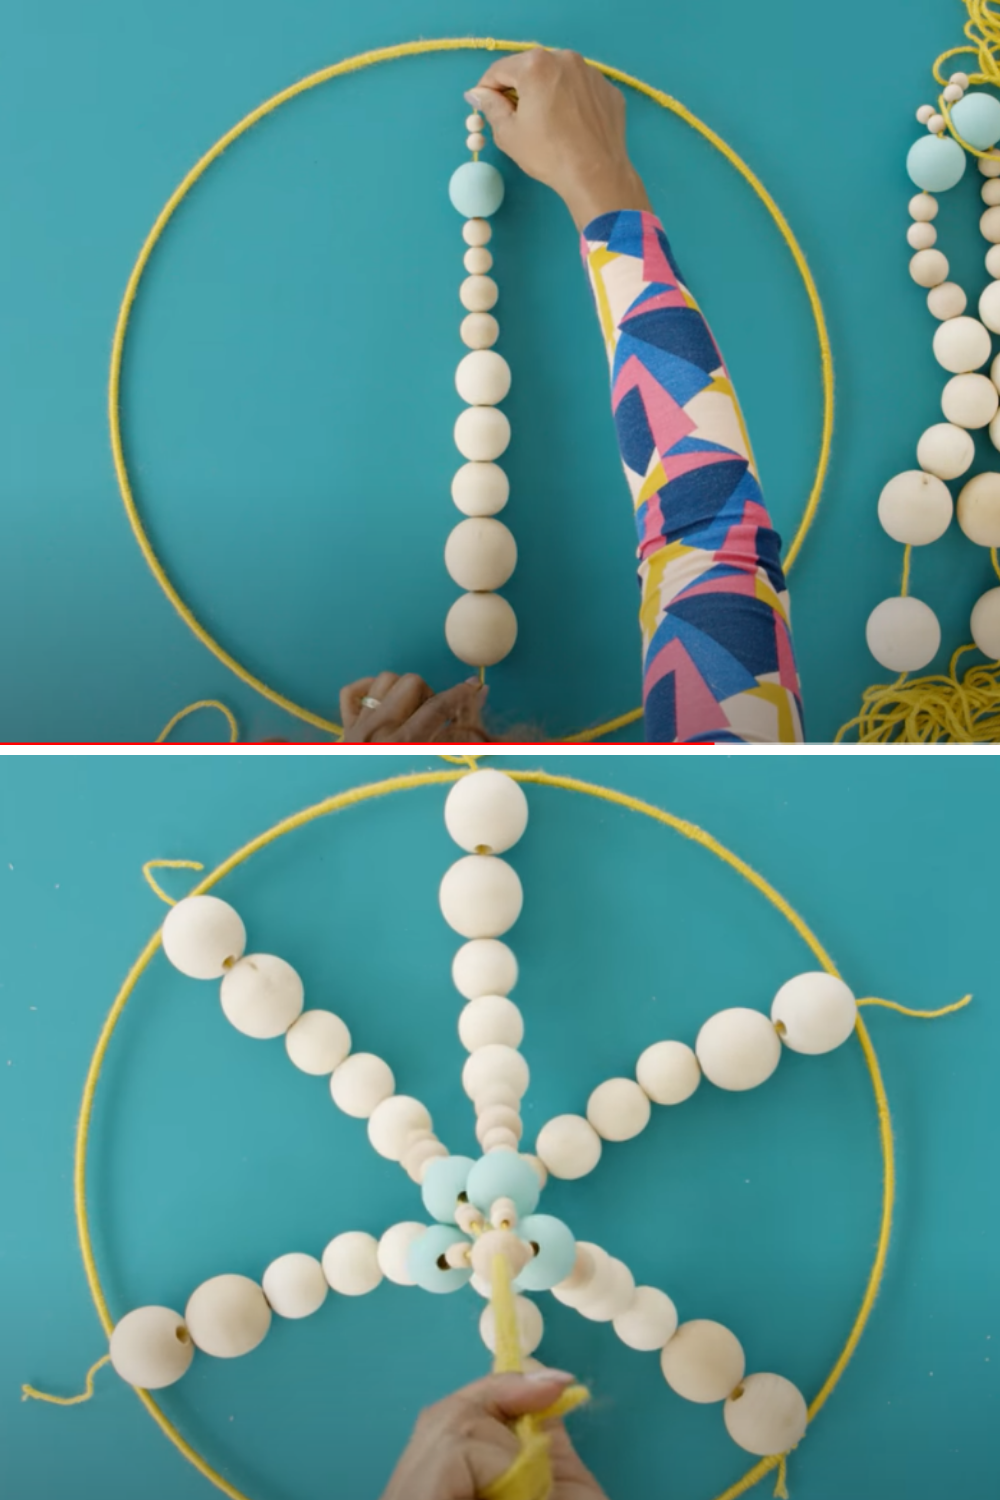
Because chandeliers are all about symmetry let’s hang it up. This will make it so much easier to see if it has perfect symmetry. Now it’s time to start adding our second set of six strings. Simply tie this in the same place as the ones going upward. Once all of the wood bead strings are secure to the chandelier go back and remove all of the excess string. Now gather all the string at the bottom and feed through the final single bead, the same way you did at the top. Then make big knots at the bottom of the bead to hold everything into place.

Lastly, grab your last shorter set of beads and double knot them to the ring end to end between the rows of already attached beads. Clip off the excess string. Now let’s add the pom-poms. Attach them to the hinge of where the top row and the bottom row meet. This will give the chandelier a seamless look, and there you have it!
To see this DIY in action check out the video below.
Latest posts by Maria Antoinette (see all)
- 10 Romantic Date Night Ideas For Any Time of The Year - January 26, 2023
- Tips To Help You Reconnect With What Brings You Joy - January 19, 2023
- Planning A Road Trip? Here Are Some Key Tips You Should Know - January 12, 2023


