

Your prom night is a big deal. What’s even more of a big deal? Your prom dress! Especially when you want to look stunning on a budget. While some may advise you to shop clearance or borrow a dress, I have an even better option for you. This DIY prom dress gives you the chance to look stunning in a one of a kind design! This is just the foundation. Get your creative juices flowing and add some spice, some jazz, and a wow factor! Here is the breakdown of what you’ll need and step by step instructions:
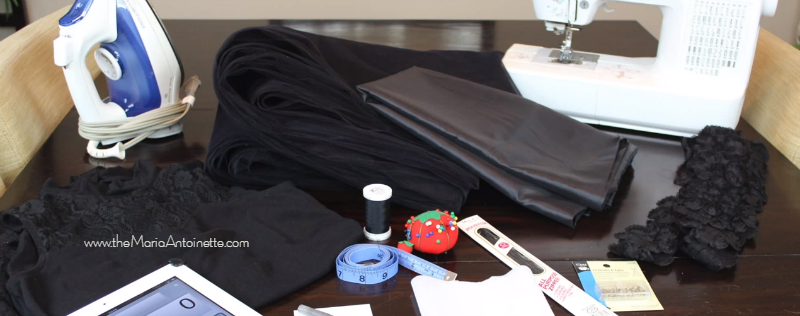
What I used :
*Please check your measurements in case you need more or less material*
- 10 yards of 108” black tulle. 2.5 yards per layer I did 4 layers
- 5 yards of Anti-Static Lining. 1.2 yards per 1/3 circle and 2.5 yards per 1/2 circle
- Interface1/3 yard
- Zipper
- Thread
- Sewing Machine
- Iron / Ironing board
- Scissors
- Measuring Tape
- Fabric Marker
- Straight Pins
Cost break down:
- Tulle $19.43 with 50% off coupon
- Lining $19.25 with 50% off coupon
- Zipper $2.19
- Interface $1.00
- Long Sleeve Bodysuit $7.23 (Sale)
-
TOTAL: $49.10
-
Advertisement
Measurements:
The first thing you’ll need to do is make sure and take good measurements.
(A) Measure your waist and
(B) Divide that number by 6.28.
(C) Will be the desired length of the skirt – not including waistband
(D) Add B & C for the total width of fabric that you will need.

On a clean floor I had my entire 10 yards of tulle sprawled out. Measure out 90 inches which is 2.5 yards. My Tulle was 108 inches wide so I was able to cut 2.5 yards for each layer. Before I began using my tulle for making the skirt, I let it soak in the sink for about an hour with just enough water to cover the fabric.
The Skirt:
To prep the lining for skirt, fold it on an angle to get the most out of the fabric since it’s going to be maxi length. Since my lining isn’t long enough I’m cutting it into 3 sections. 2 smaller quadrants for the back and one longer quadrant for the front. I’m using a pivoted motion and marking off where I want the fabric to end.
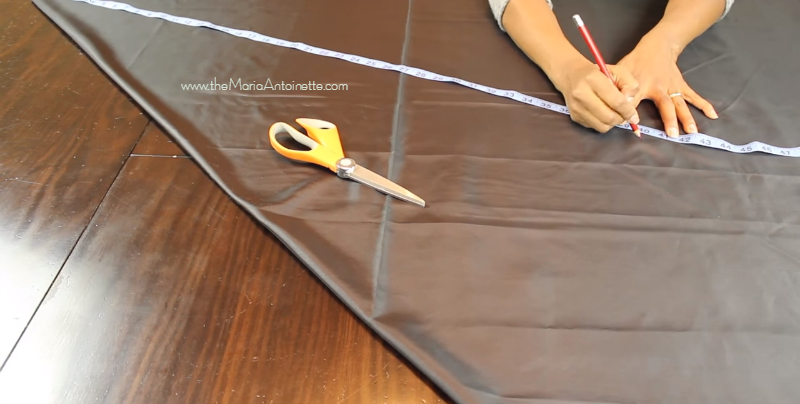
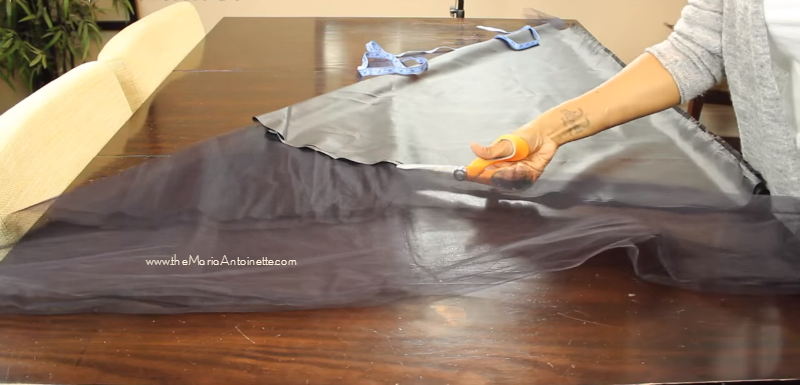
Then cut along the markings and use this as the blueprint for the next 2 layers and also the tulle. Before working with your tulle, place it it the dryer on low heat. The tulle should be placed on an angle to cut just as you did with the lining. Then place the lining (as a guide) remeasured to ensure the length was correct and then cut the tulle around the lining and completed this process for the remaining sections of tulle.
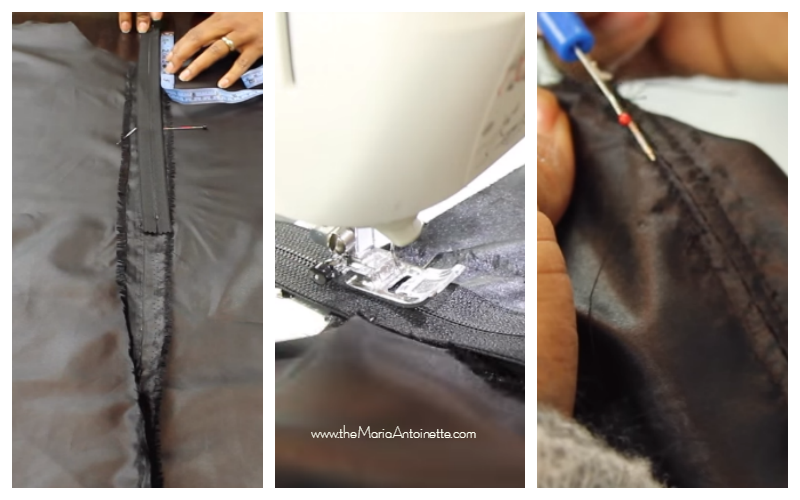
Since I want the maxi skirt to be fitted, I’m adding a zipper.
Take the zipper and place it on the 2 halves that will be on the back of my skirt. Measure out where you want the zipper to start and stop. Pin down the length of the lining where the zipper will be placed. Since the crease will be in that location, it’s a perfect place to sew the zipper.
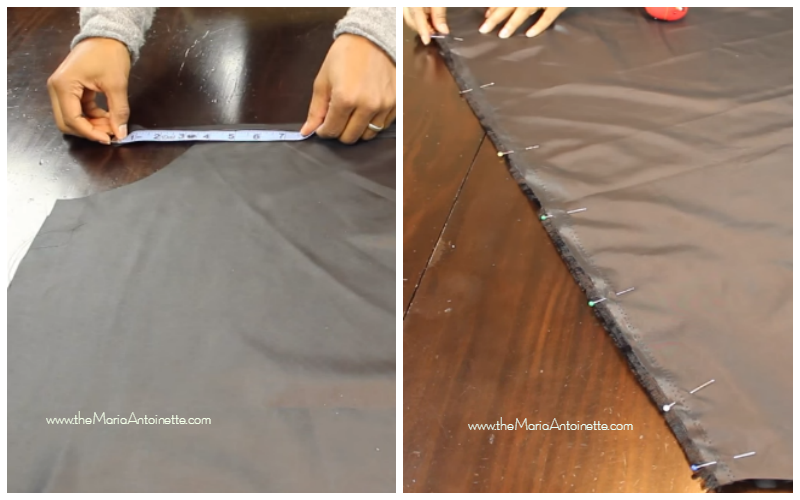
When you start sewing in the zipper, be sure to start below where the zipper will stop in a straight stitch. Place this stitch down the entire length of the skirt and remember to do a back stitch. Move back to where the zipper will be placed and do a basting stitch.
To make stitching the zipper on the skirt easier, it will help to iron that area flat between the 2 pieces of fabric. Pin the zipper on the top where the basting stitch is located. Sew the zipper into place and then remove the basting stitch with a seam ripper. You will know have a nice, invisible zipper!
 Now it’s time to put the lining and tulle together! Gather all of the openings of the tulle and layer them making sure everything is lined up. Then pin then around the waist. Place a basting stitch around the waist, and slip it on to get an idea of how the material will lay and where to adjust the waist. For this style 2 basting stitches were done (on in front the other in back) so that when they are pulled together it will cause the skirt to gather.
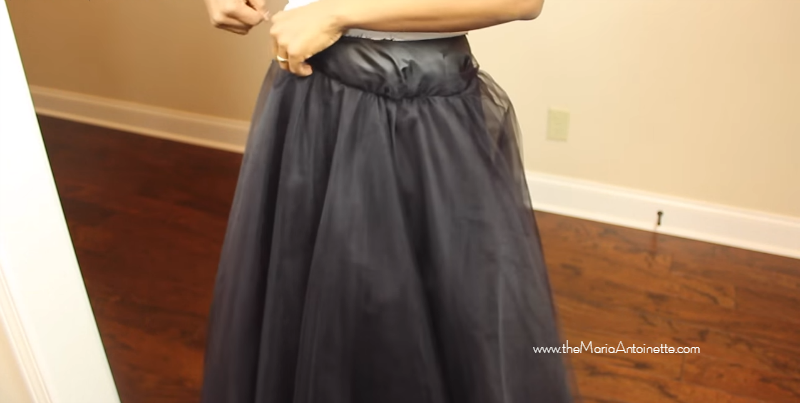
Put the smooth part in front and the gathered section in back to accentuate that area. When sewing the tulle onto the lining, make sure not to go over the zipper. Take a pair of scissors and cut a small slit slit into the tulle at the zipper.
The Waistband:
Cut out a 9×32 section from the leftover lining. Add interface and then measure how wide you want the waistband to be. Stitch Witchery was used to secure the fabric after it was folded to secure it before sewing it on the skirt. While wearing the skirt (made it easier for me) attach the band to see how it will fit, then place pins to keep it in place.
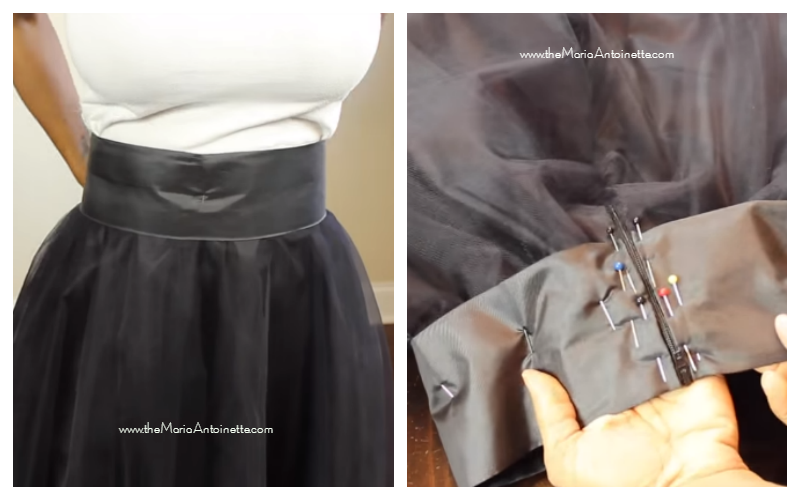
Before sewing on the waistband, cut off any of the excess zipper. Don’t forget to back stitch once you’re done! Remove any excess threads and your skirt is complete.

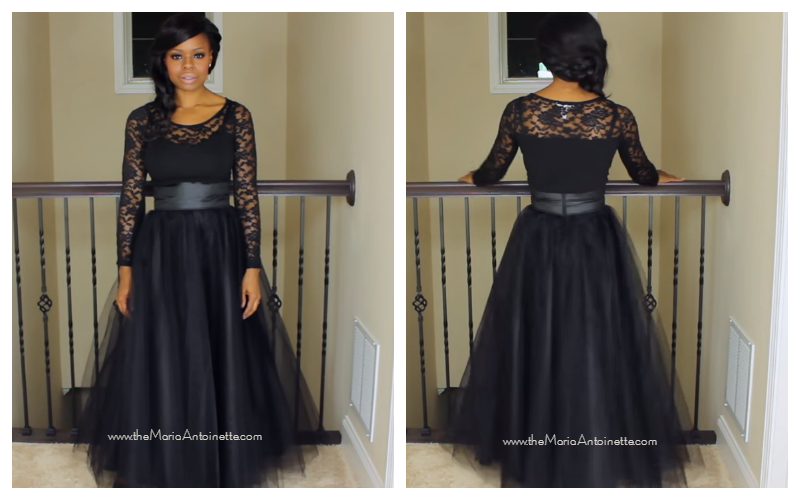
The Top:
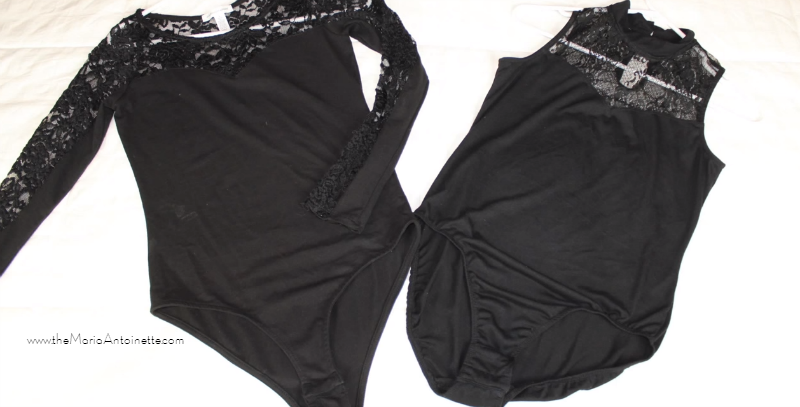
The top of the dress can be any type of shirt that you feel will compliment the dress the best for you. I chose two different lace bodysuits to complete the look and ended up choosing the long sleeve top for the final look. A bodysuit will work best because it will give the appearance of a dress and not a two-piece outfit.
Put the top and skirt together and your look is complete! Everyone will want to know where you got your gorgeous dress from and you can tell them you created it yourself. Now that’s an awesome accomplishment and once you finish this dress you’ll be wanting to make more beautiful creations!
Need more inspiration before you take the plunge and create this dress on your own? Check out the video below.
So what do you think of the final look? Are you ready to wow everyone in a dress that cost under $50 to make?! Chime in below I would love to hear from you! Let me know what color you will make your dress in or what you will do differently. Also, I would like to invite you to sign up for my newsletter, this way you will always be in the know with all things MA. If newsletters aren’t your thing, simply download my App!
~MA
Latest posts by Maria Antoinette (see all)
- 10 Romantic Date Night Ideas For Any Time of The Year - January 26, 2023
- Tips To Help You Reconnect With What Brings You Joy - January 19, 2023
- Planning A Road Trip? Here Are Some Key Tips You Should Know - January 12, 2023


Nice! Love this!!